Step into the world of dark enchantment with this Amigurumi Maleficent crochet pattern! 🖤✨ With her iconic horns, flowing robes, and piercing gaze, this design brings the legendary Disney villain to life in yarn form. Whether you’re crafting for a Sleeping Beauty fan, a Halloween décor piece, or simply love character-inspired amigurumi, this FREE pattern is a spellbinding addition to your collection.
Designed for intermediate to advanced crocheters, this pattern allows for customization in cloak details, facial features, and even tiny accessories to enhance Maleficent’s mystical presence. Choose classic deep purples and blacks for an authentic look or experiment with eerie greens for a unique twist! Whether displayed as part of a villainous lineup or gifted to a fellow crochet enthusiast, this amigurumi Maleficent is sure to impress. Grab your hook, select your favorite yarn, and let’s bring this powerful sorceress to life—one stitch at a time! 🧙♀️✨🧶
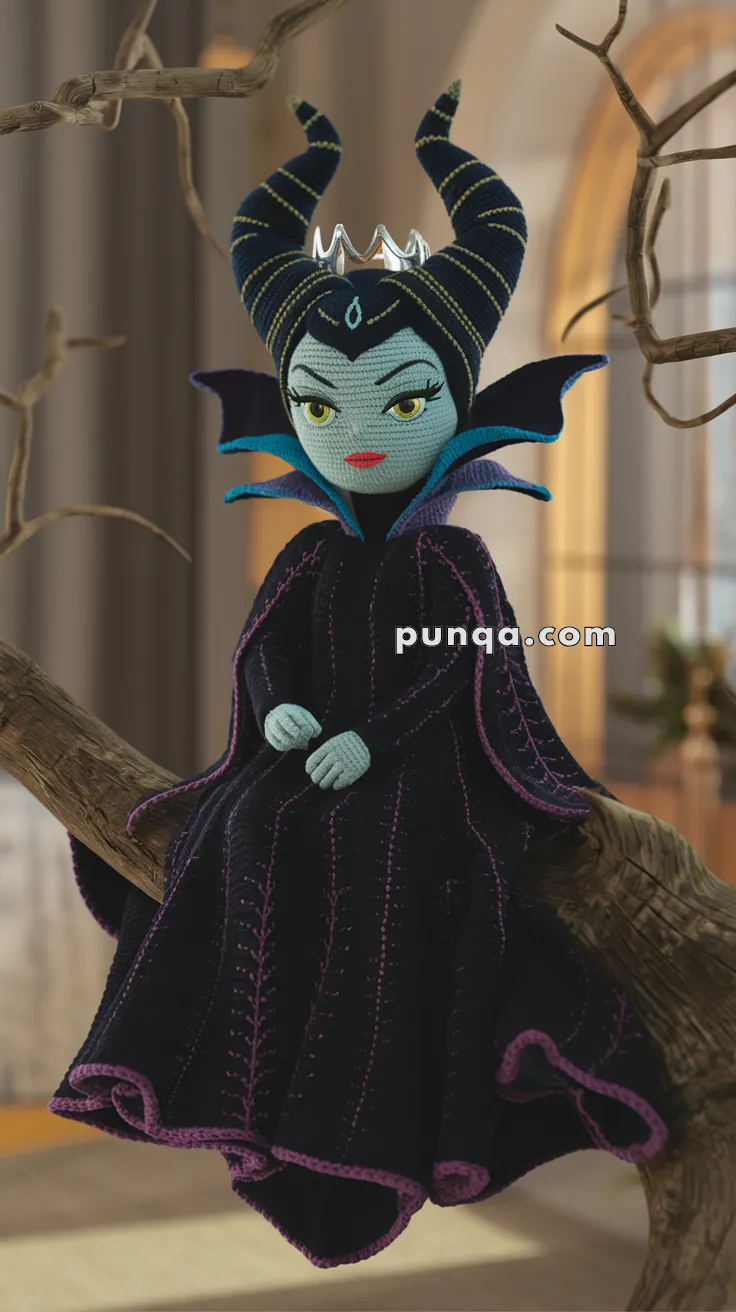
🧵 Maleficent Amigurumi Crochet Pattern
Bring the Queen of Darkness to life in yarn! This enchanting Maleficent doll captures her iconic horned headdress, dramatic robe, and piercing expression. A stunning project for intermediate to advanced crocheters who love detailed character work.
✨ Skill Level
Intermediate – includes shaping, color changes, embroidery, and structured accessories.
📏 Finished Size
Approx. 28–32 cm (11–12.5 in) tall using DK yarn and a 2.5 mm hook.
🧶 Materials Needed
-
DK yarn colors:
-
Mint green – skin
-
Black – outfit, cloak, horns
-
Purple – inner robe
-
Violet – cloak trim/embroidery
-
Blue – high collar
-
Yellow or white – crown
-
Red – lips
-
-
2.5 mm crochet hook
-
10 mm black safety eyes
-
Polyester stuffing
-
Tapestry needle, scissors, stitch markers
-
Craft wire or pipe cleaners (for horns + collar support)
-
Optional: felt pieces (for stiffening cloak), blush powder or yarn for cheeks
🧵 Abbreviations (US terms)
-
MR = magic ring
-
sc = single crochet
-
inc = increase
-
dec = decrease
-
sl st = slip stitch
-
ch = chain
-
BLO = back loop only
-
FLO = front loop only
-
hdc = half double crochet
-
dc = double crochet
-
st(s) = stitch(es)
-
FO = fasten off
🧠 Head (Mint Green)
-
MR, 6 sc (6)
-
inc x6 (12)
-
(sc, inc) x6 (18)
-
(2 sc, inc) x6 (24)
-
(3 sc, inc) x6 (30)
-
(4 sc, inc) x6 (36)
7–14. sc around (36)
👉 Insert 10 mm safety eyes between Rnds 11–12, ~8 sts apart.
👉 Embroider eyebrows with black thread and lips with red yarn. -
(4 sc, dec) x6 (30)
-
(3 sc, dec) x6 (24)
-
(2 sc, dec) x6 (18)
-
(sc, dec) x6 (12)
-
dec x6 (6), FO, close and stuff firmly.
🦹 Horned Headdress
Horns (make 2 – Black):
-
MR, 4 sc
-
sc around (4)
-
(sc, inc) x2 (6)
4–5. sc around (6) -
(2 sc, inc) x2 (8)
7–12. sc around (8)
👉 Insert wire/pipe cleaner inside horn for support. Bend slightly back before sewing.
FO, leave long tail for attaching.
Head Wrap Base (Black):
-
Ch 30 (fit around head), join to circle.
-
Work 2 rows of sc.
-
Place around head like a bonnet, covering back and sides.
-
Sew horns on top, slightly tilted backward.
👗 Body
With mint green:
-
MR, 6 sc
-
inc x6 (12)
3–4. sc (12)
Switch to black: -
(sc, inc) x6 (18)
-
(2 sc, inc) x6 (24)
-
(3 sc, inc) x6 (30)
8–12. sc (30)
Switch to purple:
13–18. sc (30)
Stuff firmly and FO.
💪 Arms (x2 – Mint Green → Black)
-
MR, 6 sc
-
(sc, inc) x3 (9)
3–5. sc (9)
Switch to black:
6–15. sc (9)
Stuff lightly, flatten opening, sc across to close. Leave tail for sewing.
🧥 Cloak (Black with Violet Trim)
-
Ch 60 (or adjust for wider cloak).
-
Work back and forth in rows of sc for 20 rows.
-
Increase 2 sts at each row’s edge (to create dramatic flare).
-
FO.
Trim: With violet yarn, sc evenly around entire cloak edge.
Optional embroidery: Add violet lines in tree-branch or swirl style along hem for magical effect.
🌀 High Collar (Blue, Make 2 Panels)
-
Ch 12, sc across (11).
2–6. sc across, dec 1 at end of each row → forms curve. -
FO.
👉 Sew one panel on each side of neckline.
👉 Insert thin wire or felt strip to make collar stand tall.
👑 Crown
-
With yellow yarn, ch 22, join to ring.
-
(sc, ch 2, sc in same st, skip 2) repeat around for crown points.
-
Sew neatly in front of horns.
✨ Assembly
-
Sew head to body securely.
-
Attach arms at sides.
-
Place bonnet + horns on head, sew in place.
-
Sew cloak around neckline, let it flare open in front.
-
Attach collar panels behind neck and secure upright with wire/felt.
-
Place crown in front of horns.
-
Add blush to cheeks and embroider lashes for detail.
🎀 Final Touches
-
Slightly bend horns backward for dramatic shape.
-
Spread cloak wide at bottom for flowing effect.
-
Add sparkly yarn or beads to crown/robe for an enchanted finish.
✨ And there you have it – a powerful, elegant Maleficent amigurumi ready to command your shelf with her dark charm. Whether gifted, displayed, or kept as part of a fairytale collection, this doll is sure to cast a spell on anyone who sees her. 🖤🌙