Welcome to the enchanting and whimsical world of amigurumi! 🧙♀️✨ Today, I’m excited to share my free crochet pattern for an Amigurumi Witch—a spellbinding and playful creation perfect for Halloween lovers, fantasy enthusiasts, or anyone who enjoys crafting expressive and magical plush designs! 🧶 Whether you love stitching up mystical characters, experimenting with textured details, or simply want to add a charming witch to your handmade lineup, this pattern will guide you through crafting a beautifully sculpted plush with a pointy hat, flowing cape, and a touch of spooky sweetness! 🎃
This design embraces deep purples, rich blacks, and intricate shaping to bring a mystical and festive presence to your crochet projects! 🧶✨ I’ve carefully outlined each step to ensure your Amigurumi Witch turns out just right—ready to fly into your collection or become a treasured handmade gift! 🎁 So grab your hooks, pick out classic Halloween hues, and let’s stitch up a delightful witch! 🧙♀️
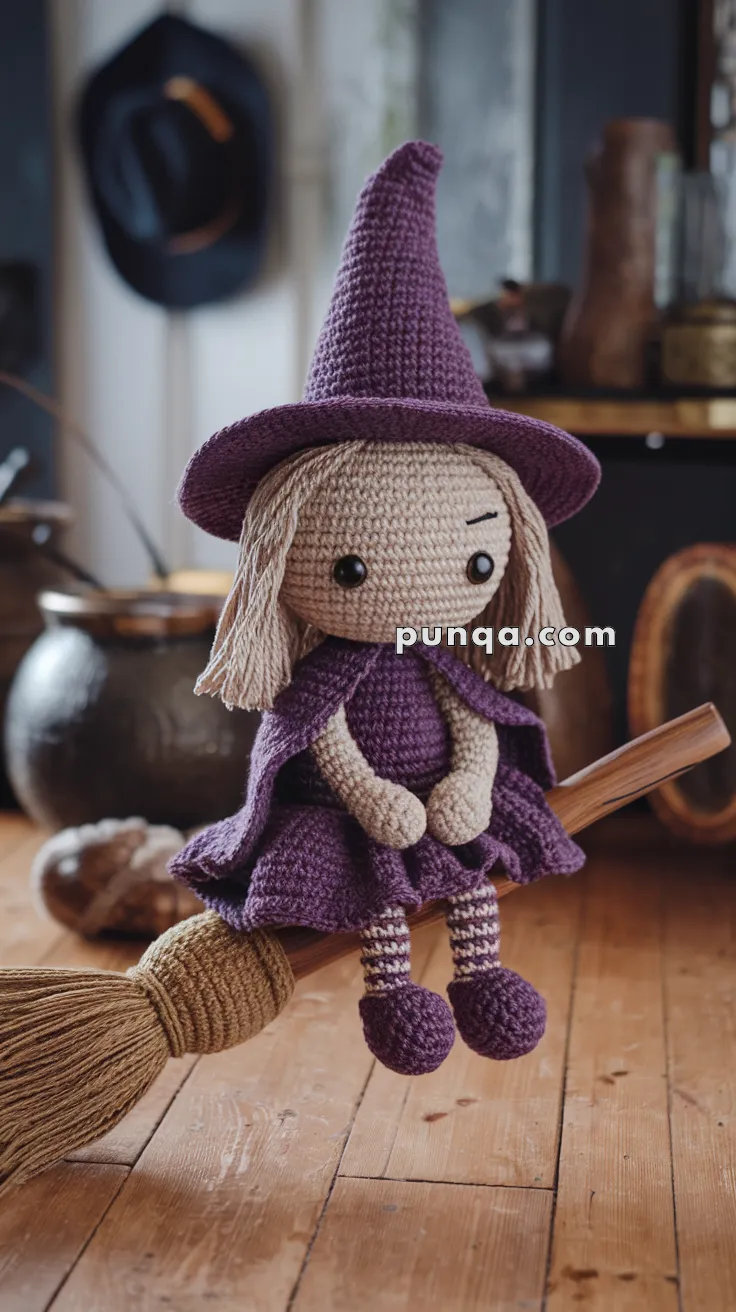
🧙♀️ Amigurumi Witch – Free Crochet Pattern
She’s sweet, spooky, and ready to fly into your handmade Halloween collection. Dressed in classic purple, this amigurumi witch doll rides her broom with style!
🧶 Skill Level
Intermediate – Includes basic shaping, color changes, and accessories.
📏 Finished Size
Approx. 25 cm (10 in) tall seated
✂️ Materials
-
Worsted weight yarn in:
-
Beige (skin)
-
Purple (hat, dress, cape, shoes)
-
Cream + brown (striped tights)
-
Light yellow or cream (hair)
-
Brown + tan (broom)
-
-
2.5 mm & 3.0 mm crochet hook
-
Fiberfill stuffing
-
10 mm safety eyes
-
Yarn needle
-
Stitch marker
-
Wire (optional, for poseable legs)
🧵 Abbreviations (US Terms)
-
MR – Magic Ring
-
sc – Single Crochet
-
inc – Increase
-
dec – Decrease
-
ch – Chain
-
hdc – Half Double Crochet
-
dc – Double Crochet
-
sl st – Slip Stitch
-
BLO – Back Loop Only
-
FO – Fasten Off
🧍♀️ Body Parts
🧠 Head
With beige yarn:
-
MR, 6 sc
-
inc x6 (12)
-
(sc, inc) x6 (18)
-
(2 sc, inc) x6 (24)
-
(3 sc, inc) x6 (30)
-
(4 sc, inc) x6 (36)
-
(5 sc, inc) x6 (42)
8–16. sc around (42) -
(5 sc, dec) x6 (36)
-
(4 sc, dec) x6 (30)
-
(3 sc, dec) x6 (24)
-
(2 sc, dec) x6 (18)
Insert safety eyes between rounds 12–13, 7 sts apart.
Stuff firmly. -
(sc, dec) x6 (12)
-
dec x6 (6)
FO and weave shut.
🧍♀️ Body
With purple yarn:
-
MR, 6 sc
-
inc x6 (12)
-
(sc, inc) x6 (18)
-
(2 sc, inc) x6 (24)
-
(3 sc, inc) x6 (30)
-
(4 sc, inc) x6 (36)
-
(5 sc, inc) x6 (42)
8–10. sc around (42) -
(5 sc, dec) x6 (36)
12–14. sc around (36) -
(4 sc, dec) x6 (30)
16–18. sc around (30)
Change to beige
19–22. sc around (30)
FO and stuff.
🦵 Legs (Make 2)
Work in stripes: cream & brown
Alternate every 2 rounds
-
MR, 6 sc
-
inc x6 (12)
3–4. sc around (12)
Change to purple for shoes
5–10. sc around (12)
FO and stuff lightly.
Leave long tail for sewing.
💪 Arms (Make 2)
With beige yarn:
-
MR, 6 sc
-
inc x6 (12)
3–4. sc around (12) -
(4 sc, dec) x2 (10)
6–10. sc around (10)
FO and leave long tail.
Do not stuff for flexibility.
🦱 Hair
Cut 30–40 strands of light yarn ~20 cm long.
Use lark’s head knot or sew across scalp in layers.
Trim to desired length.
🧹 Accessories
👗 Dress Skirt
With purple yarn:
-
Ch 40, join to ring
-
sc in each st (40)
-
(sc, inc) x20 (60)
-
(2 sc, inc) x20 (80)
-
hdc around
-
sl st, FO
Sew under bust of the body.
🧥 Cape
With purple yarn:
-
Ch 21
-
dc in 3rd ch from hook and across
-
Turn, ch 2, dc inc in each st across
-
Repeat until capelet shape forms
FO and sew under neck
🎩 Witch Hat
With purple yarn:
-
MR, 6 sc
-
(sc, inc) x3 (9)
-
sc around
-
(2 sc, inc) x3 (12)
Continue increasing until 48 sts
Add 2 rows with no inc
Brim:
Work FLO: (2 sc, inc) x16 (64)
1–2. sc around
FO and shape
🧹 Broomstick
Stick (brown):
-
Ch 25, turn, sl st back. FO.
Bristles (tan):
Make a small MR base and crochet 4–5 rounds
Add long loop sts or fringes
Sew to stick end.
🧵 Assembly
-
Sew legs under body base.
-
Attach arms to shoulders.
-
Place cape and stitch lightly.
-
Attach head.
-
Add safety eyes, cheeks, and mouth.
-
Put on the hat and secure.
-
Position on the broom and stitch hands to hold it.
🎃 Final Touch
Your charming little witch is ready to fly off! Add glittery yarn, a cat companion, or stars for more magic! ✨