Welcome to the rugged and spirited world of western-inspired crochet! 🌵🤠 Today, I’m thrilled to share my FREE Crochet Pattern for Cowboy Boots—a charming and versatile design that captures the timeless charm of the frontier. Whether you’re crafting tiny boots for amigurumi cowboys, stitching keychains for rodeo fans, or adding a touch of rustic flair to your home decor, these boots feature classic pointed toes, decorative stitching, and optional spur details for extra authenticity. Perfect for country lovers, doll enthusiasts, or anyone who enjoys a little wild west whimsy in their stitching!
This design combines simplicity with iconic style, with easy-to-follow instructions for shaping the boot’s sleek silhouette and adding customizable details like contrast stitching or embroidered laces. Use warm browns and tans for a traditional leather look, or go bold with vibrant reds, blues, or even metallic yarn for a show-stopping pair! 🎨 So grab your hooks, saddle up your yarn, and let’s crochet a pair of boots made for walkin’—or at least for sparkin’ joy! “Yeehaw—it’s stitchin’ time!” 🧶✨
🤠 Amigurumi Cowboy Boots Crochet Pattern
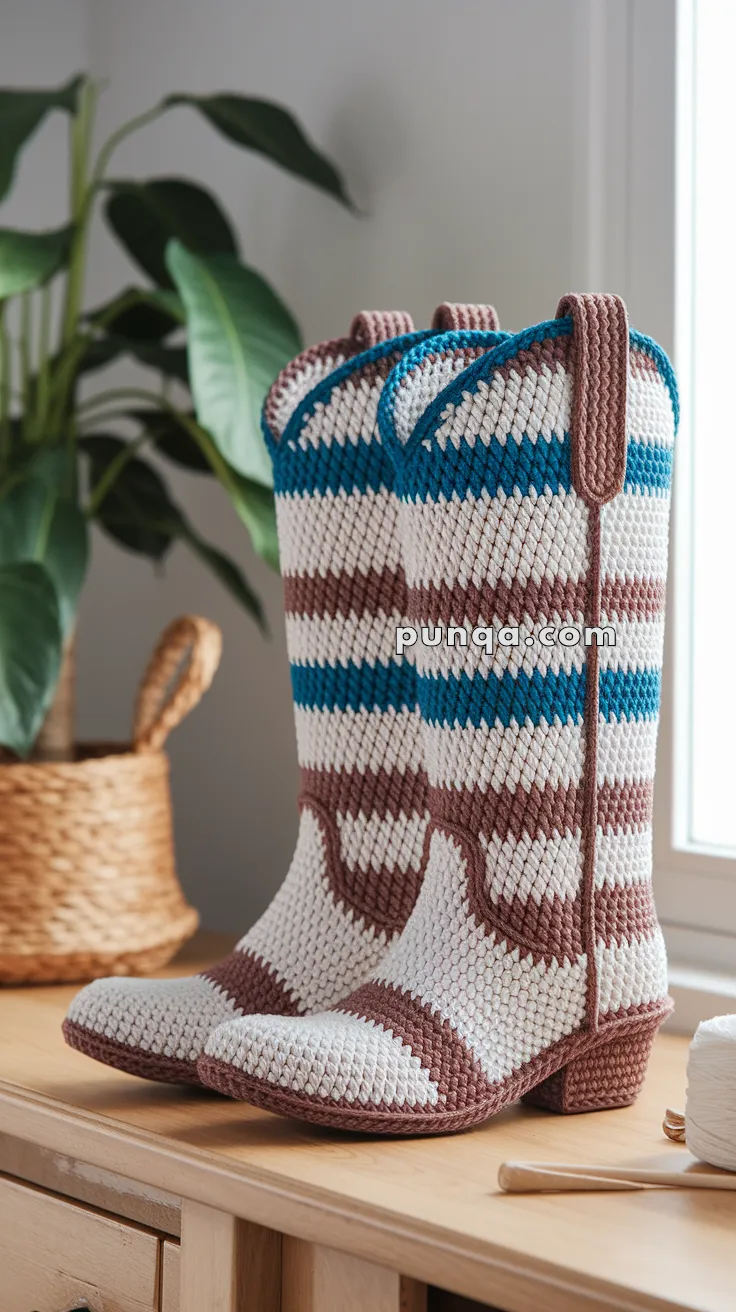
Bring a touch of western charm to your crochet collection with these stylish amigurumi cowboy boots! Designed with authentic western details — from the pointed toe and curved top to the seamless brown heel and bold teal trim — these boots are both decorative and delightfully detailed. Whether you’re a fan of cowboy culture or simply love creating statement crochet pieces, this pattern is guaranteed to be a showstopper.
✨ Skill Level
Intermediate – This project involves shaping, color changes, and structured assembly.
📏 Finished Size
Approx. 10 inches (25 cm) tall from heel to top using worsted-weight yarn and a 3.5 mm hook.
🧶 Materials
-
Worsted Weight Yarn
-
Color A – Cream or White: 80 g
-
Color B – Brown: 60 g
-
Color C – Teal or Blue: 50 g
-
-
Crochet hook – 3.5 mm
-
Plastic canvas or cardboard for the soles
-
Foam sheet or lightweight plastic cylinder for standing support
-
Fiberfill stuffing
-
Tapestry needle
-
Scissors
-
Hot glue (optional for reinforcement)
🧵 Abbreviations (US Terms)
MR – Magic Ring
sc – Single Crochet
inc – Increase (2 sc in same st)
dec – Decrease (sc 2 together)
BLO – Back Loop Only
sl st – Slip Stitch
ch – Chain
FO – Fasten Off
👢 Pattern Instructions
🦶 Sole (Make 2)
With Brown (Color B):
Ch 11
1️⃣ sc in 2nd ch from hook, sc 9, 3 sc in last ch; rotate, sc 8, 2 sc in last ch (22)
2️⃣ sc 9, inc ×3, sc 8, inc ×2 (27)
3️⃣ sc 10, (sc, inc) ×2, sc 9, (sc, inc) ×2 (31)
4️⃣ BLO sc around (31)
👉 Insert a shaped piece of plastic canvas or cardboard now for support.
👣 Foot & Integrated Heel
Continue with Brown throughout to keep the smooth, realistic heel look.
Rounds 5–10 → sc around (31)
Round 11 → (4 sc, dec) ×5, sc 1 (26)
Rounds 12–14 → sc around (26)
Heel Shaping (Short Rows in Brown):
1️⃣ sc 12 across back, turn
2️⃣ sc2tog, sc 8, sc2tog (10)
3️⃣ sc 10, turn
4️⃣ sc2tog, sc 6, sc2tog (8)
5️⃣ sc 8, turn
6️⃣ sc2tog, sc 4, sc2tog (6)
7️⃣ sc 6, sl st to rejoin round.
Stuff heel firmly for structure, then switch to Cream (Color A) to begin the shaft.
🧍 Shaft (Accurate Stripe Sequence & Widths)
Starting color = Brown (continues from heel).
Stripe order from bottom to top:
1️⃣ Brown – 5 rounds (narrow band)
2️⃣ Cream – 9 rounds (wide band)
3️⃣ Teal – 5 rounds (narrow band)
4️⃣ Cream – 9 rounds (wide band)
5️⃣ Brown – 5 rounds (narrow band)
6️⃣ Cream – 9 rounds (wide band)
7️⃣ Teal – top trim (see below)
📉 Optional ankle taper (for fit and curve): after 3 rounds of the first Cream band, work (5 sc, dec) ×3 (18). Continue straight up.
🪡 Top Trim (Teal with Western Dip)
With Teal (Color C):
1️⃣ sc around evenly.
2️⃣ sc to front center, skip 1 st, sc to back center, skip 1 st, sc to end → forms gentle curve.
3️⃣ sc around once more to reinforce edge.
FO and weave in ends.
🔹 Pull Tabs (Attach with Teal Trim)
With Teal (Color C):
Ch 9 → Rows 1–6: sc 8 across each row, ch 1 turn.
FO with long tail.
Fold tabs into loops and insert ends under the Teal rim at the sides. Sew securely inside so they look built into the trim.
🧱 Structure & Finishing
-
Insert plastic sole and secure with a bit of hot glue if needed.
-
Insert foam or rolled plastic inside shaft to keep it standing.
-
Steam and shape the ankle curve while holding the form until cool.
-
Pinch toe tips slightly for the classic cowboy point.
🌵 Optional Western Decor (Accurate to Photo)
For extra realism, add vertical decorative lines down the shaft using Brown yarn:
-
Use backstitch to embroider two parallel lines on each side, from heel to mid-shaft.
-
Keep about 1 cm (½ in) between them for balance.
You can also add tiny star motifs or zigzag embroidery on the wide cream bands for an authentic western look.
💛 Final Result
Your completed boots should show this exact sequence:
Brown base → Brown band → Cream → Teal → Cream → Brown → Cream → Teal top trim.
The heels are smooth and integrated, the shaft stands firmly, and the Teal rim with pull tabs adds the perfect finishing touch.
🎉 Ride Into Style
These crochet cowboy boots aren’t just a craft project — they’re a statement piece. Each stitch brings a little Western spirit to your workspace or home decor. Set them on a mantel, fill them with mini flowers, or use them as quirky holiday planters — however you style them, they’ll always stand tall and turn heads.
So grab your hook, kick up your heels, and let these boots remind you that every great maker deserves to walk their own creative trail. 🤠✨