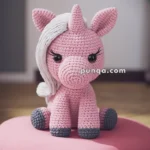
Zoom into a world of color and cuteness with the Amigurumi Rainbow Dash, a high-flying crochet creation inspired by the boldest pony in Equestria! 🦄🌈 With her vibrant rainbow mane, sky-blue body, and signature lightning bolt cutie mark, this little speedster is ready to bring magic and mischief to your amigurumi collection. Whether you’re crafting for a My Little Pony fan or simply love stitching up bright, joyful characters, Rainbow Dash is sure to steal the show.
Perfect for crocheters who enjoy playful details and expressive designs, this pattern invites you to experiment with bold hues, add tiny wings, and personalize her look with sparkly yarn or embroidered accents. Make her the centerpiece of a pony parade or gift her to someone who believes in friendship and adventure. The Amigurumi Rainbow Dash is a delightful way to stitch up smiles, one colorful loop at a time! 🧶✨
🦄 Amigurumi Rainbow Dash-Inspired Pony Crochet Pattern
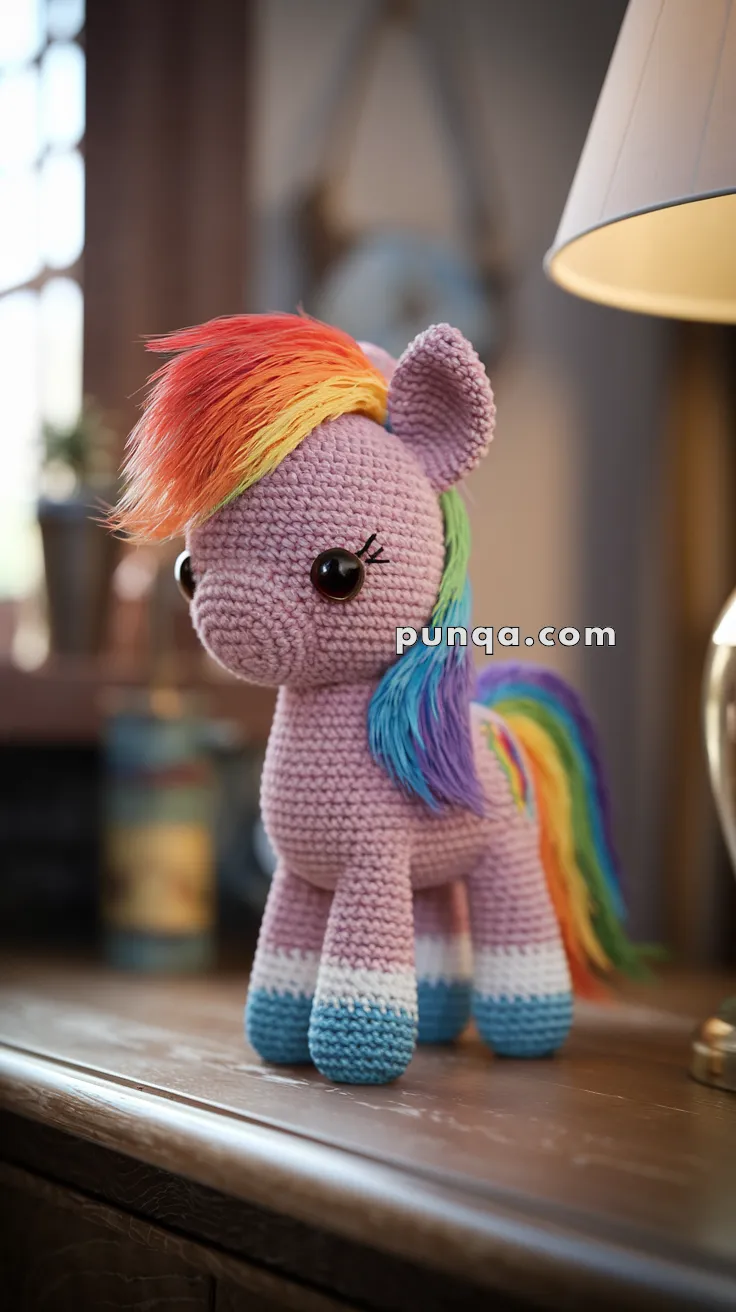
This colorful pony, with her lavender body, bold rainbow mane, and flowing tail, is the perfect project for fans of magical ponies. With her standing pose, sweet muzzle, and gradient hooves, she looks just like the one in the photo – ready to gallop into your collection.
✨ Skill Level
Intermediate – involves shaping, color changes, and hair attachment.
📏 Finished Size
Approx. 8–10 inches (20–25 cm) tall using DK or worsted yarn and a 2.5–3.5 mm hook.
🧶 Materials
- DK or Worsted yarn in:
- Lavender/light purple – body, head, ears
- Dark blue – hoof bottoms
- White – hoof middle
- Red, orange, yellow, green, blue, purple – mane & tail
- 12 mm safety eyes (with lashes or add yarn lashes)
- Crochet hook: 2.5–3.0 mm
- Polyfill stuffing
- Tapestry needle, stitch markers, scissors
🪡 Abbreviations (US Terms)
- MR – Magic Ring
- sc – Single Crochet
- inc – Increase (2 sc in same st)
- dec – Decrease (sc 2 together)
- sl st – Slip Stitch
- ch – Chain
- FO – Fasten Off
- BLO – Back Loop Only
🐴 Head (Lavender)
- MR, 6 sc
- inc x6 (12)
- (1 sc, inc) x6 (18)
- (2 sc, inc) x6 (24)
- (3 sc, inc) x6 (30)
- (4 sc, inc) x6 (36)
7–17. sc around (36) → slightly elongated oval head - (4 sc, dec) x6 (30)
- (3 sc, dec) x6 (24)
- (2 sc, dec) x6 (18)
– FO, stuff firmly.
📌 Insert safety eyes between R10–11, spaced ~10 sts apart, low and forward on the head.
🐴 Flatter Muzzle (Lavender – separate piece)
- MR, 6 sc
- inc x6 (12)
- (1 sc, inc) x6 (18)
- (2 sc, inc) x6 (24)
5–6. sc around (24) - (2 sc, dec) x6 (18)
– FO, stuff lightly, sew centered below eyes.
👉 This gives the wide, flatter snout as in the photo.
🧡 Body (Lavender)
- MR, 6 sc
- inc x6 (12)
- (1 sc, inc) x6 (18)
- (2 sc, inc) x6 (24)
- (3 sc, inc) x6 (30)
6–18. sc around (30) → includes extra rows for longer neck - (3 sc, dec) x6 (24)
- (2 sc, dec) x6 (18)
- (1 sc, dec) x6 (12)
- dec x6 (6)
– FO, stuff firmly.
🦵 Legs (Make 4 – Gradient: Blue → White → Lavender)
- With dark blue, MR, 6 sc
- inc x6 (12)
- (1 sc, inc) x6 (18)
4–7. sc around (18) → blue section
8–11. Switch to white, sc around (18) → white section - Switch to lavender, sc around (18)
13–18. sc around (18) → longer lavender leg - (1 sc, dec) x6 (12)
- dec x6 (6)
– FO, stuff, leave long tail.
👉 Balanced gradient (4 rows blue, 4 rows white, then lavender) matches photo.
👂 Ears (Make 2 – Lavender)
- MR, 4 sc
- (1 sc, inc) x2 (6)
- (2 sc, inc) x2 (8)
- (3 sc, inc) x2 (10)
- (4 sc, inc) x2 (12)
- (5 sc, inc) x2 (14)
7–8. sc around (14)
– FO, flatten into triangles, sew upright to top sides of head.
👉 Larger and sharper, like in the photo.
🦄 Mane (Rainbow Strands)
- Cut yarn strands ~6–7 in long in red, orange, yellow, green, blue, purple.
- Attach with latch-hook method.
- Style swept to left side of head, forward across face.
- Trim slightly for a layered look.
🌈 Tail (Rainbow Strands)
- Cut yarn strands ~7–8 in long.
- Bundle and tie, then sew securely to back.
- Leave long, straight, and flowing.
🧷 Assembly
- Sew muzzle onto head.
- Attach head to body.
- Sew legs evenly at body base for upright stance.
- Attach ears upright on head.
- Insert eyes and add lashes.
- Style mane swept to one side.
- Attach rainbow tail.
✨ Finished Look
Your Rainbow Dash-inspired pony should now have:
- A lavender body with slim, long legs and gradient hooves
- A wider, flatter muzzle
- Large eyes placed low and forward, with lashes
- Larger upright ears
- A rainbow mane swept dramatically to one side
- A straight rainbow tail
🌈🦄 Just like in the photo, she’s full of energy, color, and magic – the perfect pony friend to display or gift!