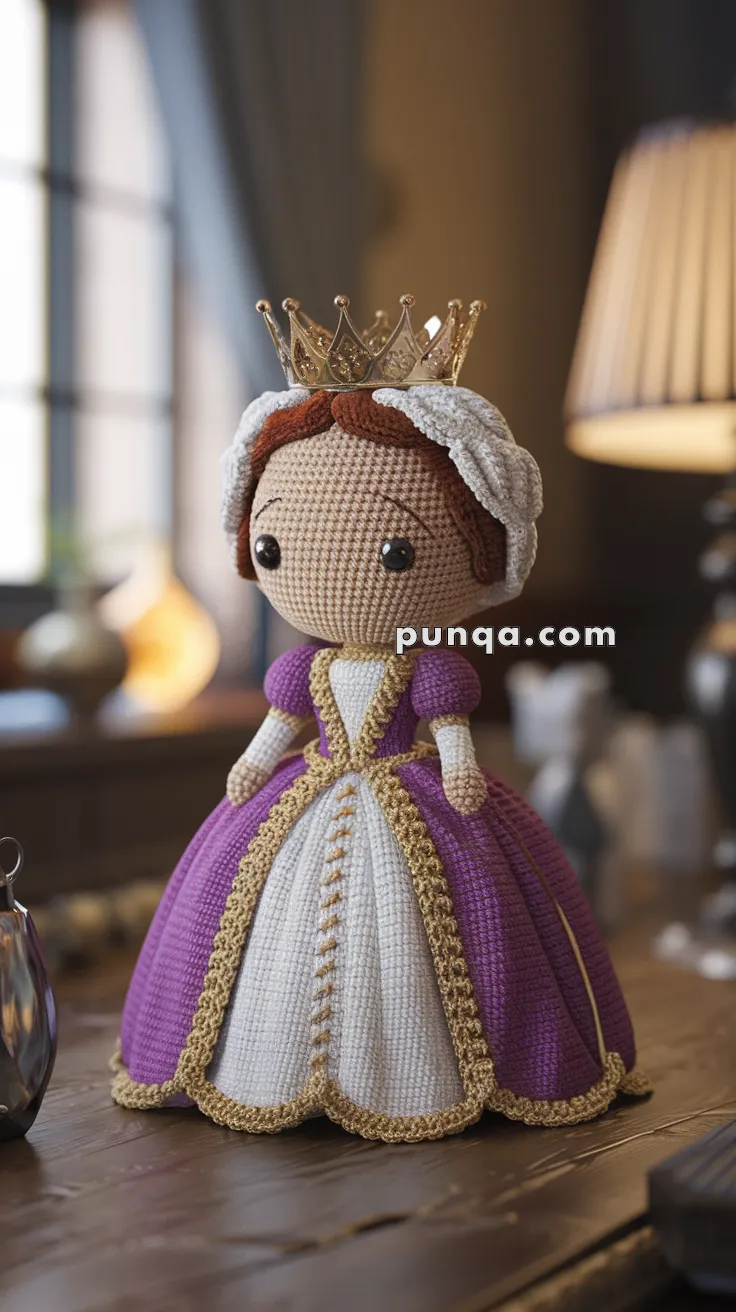
Bring the Queen Victoria to life with this Amigurumi Queen Victoria crochet pattern! 👑✨ With her regal gown, intricate crown, and stately presence, this design embodies the grandeur of one of history’s most influential monarchs. Whether crafted in classic Victorian hues or embellished with royal details, this project captures the elegance and strength of her legacy in yarn form.
Designed for crocheters who enjoy shaping detailed historical figures, this pattern allows for customization with lace accents, embroidered jewels, and accessories that enhance her majestic appeal. Whether displayed as part of a historical collection or gifted to a fellow crochet enthusiast, this Queen Victoria amigurumi is a timeless tribute to royal craftsmanship. 🧶✨
👑 Amigurumi Queen Victoria Crochet Pattern
Step back in time and create your own regal tribute with this elegant Queen Victoria amigurumi doll! Dressed in a richly detailed purple gown with golden trim, a white bonnet, and a royal crown, this dignified figure brings Victorian charm to your crochet collection. Perfect as a historical keepsake, display centerpiece, or an enchanting handmade gift.
✨ Skill Level
Intermediate to Advanced – Involves detailed shaping, color changes, dress construction, and assembly.
📏 Finished Size
Approximately 10–12 inches (25–30 cm) tall when using DK or worsted weight yarn and a 2.75–3.5 mm hook.
🧶 Materials
-
DK or Worsted weight yarn in:
-
Skin tone (face, arms)
-
Brown (hair)
-
White (bonnet, blouse, underskirt)
-
Purple (gown)
-
Gold or Yellow (trim)
-
-
Crochet hook: 2.75 mm or 3.0 mm
-
Safety eyes (10–12 mm)
-
Tapestry needle
-
Stitch marker
-
Fiberfill stuffing
-
Optional: Small gold crown (plastic or handmade with metallic thread)
🧵 Abbreviations (US Terms)
MR – Magic Ring
sc – Single Crochet
inc – Increase
dec – Decrease
ch – Chain
sl st – Slip Stitch
BLO – Back Loop Only
FLO – Front Loop Only
FO – Fasten Off
👩🦰 Head
With skin tone yarn:
-
MR, 6 sc (6)
-
inc x6 (12)
-
(1 sc, inc) x6 (18)
-
(2 sc, inc) x6 (24)
-
(3 sc, inc) x6 (30)
-
(4 sc, inc) x6 (36)
7–16. sc around (36)
Insert safety eyes between rounds 10–11, about 7–8 sts apart. -
(4 sc, dec) x6 (30)
-
(3 sc, dec) x6 (24)
-
(2 sc, dec) x6 (18)
Stuff firmly -
(1 sc, dec) x6 (12)
-
dec x6 (6)
FO and close.
💇♀️ Hair Cap
With brown yarn:
-
MR, 6 sc (6)
-
inc x6 (12)
-
(1 sc, inc) x6 (18)
-
(2 sc, inc) x6 (24)
-
(3 sc, inc) x6 (30)
-
(4 sc, inc) x6 (36)
7–11. sc around (36)
FO and sew to head.
Add hairline detailing with surface slip stitch or chain embroidery.
🪞 Bonnet
With white yarn:
-
Repeat steps 1–6 of Hair Cap
7–9. sc around (36) -
(1 sc, ch 1, skip 1) repeat for lacy edging
FO, sew over hair with back section gathered. Tuck side curls inside.
🧍♀️ Body & Arms
Arms (Make 2, with skin tone and white yarn):
-
MR, 6 sc (6)
-
inc x6 (12)
3–5. sc around (12)
Switch to white
6–12. sc around (12)
Stuff lightly. FO, leave tail for sewing.
Torso (Start with white):
-
MR, 6 sc (6)
-
inc x6 (12)
-
(1 sc, inc) x6 (18)
-
(2 sc, inc) x6 (24)
5–10. sc around (24) -
Switch to purple, sc around (24)
-
(2 sc, dec) x6 (18)
-
sc around (18)
Stuff and attach arms at sides. FO.
👗 Skirt (Worked separately then sewn to body)
With white yarn (underskirt):
-
MR, 6 sc
-
inc x6 (12)
-
(1 sc, inc) x6 (18)
Continue increasing by 6 per round until approx. 60 sts
Work 10 rounds even for length
Switch to gold for trim: sc around
FO.
With purple yarn (overskirt):
Repeat process with slightly smaller diameter so underskirt peeks out
Add decorative gold trim at edge and down center (embroidery or surface crochet)
Sew overskirt and underskirt together, then to body base.
👑 Crown (Optional)
Use a small pre-made toy crown, or crochet:
-
Ch 30, join to form ring
-
Work 1 row of sc
-
(ch 2, sl st in next st) around to create points
Attach to bonnet with stitches or glue.
🧩 Assembly
-
Sew head to body securely.
-
Attach skirt to bottom of torso.
-
Position bonnet and crown on head.
-
Add final gold trim around bodice using chain embroidery.
-
Optional: Embroider simple nose and brows for added charm.
💡 Customization Ideas
-
Use royal blue or emerald green for alternate gown colors
-
Replace the crown with a bonnet bow for a more everyday Victorian look
-
Add pearl beads or embroidery for extra elegance
This stately Queen Victoria amigurumi is ready to rule your handmade royal court with grace and charm! 👑💜