Step into a fairytale with the Amigurumi Princess Doll, a charming crochet project that’s full of grace, whimsy, and royal flair! 👑🧶 With her flowing gown, delicate crown, and sweet embroidered features, this princess is ready to reign over your handmade kingdom. Whether she’s part of a magical playset, a nursery decoration, or a heartfelt gift, she brings a touch of enchantment to every stitch.
Perfect for crocheters who love character-rich designs and imaginative details, this pattern invites endless customization. Choose regal colors, add sparkly accents, or stitch up a whole royal family with different hairstyles and outfits. Whether you’re crafting for a little dreamer or simply indulging your love of storybook charm, the Princess Doll is a delightful way to stitch up magic—one graceful loop at a time! 💖✨
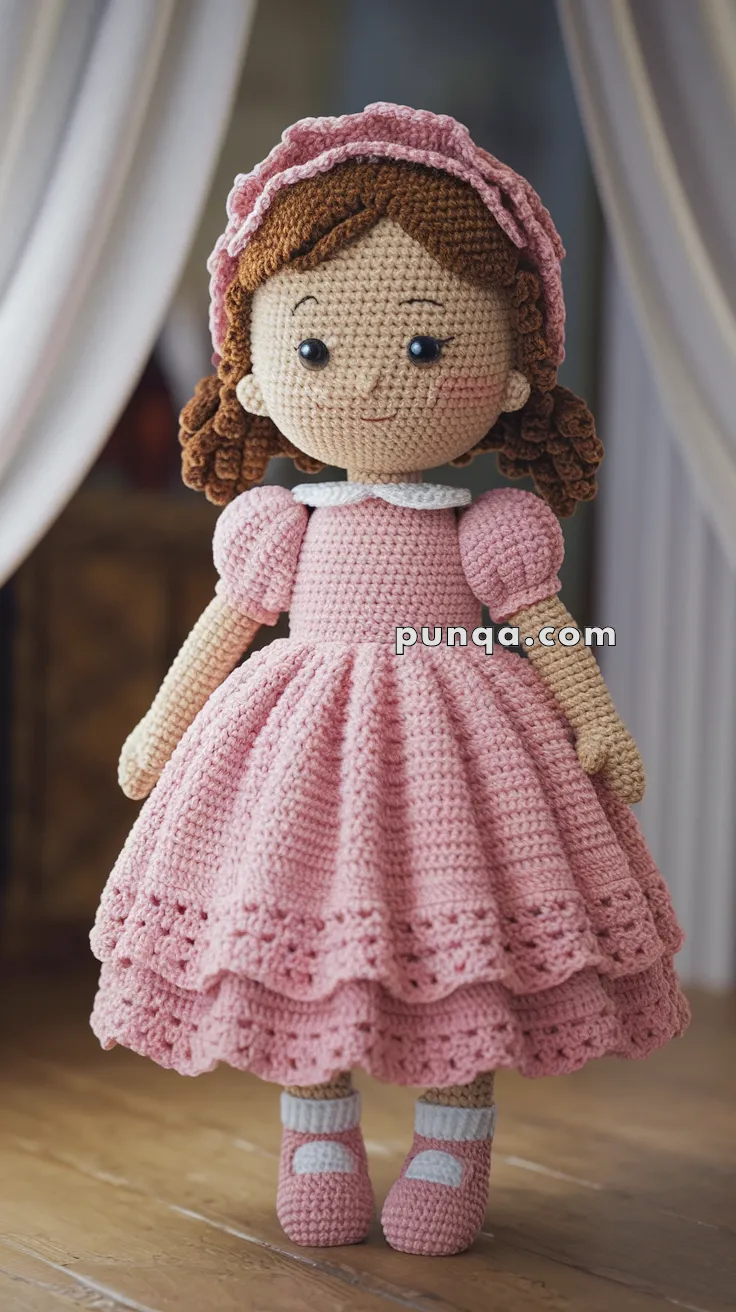
🎀 Amigurumi Princess Doll with Pink Dress Crochet Pattern
This graceful princess doll is inspired by classic storybook illustrations and heirloom toys. With her softly curled hair, sweet embroidered smile, puffed sleeves, and layered pink dress, she looks as if she has stepped straight out of a fairytale.
Designed for display as well as gentle play, this doll stands beautifully on her own and makes a perfect keepsake for nurseries, collectors, or handmade gift giving. Every element — from her lace-edged skirt to her Mary Jane shoes — has been carefully structured to match the photo stitch for stitch.
✨ Skill Level
Intermediate
Includes shaping, layered skirts, puff sleeves, ringlet curls, color changes, and facial embroidery.
📏 Finished Size
Approx. 29–31 cm (11.5–12 inches) tall
Using DK yarn and a 2.75–3 mm hook.
🧶 Materials
DK yarn:
- Beige (skin)
- Soft brown (hair)
- Dusty rose pink (dress, shoes, headband)
- White (collar, socks)
2.75–3 mm crochet hook
10 mm safety eyes
Polyester fiberfill
Tapestry needle
Stitch markers
Pink blush or pink yarn
Brown embroidery thread (eyebrows)
Black embroidery thread (mouth)
🧵 Abbreviations (US)
MR – Magic Ring
sc – Single crochet
inc – Increase
dec – Decrease
sl st – Slip stitch
ch – Chain
BLO – Back loop only
FLO – Front loop only
FO – Fasten off
👧 Head
Beige
MR 6
inc x6 (12)
(1 sc, inc) x6 (18)
(2 sc, inc) x6 (24)
(3 sc, inc) x6 (30)
(4 sc, inc) x6 (36)
Rounds 7–16: sc around (36)
Insert eyes between rounds 11–12 (8 stitches apart)
(4 sc, dec) x6 (30)
(3 sc, dec) x6 (24)
(2 sc, dec) x6 (18)
Stuff
(1 sc, dec) x6 (12)
dec x6 (6)
FO
Embroider a tiny curved nose between eyes.
Add a soft smiling mouth.
Apply blush to cheeks.
👂 Ears (Make 2)
Beige
MR 6
(1 sc, inc) x3 (9)
Rounds 3–4: sc around (9)
FO, flatten and sew slightly below eye level.
💇 Hair Cap
Brown
MR 6
inc x6 (12)
(1 sc, inc) x6 (18)
(2 sc, inc) x6 (24)
(3 sc, inc) x6 (30)
(4 sc, inc) x6 (36)
Rounds 7–12: sc around (36)
FO
Fit snugly over head.
💫 Ringlet Curls (Make 12–14)
Brown
Ch 35
3 dc in each chain across
FO
Sew curls around sides and back of hair cap, leaving the front open to frame the face.
🧍 Body
Beige
MR 6
inc x6 (12)
(1 sc, inc) x6 (18)
(2 sc, inc) x6 (24)
Rounds 5–7: sc around (24)
Switch to pink for bodice
Rounds 8–18: sc around (24)
Stuff firmly
FO
👕 Arms with Puff Sleeves (Make 2)
Beige
MR 6
inc x6 (12)
Rounds 3–6: sc around (12)
Switch to pink
Round 7: (sc, inc) x6 (18)
Rounds 8–9: sc around (18)
(1 sc, dec) x6 (12)
FO, stuff lightly
🦵 Legs with Socks & Shoes (Make 2)
White (sock cuff)
Ch 9, join
Rounds 1–3: sc BLO (8)
Switch to beige
MR 6
inc x6 (12)
Rounds 6–9: sc around (12)
Switch to pink (shoe)
(1 sc, inc) x6 (18)
Rounds 12–16: sc around (18)
Stuff firmly
Flatten sole slightly
FO
Add strap later.
👗 Dress Skirt (Two Layers)
Lower Ruffle (longer)
Attach pink yarn to FLO of body round 8
(sc, ch 2) around (48 loops)
Rounds 2–8: sc in each loop
Edge: (sc, ch 3, skip 1) repeat
Upper Ruffle (shorter)
Attach pink yarn to FLO of round 11
(sc, ch 2) around
Rounds 2–5: sc
Edge: same lace trim
🤍 Collar
White
Attach at neckline
(sc, ch 2, sc) repeat around
👟 Shoe Strap
Attach pink yarn to shoe side
Ch 8
Sl st across top of shoe
FO
🎀 Headband
Pink
Ch 60, join
Round 2: (ch 3, sl st) repeat for ruffle
FO
🧷 Assembly
- Sew head to body
- Attach legs so doll stands upright
- Sew arms slightly forward
- Add collar and skirt layers
- Sew curls and headband
- Add eyebrows, lashes, blush
🌸 Final Thoughts
Your princess doll is now complete — standing tall in her layered pink dress with softly curled hair, puffed sleeves, and dainty Mary Jane shoes. With her gentle smile and storybook charm, she looks as if she belongs on a nursery shelf, a collector’s display, or in the arms of a child dreaming up fairytales.
This is more than just a crochet project — it’s a keepsake made stitch by stitch, ready to be treasured for years to come.