Celebrate the warmth of family with this Amigurumi Grandma With Grandkids crochet pattern! Featuring a sweet grandmother figure surrounded by her adorable little grandkids, this heartwarming set captures the joy of generational love in every stitch. With Grandma’s cozy outfit, gentle smile, and loving arms, and the kids’ playful expressions and tiny accessories, this project is perfect for storytelling, gifting, or simply adding a touch of handmade affection to your collection. 🧶👵👧👦
Designed for charm and connection, this pattern invites you to mix soft yarns, expressive features, and delightful extras like a rocking chair, tiny toys, or even a basket of yarn. Customize each grandchild with different hairstyles, outfits, or favorite items to reflect your own family or create a whimsical scene. Whether displayed as a keepsake, used in imaginative play, or gifted with love, this Grandma With Grandkids Amigurumi is a joyful and satisfying project—perfect for stitching up a little handmade legacy, one hug at a time! 💖✨🏡
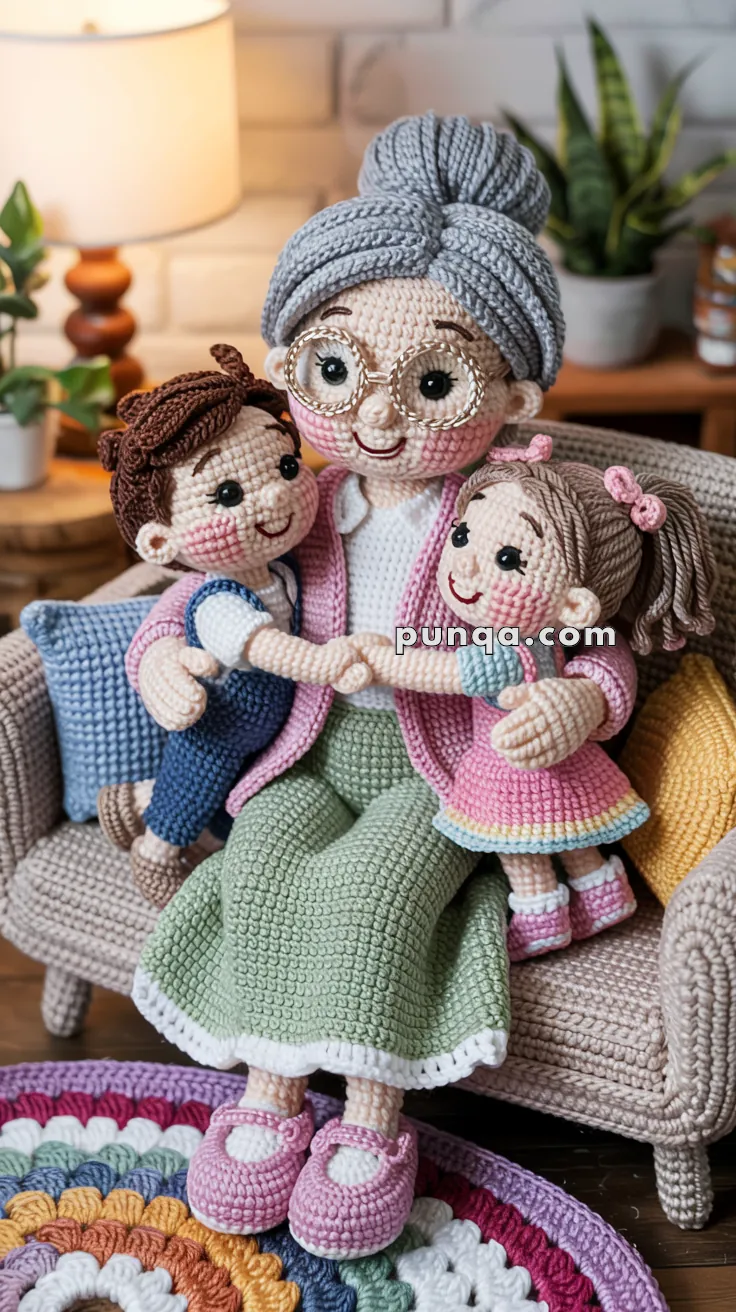
👵💕 Grandma with Grandchildren Amigurumi Crochet Pattern
Create this touching family scene featuring a loving Grandma holding her two adorable grandchildren. Complete with glasses, detailed clothing, and a cozy couch for display. A heartwarming heirloom piece! 💝
✨ Skill Level
Advanced — Includes complex shaping, layered clothing, wire work for glasses, posable limbs, textured hair techniques, and intricate assembly.
📏 Finished Sizes
- Grandma: Approximately 28-30 cm (11-12 inches) tall
- Boy Grandchild: Approximately 18-20 cm (7-8 inches) tall
- Girl Grandchild: Approximately 18-20 cm (7-8 inches) tall
- Couch: Approximately 30 cm wide × 15 cm tall (12″ × 6″)
Note: Children are proportionally smaller than original pattern for photo accuracy
🧶 Materials & Yarn Requirements
Yarn (DK or Light Worsted Weight)
For Grandma:
- Peachy Cream/Light Beige (skin – very light, warm tone): 80g (175 yards)
- Recommended: Alize Cotton Gold #01 Cream, Lion Brand Vanna’s Choice Linen, or similar peachy-cream
- Medium Grey (hair): 60g (132 yards)
- Dusty Rose Pink (cardigan): 50g (110 yards)
- White (blouse): 35g (77 yards)
- Sage Green (skirt): 45g (99 yards)
- Light Pink (shoes): 15g (33 yards)
For Boy Grandchild:
- Peachy Cream/Light Beige (skin – match Grandma): 30g (66 yards)
- Light Brown/Taupe (hair): 15g (33 yards)
- White (shirt): 12g (26 yards)
- Denim Blue (overalls): 25g (55 yards)
- Brown (shoes): 8g (18 yards)
For Girl Grandchild:
- Peachy Cream/Light Beige (skin – match Grandma): 30g (66 yards)
- Light Brown/Taupe (hair): 20g (44 yards)
- Pink (dress bodice): 18g (40 yards)
- Mint Green (dress stripe): 10g (22 yards)
- Yellow (dress stripe): 10g (22 yards)
- White (socks/collar): 10g (22 yards)
- Light Pink (shoes/hair bows): 15g (33 yards)
For Couch:
- Beige/Taupe/Grey (mixed or solid): 150g (330 yards)
- Blue (cushion): 20g (44 yards)
- Yellow (cushion): 20g (44 yards)
Total Yarn Needed: Approximately 593g (1,304 yards)
Additional Materials
- Crochet Hooks: 2.5mm and 3.0mm
- Safety Eyes:
- Grandma: 8mm (1 pair) – black
- Children: 6mm (2 pairs) – black
- Polyester Fiberfill: 300g
- Craft Wire:
- 20-gauge for glasses
- 18-gauge for leg armature (optional but recommended)
- Embroidery Thread: Dark brown, rose pink
- Tapestry Needle
- Stitch Markers
- Cream/Ivory Embroidery Thread or Thin Wire: For glasses frames (NOT white)
- Pipe Cleaners: 12-14 pieces for posable limbs (highly recommended)
- Grandma: 2 for legs (30cm each), 2 for arms (20cm each)
- Boy: 2 for legs (20cm each), 2 for arms (15cm each)
- Girl: 2 for legs (20cm each), 2 for arms (15cm each)
- Scissors
- Pins
- Pink chalk pastel or blush makeup for cheeks
Gauge
- 10 sc × 10 rows = 5cm (2 inches) with 2.5mm hook and DK yarn
- Gauge is important for achieving photo-accurate proportions
🔤 Abbreviations (US Crochet Terms)
- MR = Magic Ring
- ch = Chain
- sc = Single Crochet
- hdc = Half Double Crochet
- dc = Double Crochet
- inc = Increase (2 sc in one stitch)
- dec = Invisible Decrease (sc2tog)
- sl st = Slip Stitch
- BLO = Back Loop Only
- FLO = Front Loop Only
- FO = Fasten Off
- ( ) x # = Repeat sequence # times
- (#) = Total stitch count
👵 GRANDMA DOLL PATTERN
🎯 Head (Peachy Cream)
- MR, 6 sc (6)
- inc x6 (12)
- (1 sc, inc) x6 (18)
- (2 sc, inc) x6 (24)
- (3 sc, inc) x6 (30)
- (4 sc, inc) x6 (36)
- (5 sc, inc) x6 (42)
- (6 sc, inc) x6 (48)
- (7 sc, inc) x6 (54) 10-18. sc around (54) — 9 rounds
Insert 8mm safety eyes between Rounds 14-15, spaced 11 stitches apart
- (7 sc, dec) x6 (48)
- (6 sc, dec) x6 (42)
- (5 sc, dec) x6 (36)
- (4 sc, dec) x6 (30)
Stuff head very firmly
- (3 sc, dec) x6 (24)
- (2 sc, dec) x6 (18)
- (1 sc, dec) x6 (12)
- dec x6 (6)
FO, close opening, weave in ends
👃 Nose (Peachy Cream)
- MR, 6 sc (6)
- (2 sc, inc) x2 (8) 3-4. sc around (8) — 2 rounds
FO with long tail, stuff very lightly, sew centered below eyes spanning Rounds 15-17 of head
👂 Ears (Peachy Cream) – Make 2
- MR, 6 sc (6)
- sc around (6)
FO with long tail, do not stuff, flatten and sew to sides of head at Rounds 14-16, positioned slightly toward back of head
💇 Hair Construction (Medium Grey)
Hair Cap Base:
- MR, 6 sc (6)
- inc x6 (12)
- (1 sc, inc) x6 (18)
- (2 sc, inc) x6 (24)
- (3 sc, inc) x6 (30)
- (4 sc, inc) x6 (36)
- (5 sc, inc) x6 (42)
- (6 sc, inc) x6 (48)
- (7 sc, inc) x6 (54) 10-13. sc around (54) — 4 rounds
FO with long tail, sew to head covering Rounds 1-13
PHOTO-ACCURATE Hair Texture (Horizontal Ridges):
The photo shows very distinctive, evenly-spaced horizontal ridges across the entire hair cap. This creates the realistic grey hair texture.
Method – Slip Stitch Surface Ridges (Recommended):
- Thread tapestry needle with grey yarn (same as hair cap)
- Starting at the front hairline (Round 13 of hair cap where it meets face):
- Insert hook from inside cap through to surface at beginning of round
- Pull yarn through to create starting point
- Create first ridge:
- Insert hook under both loops of next stitch to the left (working horizontally)
- Yarn over and pull through (slip stitch on surface)
- Continue around entire circumference of round
- This creates a raised horizontal ridge
- Space ridges evenly:
- Skip 2 rounds up
- Create next horizontal ridge on next round
- Continue pattern: ridge, skip 2, ridge, skip 2
- Work from front to back:
- First ridge: Round 13 (hairline)
- Second ridge: Round 11
- Third ridge: Round 9
- Fourth ridge: Round 7
- Fifth ridge: Round 5
- Sixth ridge: Round 3
- Top ridges: Work 2-3 more ridges across crown
Result: 7-8 clear horizontal ridges evenly spaced across entire hair cap, creating the textured grey hair effect visible in photo
Hair Bun:
- MR, 6 sc (6)
- inc x6 (12)
- (1 sc, inc) x6 (18)
- (2 sc, inc) x6 (24)
- (3 sc, inc) x6 (30) 6-8. sc around (30) — 3 rounds
- (3 sc, dec) x6 (24)
- (2 sc, dec) x6 (18)
- (1 sc, dec) x6 (12)
FO with long tail, stuff moderately-firm, sew to top-back of head positioned high and toward crown
👓 Glasses (CREAM/IVORY – Not White!)
Wire Frame Method (Highly Recommended):
Materials needed:
- 20-gauge craft wire, 35cm length
- Cream or ivory embroidery thread/thin yarn (NOT white)
- Small needle-nose pliers
Instructions:
- Create lens frames:
- Form first circle 1.6cm diameter
- Form second circle 1.6cm diameter
- Ensure circles are even and round
- Connect lenses:
- Create small bridge between circles (0.6cm length)
- Position bridge in center
- Create temples (arms):
- Extend wire from outer edge of each lens
- Each temple should be 5.5cm long
- Curve temples to follow head shape
- Wrap with cream/ivory thread:
- Starting at one temple end, wrap thread tightly around entire wire frame
- Keep wrapping consistent and tight
- Cover all wire completely
- Secure ends with small knot and glue
Attachment (Critical for Photo Accuracy):
- Position glasses on face so lenses sit over eyes
- Bridge should rest on nose (Round 16-17)
- Use cream thread and tapestry needle
- Stitch bridge to nose: 3-4 small stitches through nose piece
- Curve temples around head sides
- Stitch each temple to hair cap: At approximately Round 12-13 of head, where hair meets side
- Temples should disappear into hair at sides
- Make several stitches on each temple for security
🦵 Legs (Peachy Cream) – Make 2
Important: Insert pipe cleaner (30cm) through center during construction for stability and posing
- MR, 6 sc (6)
- inc x6 (12)
- (1 sc, inc) x6 (18)
- BLO: (1 sc, dec) x6 (12) 5-30. sc around (12) — 26 rounds
For bent knee at Round 18:
- If using pipe cleaner, bend it at this point to 90-100 degree angle
- Stuff firmly below knee (Rounds 5-18)
- Stuff moderately above knee (Rounds 19-30)
- This creates permanent natural bend
Do NOT FO. Continue to shoe.
👟 Grandma’s Shoes (Light Pink) – Make 2
Continuing from leg Round 30:
- Change to light pink, BLO: (1 sc, inc) x6 (18)
- sc around (18)
- BLO: sc around (18) — creates edge for sole attachment 34-36. sc around (18) — 3 rounds
- (1 sc, dec) x6 (12)
- sc around (12)
- (2 sc, dec) x3 (9)
- sc around (9)
FO, stuff shoe portion firmly
Shoe Sole (Light Pink):
- MR, 6 sc (6)
- inc x6 (12)
- (1 sc, inc) x6 (18)
- (2 sc, inc) x6 (24)
- sc around (24)
FO with long tail, sew to FLO of Round 33 on bottom of shoe to create flat sole
Shoe Strap (Light Pink):
- Ch 10
- Sc in 2nd ch from hook, sc across (9)
- FO
Sew across top of foot in T-strap or cross pattern Add small white button or bead at center (optional)
👔 Body Construction
White Blouse (worked separately, then attached):
- Ch 28, sl st to join in ring 2-12. sc around (28) — 11 rounds
Create Armholes:
- sc 7, ch 3 (skip 7 for armhole), sc 7, ch 3 (skip 7 for armhole), sl st to join (14 sc + 6 ch = 20)
- sc around including chain stitches (20) 15-16. sc around (20) — 2 rounds
FO, set aside
Body Base (Peachy Cream):
Join Legs:
Position both completed legs side by side with knees bent forward
Using peachy cream, ch 6 for hip width
- Sc around first leg (12), sc 6 across chain, sc around second leg (12), sc 6 across other side of chain = (36)
Hip/Waist:
2-8. sc around (36) in peachy cream — 7 rounds 9. (4 sc, dec) x6 (30) 10-12. sc around (30) — 3 rounds 13. (3 sc, dec) x6 (24) 14-16. sc around (24) — 3 rounds 17. (2 sc, dec) x6 (18) 18-20. sc around (18) — 3 rounds
FO, stuff body very firmly
Attach White Blouse:
- Slip white blouse over body
- Position so bottom edge sits at Round 8-9 of body
- Pin in place first
- Sew bottom edge to body all around with matching thread
- Top opening should sit at neck area (Round 20)
- Sew body with blouse to head securely – use multiple stitches around neck
💪 Arms (Peachy Cream Hand, White Sleeve) – Make 2
Insert pipe cleaner (20cm) for posable arms
Hand with Thumb:
- MR, 6 sc (6)
- inc x6 (12)
- (1 sc, inc) x6 (18) 4-5. sc around (18) — 2 rounds
Create Thumb:
- Sc 3, ch 5
- Starting in 2nd ch from hook: sc 4 back down chain
- Sl st back to hand
- Continue around hand
- (1 sc, dec) x6 (12)
Wrist/Lower Arm (Peachy Cream):
7-11. sc around (12) — 5 rounds
Change to White for Sleeve:
12-24. sc around (12) in white — 13 rounds
FO with long tail
Stuffing:
- Hand: stuff firmly
- Lower arm: stuff moderately
- Upper arm: stuff lightly for flexibility
Attachment:
- Position arms at shoulders where blouse meets neck (Rounds 18-20 of body)
- Angle arms forward and downward to create hugging position
- Stitch securely to body in multiple places
- Arms should curve forward, ready to wrap around children
🧥 Pink Cardigan with Rolled Edges
Back Panel:
- Ch 18
- Row 1: sc in 2nd ch from hook, sc across (17)
- Rows 2-22: ch 1, turn, sc across (17) — 21 more rows
- FO
Right Front Panel:
- Ch 11
- Row 1: sc in 2nd ch from hook, sc across (10)
- Rows 2-22: ch 1, turn, sc across (10) — 21 more rows
- FO
Left Front Panel:
Repeat right front panel
Sleeves (make 2):
- Ch 18, sl st to join in ring 2-14. sc around (18) — 13 rounds
- (4 sc, dec) x3 (15)
FO
PHOTO-ACCURATE Rolled Edges:
Front Opening Borders (make 2 – one for each front edge):
- Pick up stitches along front opening edge
- Round 1: sc evenly down edge (approximately 22 sc)
- Round 2: sc in each sc
- Round 3: sc in each sc
- FO
The 3 rounds will naturally roll forward creating the rolled edge visible in photo
Cardigan Assembly:
- Lay back panel flat
- Position front panels on each side of back panel
- Sew shoulder seams (4-5 stitches on each side)
- Sew sleeves into armholes
- Place cardigan on doll over white blouse
- Leave front open – characteristic cardigan look
- Optional: Add 2-3 small light pink buttons down one front edge (decorative only)
Collar (Optional but Recommended):
- Attach yarn to neck edge at back
- Sc around entire neck opening (approximately 28 sc)
- Ch 1, turn, sc back around for thicker collar
- Let collar roll naturally
- FO
👗 Sage Green Skirt with White Scalloped Hem
Attach to body at waist (Round 13 of body base):
- Using sage green, attach to Round 13 of body, working in BLO: sc around (24)
- inc in each stitch (48)
- (inc in each stitch) around (96) 4-16. sc around (96) — 13 rounds
White Decorative Scalloped Hem:
- Change to white: sc around (96)
- sc 2, ch 3, sl st in 2nd ch from hook, sc in next ch (picot made), sc 1 in skirt — repeat around for scalloped edge
FO
The skirt should be full, gathered at waist, and flow nicely, reaching to just above shoes
🧒 BOY GRANDCHILD PATTERN
🎯 Head (Peachy Cream)
- MR, 6 sc (6)
- inc x6 (12)
- (1 sc, inc) x6 (18)
- (2 sc, inc) x6 (24)
- (3 sc, inc) x6 (30)
- (4 sc, inc) x6 (36)
- (5 sc, inc) x6 (42) 8-15. sc around (42) — 8 rounds
Insert 6mm safety eyes between Rounds 11-12, spaced 8-9 stitches apart
- (5 sc, dec) x6 (36)
- (4 sc, dec) x6 (30)
- (3 sc, dec) x6 (24)
- (2 sc, dec) x6 (18)
Stuff head very firmly
- (1 sc, dec) x6 (12)
- dec x6 (6)
FO, close opening
👃 Nose (Peachy Cream)
- MR, 5 sc (5)
- sc around (5)
FO, stuff very lightly, sew below eyes on Round 13-14
💇 Boy’s Hair (Light Brown/Taupe)
Hair Cap:
- MR, 6 sc (6)
- inc x6 (12)
- (1 sc, inc) x6 (18)
- (2 sc, inc) x6 (24)
- (3 sc, inc) x6 (30)
- (4 sc, inc) x6 (36)
- (5 sc, inc) x6 (42) 8-10. sc around (42) — 3 rounds
FO, sew to head covering top and sides, leaving face exposed (forehead to Round 6-7)
PHOTO-ACCURATE Side Ponytail/Tuft:
The photo shows a distinctive small textured tuft sticking out on the left side of the boy’s head.
Method:
- Cut 12-15 strands of light brown yarn, each 6cm long
- Take all strands and gather together
- Fold bundle in half to find center
- Tie VERY tightly at center fold with matching yarn (create 5-6 tight wraps)
- Position on LEFT side of head at Round 7-8 (temple area)
- Sew the tied center point securely to hair cap
- Fluff the strands outward to create spiky/textured effect
- Trim to 2-2.5cm length so tuft sticks out prominently
- The tuft should angle upward/outward from side of head
Bangs/Forehead Hair:
- Cut 8-10 strands of light brown yarn, each 3cm long
- Use latch-hook method or needle to attach across forehead (Rounds 6-7 of head)
- Space evenly across forehead
- Trim straight across for neat, short bangs
- Keep natural and boyish
🦵 Legs (Peachy Cream) – Make 2
Insert pipe cleaner (20cm) for posable legs
- MR, 6 sc (6)
- inc x6 (12)
- (1 sc, inc) x6 (18)
- BLO: (1 sc, dec) x6 (12) 5-22. sc around (12) — 18 rounds
Knee bend at Round 13:
- Bend pipe cleaner at this point
- Stuff firmly below knee
- Stuff moderately above knee
Do NOT FO, continue to shoe
👞 Boy’s Shoes (Brown) – Make 2
Continuing from leg Round 22:
- Change to brown, BLO: (1 sc, inc) x6 (18) 24-26. sc around (18) — 3 rounds
- (1 sc, dec) x6 (12)
- (2 sc, dec) x3 (9)
- sc around (9)
FO, stuff shoe firmly, leg moderately
Shoe Sole (Brown):
- MR, 6 sc (6)
- inc x6 (12)
- (1 sc, inc) x6 (18)
- sc 3, inc 3, sc 6, inc 3, sc 3 (24)
FO, sew to bottom of shoe creating oval sole
Shoe Laces (Optional):
Using white or cream embroidery thread:
- Embroider X pattern across top of shoe
- Or ch 15 and weave through top stitches
👕 Body with White Shirt & Blue Overalls
White Shirt:
- Ch 24, sl st to join in ring 2-7. sc around (24) in white — 6 rounds
Create Armholes:
- sc 6, ch 2 (skip 6 for armhole), sc 6, ch 2 (skip 6 for armhole) = (12 sc + 4 ch = 16) 9-10. sc around (16) — 2 rounds
FO, set aside
Body Base (Peachy Cream) with Blue Overall Bottom:
Join Legs:
Position both legs side by side with knees bent
Using denim blue, ch 4
- Sc around first leg (12), sc 4 across chain, sc around second leg (12), sc 4 across other side of chain = (32)
Overall Bottom/Pants (Denim Blue):
2-12. sc around (32) in denim blue — 11 rounds 13. (6 sc, dec) x4 (28) 14-16. sc around (28) — 3 rounds 17. (5 sc, dec) x4 (24) 18-20. sc around (24) — 3 rounds
FO, stuff firmly
Assembly:
- Slip white shirt over body
- Position at waist area (Round 12-13)
- Sew in place with white thread
- Sew body to head securely
Overall Bib Front (Denim Blue):
- Ch 10
- Row 1: sc in 2nd ch from hook, sc across (9)
- Rows 2-7: ch 1, turn, sc across (9) — 6 more rows
- FO
Sew to front chest area of doll, covering white shirt front (position at neck to waist)
Overall Straps (make 2):
- Ch 25
- Sc in 2nd ch from hook, sc across (24)
- FO
Attachment:
- Sew one end to top corner of bib
- Cross straps over shoulders in X pattern on back
- Sew other ends to back of overall pants (Round 17-18)
- Optional: Add small buttons where straps meet bib
💪 Boy’s Arms (Peachy Cream, White Sleeves) – Make 2
Insert pipe cleaner (15cm)
Hand:
- MR, 6 sc (6)
- inc x6 (12) 3-4. sc around (12) in peachy cream — 2 rounds
Optional Thumb:
- Sc 2, ch 4, sc back down chain (3), continue around hand
- (1 sc, dec) x4 (8)
Change to White for Sleeve:
6-14. sc around (8) in white — 9 rounds
FO, stuff hand area firmly, arm lightly
Attachment:
- Sew to body at shoulder area where shirt meets neck
- Position to allow arms to wrap around/hold onto Grandma
- One arm can reach forward, one can rest at side
👧 GIRL GRANDCHILD PATTERN
🎯 Head (Peachy Cream)
Follow Boy’s Head pattern exactly (Rounds 1-21)
👃 Nose (Peachy Cream)
Follow Boy’s Nose pattern exactly
💇 Girl’s Hair (Light Brown/Taupe)
Hair Cap:
- MR, 6 sc (6)
- inc x6 (12)
- (1 sc, inc) x6 (18)
- (2 sc, inc) x6 (24)
- (3 sc, inc) x6 (30)
- (4 sc, inc) x6 (36)
- (5 sc, inc) x6 (42) 8-10. sc around (42) — 3 rounds
FO, sew to head covering top and sides
Bangs:
- Cut 12-15 strands of light brown yarn, each 3-3.5cm long
- Use latch-hook method to attach across forehead (Rounds 5-6 of head)
- Attach loops evenly across entire forehead width
- Trim straight across for neat, even bangs
PHOTO-ACCURATE Low Side Pigtails (make 2):
The photo shows two pigtails positioned LOW on the sides of the head, hanging down beside the face.
For each pigtail:
- Cut 22-25 strands of yarn, each 11cm long
- Gather all strands together
- Fold bundle in half to find center
- Tie VERY tightly at center fold with matching yarn
- Position LOW on side of head at Round 8-9 (below temple, near ear level)
- First pigtail: LEFT side
- Second pigtail: RIGHT side
- Sew the tied center securely to hair cap
- Pigtails should hang straight down alongside face
- Trim ends evenly to desired length (approximately 4-5cm from tie point)
- Can brush out slightly for fuller look
Pink Hair Bows (make 2):
- Ch 16
- Row 1: sc in 2nd ch from hook, sc across (15)
- Row 2: ch 1, turn, sc across (15)
- FO
Shape into bow:
- Fold piece accordion-style (or gather in center)
- Wrap center tightly with yarn to cinch
- Wrap multiple times to create bow shape
- Secure with knot
Attach:
- Sew one bow to base of each pigtail (at the tied center point)
- Bows should be prominent and visible
🦵 Girl’s Legs (Peachy Cream) – Make 2
Insert pipe cleaner (20cm)
Follow Boy’s Legs pattern exactly (Rounds 1-22)
🧦 White Socks – Make 2
Continuing from leg Round 22:
- Change to white, sc around (12) 24-25. sc around (12) — 2 rounds
Optional Sock Trim:
- Change to light pink, sc around (12)
Do NOT FO, continue to shoe
👟 Girl’s Shoes (Light Pink) – Make 2
Continuing from sock:
- Change to light pink, BLO: (1 sc, inc) x6 (18) 28-30. sc around (18) — 3 rounds
- (1 sc, dec) x6 (12)
- (2 sc, dec) x3 (9)
FO, stuff shoe firmly
Shoe Sole (Light Pink):
- MR, 6 sc (6)
- inc x6 (12)
- (1 sc, inc) x6 (18)
- sc 3, inc 3, sc 6, inc 3, sc 3 (24)
FO, sew to bottom of shoe creating oval sole
Shoe Strap:
- Ch 12
- Sc in 2nd ch from hook, sc across (11)
- FO
Attachment:
- Sew across top of foot in T-strap pattern
- Add small white or light pink bead/button at center intersection (optional)
👗 Girl’s Striped Dress
Pink Bodice with White Collar:
- Ch 24, sl st to join in ring 2-4. sc around (24) in pink — 3 rounds
PHOTO-ACCURATE White Collar:
- Change to white, FLO: (sc, ch 1) around (24 sc + 24 ch-1 spaces)
- In each ch-1 space from previous round: sc, creating raised collar effect (24)
- sc around (24) in white
Return to Pink Bodice:
8-10. Change to pink, sc around (24) — 3 rounds
Create Armholes:
- sc 6, ch 2 (skip 6 for armhole), sc 6, ch 2 (skip 6 for armhole) = (12 sc + 4 ch = 16) 12-13. sc around (16) — 2 rounds
FO, set aside
Body Base (Peachy Cream):
Join Legs:
Position both legs side by side with knees bent
Using peachy cream, ch 4
- Sc around first leg (12), sc 4 across chain, sc around second leg (12), sc 4 across other side of chain = (32)
Body:
2-8. sc around (32) in peachy cream — 7 rounds 9. (6 sc, dec) x4 (28) 10-12. sc around (28) — 3 rounds 13. (5 sc, dec) x4 (24) 14-16. sc around (24) — 3 rounds
FO, stuff firmly
Assembly:
- Slip pink bodice over body
- Position at waist (around Round 8-9)
- Pin in place first
- Sew bottom edge of bodice to body
- White collar should stand up at neckline
- Sew body to head securely
PHOTO-ACCURATE Striped Skirt (Pink, Mint Green, Yellow):
The photo clearly shows horizontal stripes in the skirt. Attach to FLO of Round 4 of pink bodice (below the white collar section).
Working in double crochet for better drape:
- Using pink, attach to FLO of Round 4: 2 dc in each st around (48)
- dc around (48) in pink
- Change to mint green, dc around (48)
- dc around (48) in mint green
- Change to yellow, dc around (48)
- dc around (48) in yellow
- Change to pink, dc around (48)
- dc around (48) in pink
- Change to mint green, dc around (48)
- dc around (48) in mint green
FO
Stripe sequence: Pink (2 rounds), Mint (2 rounds), Yellow (2 rounds), Pink (2 rounds), Mint (2 rounds)
The skirt should have clear, even horizontal stripes and nice flow.
💪 Girl’s Arms (Peachy Cream, Pink Sleeves) – Make 2
Insert pipe cleaner (15cm)
Hand:
- MR, 6 sc (6)
- inc x6 (12) 3-4. sc around (12) in peachy cream — 2 rounds
Optional Thumb:
- Sc 2, ch 4, sc back down chain (3), continue around
- (1 sc, dec) x4 (8)
Change to Pink for Sleeve:
6-14. sc around (8) in pink — 9 rounds
White Sleeve Trim:
- Change to white, sc around (8)
FO, stuff hand area firmly, arm lightly
Attachment:
- Sew to body at shoulder area where bodice meets neck
- Position for natural hugging/holding pose
- One arm can reach toward Grandma, one can rest at side
🛋️ COUCH PATTERN
🪑 Couch Seat/Base
Using beige/taupe:
- Ch 55
- Row 1: sc in 2nd ch from hook, sc across (54)
- Row 2: ch 1, turn, 2 sc in first st, sc across to last st, 2 sc in last st (56)
- Rows 3-4: ch 1, turn, sc across (56)
- Row 5: ch 1, turn, 2 sc in first st, sc across to last st, 2 sc in last st (58)
- Rows 6-12: ch 1, turn, sc across (58) — 7 rows
FO
Seat Sides (make 2):
- Ch 18
- Row 1: sc in 2nd ch from hook, sc across (17)
- Rows 2-12: ch 1, turn, sc across (17)
FO
Assemble Seat:
- Sew sides to main seat piece creating 3D cushion shape
- Stuff firmly with fiberfill
- Create bottom piece: ch 55, work matching rows, sew to bottom
🪑 Couch Backrest
Using beige/taupe:
- Ch 55
- Row 1: sc in 2nd ch from hook, sc across (54)
- Rows 2-25: ch 1, turn, sc across (54) — 24 more rows
FO
Assembly:
- Backrest should be tall enough to provide backdrop
- Sew backrest to back edge of seat
- Position upright at 90-degree angle
- Stitch securely
🪑 Couch Arms (make 2)
- MR, 6 sc (6)
- inc x6 (12)
- (1 sc, inc) x6 (18)
- (2 sc, inc) x6 (24) 5-18. sc around (24) — 14 rounds
FO, stuff firmly
Attachment:
- Sew to each side of couch
- Connect seat and backrest
- Position vertically/upright
- Should be same height as backrest
🪑 Cushions
Blue Square Cushion:
- Ch 16
- Row 1: sc in 2nd ch from hook, sc across (15)
- Rows 2-15: ch 1, turn, sc across (15)
- FO
Make second identical piece
Sew together around edges leaving opening, stuff moderately, close opening
Yellow Round Cushion:
- MR, 6 sc (6)
- inc x6 (12)
- (1 sc, inc) x6 (18)
- (2 sc, inc) x6 (24)
- (3 sc, inc) x6 (30) 6-8. sc around (30) — 3 rounds
- (3 sc, dec) x6 (24)
- (2 sc, dec) x6 (18)
Stuff firmly
- (1 sc, dec) x6 (12)
- dec x6 (6)
FO, close opening
Display:
- Place cushions on couch for decoration
- Can position on seat or against backrest
😊 FACIAL FEATURES FOR ALL DOLLS
Grandma:
Eyes: 8mm safety eyes already inserted between Rounds 14-15, 11 stitches apart
Eyebrows:
- Using dark brown embroidery thread (3 strands)
- Embroider gentle, soft curved lines above each eye
- Position at Round 12-13 of head
- Curve should be gentle arc, not harsh
- Each eyebrow approximately 5-6 stitches wide
- Keep them natural and warm, not too dark or dramatic
Mouth:
- Position at Round 17-18 of head
- Use rose pink or dark brown embroidery thread (3 strands)
- Create curved smile approximately 6-7 stitches wide
- Curve upward gently at corners
- Can add slight upturn at each end for warm expression
- Keep soft and grandmotherly
Blush:
- Apply pink chalk pastel or makeup to cheeks
- Position at Rounds 16-17
- Circular application on each cheek
- Keep subtle and natural
- Or embroider small circles with light pink thread
Expression Goal: Warm, loving, gentle, and grandmotherly
Boy Grandchild:
Eyes: 6mm safety eyes already inserted between Rounds 11-12, 8-9 stitches apart
Eyebrows:
- Using dark brown embroidery thread (2 strands)
- Small straight or slightly curved lines
- Position at Round 9-10 of head
- Each eyebrow approximately 3-4 stitches wide
- Keep simple and childlike
- Not too thick or dark
Mouth:
- Position at Round 14-15 of head
- Use dark brown or pink thread (2 strands)
- Small curved smile approximately 3-4 stitches wide
- Simple upward curve
- Keep sweet and boyish
Blush:
- Light pink on cheeks at Round 13
- Keep subtle for boyish look
- Small circular application
Optional Freckles:
- 2-3 tiny brown dots on each cheek
- Use brown embroidery thread
- Single stitch for each freckle
Expression Goal: Sweet, happy, childlike, content
Girl Grandchild:
Eyes: 6mm safety eyes already inserted between Rounds 11-12, 8-9 stitches apart
Eyebrows:
- Using dark brown embroidery thread (2 strands)
- Delicate curved lines
- Position at Round 9-10 of head
- Slightly more arched than boy’s for feminine look
- Each eyebrow approximately 3-4 stitches wide
- Keep gentle and sweet
Mouth:
- Position at Round 14-15 of head
- Use pink or rose-colored thread (2 strands)
- Sweet curved smile approximately 4-5 stitches wide
- Slightly wider than boy’s smile
- Gentle upward curve with slight upturn at corners
Blush:
- Pink on cheeks at Round 13
- Can be slightly more prominent than boy’s
- Circular application on each cheek
Optional Eyelashes:
- Using dark brown thread (1 strand)
- Add 2-3 small straight stitches extending from outer corners of eyes
- Angle upward and outward
- Keep delicate
Expression Goal: Sweet, happy, gentle, slightly more expressive than boy
🔧 PHOTO-ACCURATE ASSEMBLY INSTRUCTIONS
CRITICAL ASSEMBLY NOTE:
The photo shows the children being HELD by Grandma, NOT sitting independently. They are positioned AGAINST her body with her arms wrapped around them protectively. Their legs dangle naturally with bent knees. This is the key to photo accuracy.
Step 1: Complete All Individual Pieces
Before assembly, ensure you have:
✅ Grandma: Fully assembled
- Head with hair cap, ridges, bun, glasses, facial features
- Body with white blouse underneath
- Pink cardigan on top
- Sage green skirt with white hem
- Both arms with white sleeves
- Both legs with pink shoes
- All pipe cleaners in place
✅ Boy: Fully assembled
- Head with hair cap, side tuft, bangs, facial features
- Body with white shirt
- Blue overalls with bib and straps
- Both arms with white sleeves
- Both legs with brown shoes
- All pipe cleaners in place
✅ Girl: Fully assembled
- Head with hair cap, bangs, pigtails with pink bows, facial features
- Body with pink bodice
- White collar detail
- Striped skirt
- Both arms with pink sleeves
- Both legs with white socks and pink shoes
- All pipe cleaners in place
✅ Couch: Fully assembled with cushions
Step 2: Prepare Grandma for Holding Children
Position Grandma’s arms:
- Bend both arms at “elbow” area (approximately Round 14-16 of arm)
- Using pipe cleaners, shape arms forward and slightly outward
- Arms should curve inward at ends (ready to embrace)
- Leave arms loose, not stiff
- Test positioning before final assembly
Ensure stability:
- Grandma should be able to stand on her own
- Legs should be firmly stuffed
- Body should be very firm
- Wide stance from leg joining provides base
Step 3: Position Boy Grandchild (Grandma’s LEFT Side)
Placement:
- Position boy against Grandma’s LEFT side
- His right shoulder/side should press against Grandma’s torso
- His head should rest near/against Grandma’s left shoulder/upper chest
- His body should angle slightly inward toward Grandma (not straight)
- Height: Position so his head reaches approximately Grandma’s chest/shoulder area
Leg Position:
- Use pipe cleaners to bend BOTH legs at knees
- Knees should bend at approximately 90-100 degrees
- Legs dangle down naturally
- Feet point downward and slightly forward
- One leg can bend slightly more than other for natural look
- Important: Legs are NOT supporting weight – they hang freely
Test positioning with pins first:
- Pin boy’s right shoulder to Grandma’s left torso
- Pin boy’s right side/back to Grandma’s body
- Step back and check from multiple angles
- Adjust height and angle as needed
- Ensure he appears relaxed and cuddled
Permanent stitching:
- Using matching peachy cream yarn and tapestry needle
- Stitch boy’s right shoulder to Grandma’s body (5-6 stitches minimum)
- Stitch boy’s upper back to Grandma’s torso/side (5-6 stitches)
- Stitch boy’s right side to Grandma’s body (3-4 stitches)
- Use small stitches that won’t show
- Ensure very secure – this needs to hold permanently
- He should appear to be leaning into her embrace
Step 4: Position Girl Grandchild (Grandma’s RIGHT Side)
Placement:
- Position girl against Grandma’s RIGHT side
- Her left shoulder/side should press against Grandma’s torso
- Her head should rest near/against Grandma’s right shoulder/upper chest
- Her body should angle slightly inward toward Grandma
- Height: Should be approximately same height as boy (heads at similar level)
- Both children should appear balanced and symmetrical
Leg Position:
- Use pipe cleaners to bend BOTH legs at knees
- Similar bend angle to boy’s legs (90-100 degrees)
- Legs dangle naturally
- Can cross ankles for variety and interest
- Dress should drape nicely over bent legs
- Striped skirt should be visible
Test positioning with pins first:
- Pin girl’s left shoulder to Grandma’s right torso
- Pin girl’s left side/back to Grandma’s body
- Check symmetry with boy
- Both heads should be at similar height
- Both should angle inward
- Step back and view overall composition
Permanent stitching:
- Using matching peachy cream yarn
- Stitch girl’s left shoulder to Grandma’s body (5-6 stitches minimum)
- Stitch girl’s upper back to Grandma’s torso/side (5-6 stitches)
- Stitch girl’s left side to Grandma’s body (3-4 stitches)
- Ensure very secure stitching
- She should appear held and secure in Grandma’s embrace
Step 5: Position Grandma’s Arms Around Children
This is the critical step that creates the loving embrace visible in the photo.
Grandma’s LEFT Arm (around Boy):
- Bring Grandma’s left arm across boy’s front
- Arm should wrap around his torso/chest area
- Hand can rest on his right side or front
- Curve arm naturally using pipe cleaner
- Stitching:
- Stitch underside of arm to boy’s chest (2-3 places)
- Stitch hand to boy’s side or front torso
- Use matching pink yarn (from cardigan sleeve)
- Make stitches invisible by going through layers
Grandma’s RIGHT Arm (around Girl):
- Bring Grandma’s right arm across girl’s front
- Arm should wrap around her torso/chest area
- Hand can rest on her left side or front
- Mirror the position of left arm for symmetry
- Stitching:
- Stitch underside of arm to girl’s chest (2-3 places)
- Stitch hand to girl’s side or front torso
- Use matching pink yarn
- Keep stitches invisible
Overall Embrace Effect:
- Both arms should create protective, loving gesture
- Arms wrap around children simultaneously
- Children appear secure and cuddled
- The embrace should look natural, not forced
- This is the signature element of the piece
Step 6: Position Children’s Arms
Boy’s Arms:
- Left arm (outer arm): Can rest at his side naturally
- Right arm (against Grandma):
- Can reach across toward Grandma’s body
- Can rest on Grandma’s arm that’s hugging him
- Can hold onto Grandma’s cardigan
- Keep natural and relaxed
- Stitch in final position if desired (optional)
- Arms should enhance the cuddling effect
Girl’s Arms:
- Right arm (outer arm): Can rest at her side naturally
- Left arm (against Grandma):
- Can reach toward Grandma’s body
- Can rest on Grandma’s arm
- Can appear to hug back gently
- Keep gentle and sweet
- Stitch in final position if desired (optional)
- Should look affectionate
Step 7: Final Adjustments and Quality Check
Check all stitching:
- Tug gently on each child to ensure secure attachment
- Add more stitches anywhere that feels loose
- All connection points should be very secure
- This is a display piece that must hold together
Verify symmetry:
- Both children at similar heights
- Both angled inward similarly
- Heads positioned symmetrically
- Overall balanced appearance
Check head positions:
- Heads can tilt slightly toward Grandma
- Should appear natural and comfortable
- Not tilted too far (looks broken)
- Gentle, relaxed positioning
Smooth all clothing:
- Grandma’s cardigan should lay naturally and open in front
- White blouse should show at neck and cuffs
- Grandma’s skirt should have nice fullness
- Boy’s overall straps should be clearly visible
- Boy’s white shirt should show at neck
- Girl’s white collar should stand up properly
- Girl’s striped skirt should show clear stripes
- All white trim details visible
Adjust hair details:
- Grandma’s bun should be prominent and well-shaped
- Grandma’s ridges should be clear and evenly spaced
- Boy’s side tuft should stick out prominently on left side
- Boy’s bangs should be neat
- Girl’s pigtails should hang evenly on both sides
- Pink bows should be visible and well-positioned
Check glasses:
- Glasses should sit centered on Grandma’s nose
- Frames should be secure
- Temples should curve naturally around head into hair
- No loose threads visible
Verify leg positions:
- Both children’s legs should dangle with bent knees
- Knees bent at natural angle (90-100 degrees)
- Feet pointing downward
- Legs not stiff or straight
- Natural, relaxed dangling appearance
Step 8: Couch Placement Options
Option 1 – Background Display (Recommended):
- Place couch behind the assembled group
- Position group standing in front of couch
- Couch serves as backdrop and context
- Creates complete scene
- Best for photography
- Shows full composition
Option 2 – Seated Display:
- Position Grandma on edge of couch seat
- Her legs should rest on/near seat
- Children remain in her arms in held position
- Creates appearance of Grandma sitting while holding grandchildren
- More relaxed pose
- Couch becomes active part of scene
Option 3 – Side Placement:
- Place couch to the side
- Group stands separately
- Couch adds to scene without interfering
- Can photograph with or without couch in frame
- Most flexibility
Cushion placement:
- Position blue and yellow cushions on couch
- Can lean against backrest
- Or place on seat
- Adds color and detail to scene
🌟 FINISHING TOUCHES CHECKLIST
Visual Details:
✨ Grandma’s glasses sit properly centered, frames secure, cream/ivory color visible
✨ Grandma’s hair has clear horizontal ridges across entire cap, bun is prominent
✨ Grandma’s cardigan lays naturally with visible rolled edges, front stays open
✨ Grandma’s white blouse peeks out at neck and wrists
✨ Grandma’s skirt has fullness and flow, white scalloped hem visible
✨ Boy’s side tuft sticks out prominently on left side of head
✨ Boy’s overall straps visible and crossed in back
✨ Boy’s white shirt shows at neck and sleeves
✨ Girl’s pigtails hang evenly with pink bows clearly visible
✨ Girl’s white collar stands up properly at neckline
✨ Girl’s striped skirt shows clear, even horizontal stripes (pink, mint, yellow pattern)
✨ All facial features clearly visible with sweet, happy expressions
✨ All shoes properly shaped with visible details (straps, soles)
Structural Check:
✨ Grandma stands stably on her own before children attached
✨ Children are securely stitched to Grandma in multiple places
✨ Arms create embracing gesture around both children
✨ Children’s legs dangle naturally with proper knee bends
✨ Overall composition is balanced and symmetrical
✨ All pipe cleaners positioned correctly for natural poses
✨ No visible stitching at attachment points
✨ Group is stable when moved or displayed
Expression and Emotion:
✨ Grandma’s expression appears warm, loving, and gentle
✨ Children’s expressions appear content, happy, and secure
✨ Overall scene conveys love and family connection
✨ Embrace looks natural, not forced
✨ Positioning creates storytelling moment
📸 PHOTOGRAPHY TIPS FOR DISPLAY
Lighting:
- Natural window light works best for warm, soft appearance
- Avoid harsh overhead lighting or direct flash
- Soft, diffused light creates cozy feeling
- Golden hour lighting (early morning or late afternoon) for warmth
- Position near window with indirect sunlight
Camera Angles:
Front view (primary):
- Shoot from slightly above at Grandma’s eye level
- Capture all three faces clearly
- Show the embrace and arm positioning
- This is the main angle from the photo
Side angle:
- Shows profile and embrace depth
- Captures dimension of scene
- Shows how children are held against Grandma
Close-up:
- Focus on faces and facial expressions
- Capture detail work (glasses, hair, clothing)
- Show craftsmanship
Wide shot:
- Include couch in background
- Show full scene and context
- Capture overall composition
Background:
- Neutral solid colors work best (cream, beige, soft grey, white)
- Warm tones complement the piece
- Wood surfaces add natural warmth
- Avoid busy patterns that distract from dolls
- Can include soft texture (blanket, rug) underneath
Composition:
- Rule of thirds – position group slightly off-center
- Keep all three faces visible in main shot
- Ensure embrace is clearly shown
- Include details like glasses, hair texture, clothing layers
- Capture the emotional connection
- Show scale by including couch or props
Props (Optional):
- Add warm-toned blanket or rug underneath for context
- Include small potted plant in background
- Add miniature picture frames nearby
- Include storybook as prop
- Create cozy living room scene
- Keep props minimal – dolls are the focus
Editing:
- Warm color temperature enhances cozy feeling
- Slight vignette draws eye to center
- Don’t oversaturate colors
- Keep editing natural and subtle
- Enhance but don’t alter the handmade quality
✨ CARE INSTRUCTIONS
Cleaning:
- Spot clean only with slightly damp cloth
- Use mild soap if necessary (very small amount)
- Dab gently, do not rub harshly
- Air dry completely before handling
- Do NOT machine wash – will destroy piece
- Avoid getting safety eyes wet – can rust or come loose
- Protect glasses during any cleaning
Storage:
- Store in cool, dry place away from humidity
- Keep away from direct sunlight (colors may fade over time)
- Store assembled if possible (preferred)
- If separating for storage:
- Keep children with Grandma in large box
- Use tissue paper between pieces
- Store couch separately
- Keep in dust-free container or display case
- Do not compress or stack heavy items on top
Maintenance:
- Dust gently with soft brush or dry cloth
- Brush hair texture gently if it gets flattened
- Reshape clothing periodically if compressed
- Tighten any loose stitches promptly (check every few months)
- Check glasses security regularly
- Check safety eye security
- Fluff stuffing gently if areas become compressed
- Re-position pipe cleaners if pose changes over time
Display:
- Choose stable surface where piece won’t be bumped
- Avoid high-traffic areas where it might fall
- Keep away from pets (may chew or damage)
- Keep away from small children (choking hazard)
- Consider glass display case for protection
- Rotate occasionally if in direct light (prevents uneven fading)
Safety Warnings:
- NOT suitable for children under 3 years (small parts)
- Safety eyes are choking hazard if they come loose
- Wire in glasses could be sharp if broken
- Supervise if allowing children to interact with piece
- Inspect regularly for loose parts
- Keep away from pets (may ingest small parts)
💡 ADVANCED TIPS FOR SUCCESS
Pipe Cleaner Usage:
Benefits:
- Grandma’s legs: Allows her to stand stably
- Children’s legs: Creates realistic bent-knee dangling poses
- All arms: Enables and maintains hugging positions
- Allows repositioning if needed
Insertion technique:
- Insert BEFORE stuffing
- Run through entire length of limb
- Leave 1cm at each end (fold over inside)
- Do not let wire poke through
- Bend to desired position AFTER stuffing complete
Glasses Construction:
- Wire-wrapped method is significantly sturdier than crochet
- Use 20-gauge wire (not thinner or thicker)
- Cream/ivory color is essential – white looks artificial
- Wrap tightly with no gaps
- Shape circles to be perfectly even (use round object as guide)
- Test fit on face before wrapping completely
- Multiple attachment points prevent shifting
Layered Clothing Assembly:
- Always work inside to outside: body base → undershirt/blouse → outer layers
- Sew each layer securely before adding next
- Grandma’s white blouse must peek out at neck and wrists
- Boy’s white shirt must show at neck and sleeve edges
- Proper layering creates realistic appearance
Hair Texture for Grandma:
- The horizontal ridges are CRITICAL for realistic grey hair
- Work ridges AFTER cap is sewn to head (easier)
- Use matching grey yarn
- Space evenly (every 2-3 rounds)
- Keep tension consistent for uniform ridges
- Ridges should be visible but not overly thick
- Creates dimensional, textured grey hair effect
Children’s Proportions:
- Children should be noticeably smaller than Grandma (30-35% smaller)
- Head-to-body ratio should be more childlike (larger head proportion)
- Keep features simpler and rounder than Grandma’s
- Hands smaller, feet smaller
- This size difference is essential for photo accuracy
Knee Bending Technique:
- Bend pipe cleaner at knee point to 90-100 degree angle
- Stuff firmly BELOW knee for stability
- Stuff moderately ABOVE knee for some flexibility
- Creates permanent natural bend
- Allows legs to dangle realistically
- Do not bend too sharply (looks broken)
Assembly: Holding vs. Sitting:
CRITICAL UNDERSTANDING:
- Children are being HELD, not sitting independently
- Their weight is against Grandma’s body, not on their feet
- Legs dangle freely with no weight on them
- Stitching to Grandma provides ALL support needed
- This is what makes the pose work
Cardigan Fitting:
- Should be slightly loose, not tight
- Should lay open naturally in front
- Rolled edges add realistic detail
- Sleeves should cover white blouse sleeves completely
- Bottom edge should reach waist/upper hip area
- Drape should be natural and flowing
Overall Straps:
- Must cross in X pattern on back
- Should be clearly visible from front
- Add button details for realism (small beads work well)
- Ensure straps are taut, not loose
- Proper strap positioning is characteristic of overalls
Skirt Fullness:
- The increase rounds create the flared, full look
- Skirt should have significant volume and flow
- Should NOT be tight or straight
- Full circular skirt effect when standing
- Creates grandmotherly appearance
- White scalloped hem adds delicate detail
Striped Dress:
- Use double crochet (not single crochet) for skirt drape
- Color changes should be clean – cut and rejoin yarn
- Each color stripe is 2 rounds for clear definition
- Stripes must be even width
- Creates cheerful, youthful appearance
- Pattern: Pink, Mint, Yellow, Pink, Mint
Assembly Stitching Technique:
- Use matching yarn color for invisible stitching
- Take multiple small stitches rather than few large ones
- Enter and exit through hidden areas (seams, under clothing)
- Test with pins first before permanent stitching
- Step back and view from multiple angles while pinning
- This ensures proper positioning before committing
Stuffing Firmness Guide:
| Part | Firmness | Reason |
|---|---|---|
| Grandma’s head | VERY FIRM | Supports glasses and heavy hair |
| Grandma’s body | VERY FIRM | Supports entire assembly |
| Grandma’s legs | FIRM | Must stand independently |
| Grandma’s arms | MODERATE | Need to bend naturally around children |
| Grandma’s hands | FIRM | Maintain shape |
| Children’s heads | VERY FIRM | Proper head shape |
| Children’s bodies | FIRM | Structure and shape |
| Children’s arms | LIGHT TO MODERATE | Flexibility for posing |
| Children’s legs | LIGHT TO MODERATE | Must bend at knees naturally |
| Couch | FIRM | Structural stability |
Color Matching:
- All three dolls use same skin tone (peachy cream – must match)
- Test skin tone yarn against itself before starting
- All whites should match across all pieces
- Pink shades should coordinate:
- Grandma’s cardigan and shoes
- Girl’s dress bodice and shoes
- Girl’s hair bows
- Keep denim blue consistent
- Browns should be similar (boy’s hair and shoes)
Final Stability:
- Grandma’s wide stance (from leg joining with chain) provides stability base
- Long legs give good center of gravity
- Firm stuffing in Grandma’s lower body is crucial
- Weight distribution: Most weight in Grandma’s lower body and legs
- Children add minimal weight since they’re smaller
- Proper pipe cleaner placement enhances stability
🎁 PERFECT OCCASIONS FOR GIFTING
💝 Grandmother’s Day (Second Sunday in September in many countries)
💝 Mother’s Day for grandmothers
💝 Grandparent’s Day (September)
💝 Birthday gift for grandmother
💝 New grandchild announcement or celebration
💝 Adoption celebration in family
💝 Retirement gift for grandmother
💝 Christmas family display piece
💝 Baby shower gift for grandmother-to-be
💝 Anniversary gift for grandparents
💝 Memorial/memory pieces honoring grandmother
💝 Custom family portraits in yarn form
💝 Multi-generational family celebrations
💝 “Grandma’s house” décor permanent display
💝 Children’s room (connection to grandmother)
💝 Family photo prop for special occasions
🎨 CUSTOMIZATION IDEAS
Personalization:
- Match real grandmother’s hair color: white, silver, salt-and-pepper, blonde, brown
- Match actual grandchildren’s hair colors and styles
- Replicate favorite outfit colors from photos
- Add grandmother’s signature accessory: brooch on cardigan, necklace, watch
- Embroider names on clothing (back of shirt, dress hem)
- Change eye colors using different colored safety eyes
Family Variations:
- Create grandfather version: shorter hair, mustache, different clothing (vest, trousers)
- Add more grandchildren: 3, 4, or entire family
- Different age children: baby in arms, toddler, teen standing beside
- Add family pets: crochet dog or cat at Grandma’s feet
- Include other family members: parents, siblings
- Create matching great-grandparent set
Cultural Adaptations:
- Traditional cultural clothing: sari, kimono, hanbok, etc.
- Different skin tones: adjust yarn colors to represent your family
- Cultural hairstyles: head coverings, traditional styles
- Traditional patterns on clothing (Nordic, African prints, etc.)
- Cultural accessories: jewelry, head pieces
- Represent your heritage authentically
Seasonal Versions:
Winter:
- Add scarves, mittens, winter coats
- Snow scene with white base
- Warmer color palette
- Knitted textures
Spring:
- Floral prints on clothing
- Easter theme with eggs
- Pastel colors
- Flower accessories
Summer:
- Lighter colors
- Sun hats
- Beach theme
- Bright, cheerful colors
Fall:
- Autumn colors (orange, burgundy, brown)
- Pumpkins as props
- Cozy sweaters
- Thanksgiving theme
Christmas:
- Holiday outfits (red and green)
- Santa theme
- Christmas tree prop
- Holiday accessories
Special Occasions:
Wedding theme:
- Grandma in fancy dress or suit
- Flower girl and ring bearer outfits for children
- Formal attire
Birthday celebration:
- Add miniature balloons
- Birthday cake prop
- Party hats
- Festive colors
Holiday specific:
- Halloween costumes
- Fourth of July theme
- Valentine’s Day colors
- Any holiday adaptation
Story time theme:
- Add crochet books
- Reading glasses on chain
- Bookshelf prop
- Library setting
Baking theme:
- Add apron to Grandma
- Cookie tray prop
- Chef hat
- Kitchen setting
Size Variations:
Miniature version:
- Use smaller hook (1.5-2mm)
- Thread weight yarn
- Creates 4-6 inch dolls
- More delicate and detailed
Larger version:
- Use bulky yarn
- 4-5mm hook
- Creates 16-20 inch Grandma
- Quicker to make, more huggable
Single dolls:
- Make just Grandma as standalone
- Make just one grandchild
- Create individual character studies
Accessory Additions:
For Grandma:
- Reading glasses on chain around neck
- Handbag or purse
- Knitting project in lap (needles and yarn)
- Apron over clothes
- Brooch on cardigan
- Pearl necklace
- Wristwatch
- Walking stick (decorative)
For Scene:
- Storybook (open or closed)
- Tea set (teapot, cups)
- Cookies on plate
- Blanket or afghan draped over couch
- Family photo frame (miniature)
- Potted plant
- Side table
- Lamp
- Rug under couch
For Children:
- Toys (teddy bear, doll, ball)
- Books
- Stuffed animals
- Toys in hands
- Backpacks
📊 PATTERN STATISTICS
Time Investment:
- Grandma: 12-15 hours
- Head and face: 2-3 hours
- Hair with ridges: 2-3 hours
- Body and legs: 3-4 hours
- Arms: 1-2 hours
- Clothing (blouse, cardigan, skirt): 3-4 hours
- Glasses and finishing: 1 hour
- Boy Grandchild: 8-10 hours
- Head and face: 1.5-2 hours
- Hair: 1.5-2 hours
- Body and legs: 2-3 hours
- Arms: 1 hour
- Clothing (shirt, overalls): 2-3 hours
- Girl Grandchild: 8-10 hours
- Head and face: 1.5-2 hours
- Hair with pigtails: 2-2.5 hours
- Body and legs: 2-3 hours
- Arms: 1 hour
- Clothing (dress): 2-2.5 hours
- Couch: 4-5 hours
- Base and backrest: 2-3 hours
- Arms: 1 hour
- Cushions: 1 hour
- Assembly and finishing: 3-4 hours
- Facial features: 1 hour
- Final assembly: 2-3 hours
Total Project Time: 35-44 hours for complete scene
Skill Progression:
This pattern helps develop:
- Complex assembly techniques
- Layered clothing construction
- Wire work and structural elements
- Sculptural shaping
- Facial embroidery
- Multi-piece project management
- Detail work and finishing
- Proportional understanding
📝 TROUBLESHOOTING GUIDE
Problem: Grandma won’t stand on her own
Solutions:
- Stuff legs and body more firmly
- Ensure pipe cleaners are properly positioned in legs
- Check that legs are joined with adequate chain space (6 chains for width)
- Weight can be added to base (place small washer inside before closing)
- Ensure feet are flat (shoe soles sewn properly)
Problem: Children keep falling off or feel insecure
Solutions:
- Add more stitches at attachment points
- Use thicker yarn for stitching (double strand)
- Stitch in more locations (shoulder, back, side)
- Ensure children are positioned against Grandma’s body, not away from it
- Check that children’s weight is supported by Grandma’s torso
Problem: Glasses won’t stay in place
Solutions:
- Add more stitching points (4-6 minimum)
- Ensure bridge is stitched to nose securely
- Stitch temples deeper into hair cap
- Wrap wire frame tighter with thread
- Use cream/ivory thread that blends better
Problem: Hair ridges don’t show clearly
Solutions:
- Use slightly thicker yarn for ridges
- Pull tighter when creating surface stitches
- Ensure proper spacing (not too close together)
- Work into both loops of stitches (not just one)
- Consider adding more ridges for pronounced effect
Problem: Cardigan doesn’t drape properly
Solutions:
- Block the cardigan pieces before assembly
- Ensure not stuffed too firmly (should have some flow)
- Add rolled edge borders for weight
- Pin in desired position and steam gently
- May need to adjust armhole size
Problem: Children’s proportions look wrong
Solutions:
- Double-check stitch counts in pattern
- Ensure using correct hook size (2.5-3mm)
- Check gauge (10sc x 10 rows = 5cm)
- Children should be noticeably smaller than Grandma
- May need to adjust round counts for better proportion
Problem: Skirt doesn’t have enough fullness
Solutions:
- Ensure increase rounds are worked correctly
- May need to add one more increase round
- Block skirt to encourage spreading
- Don’t stuff body too wide (affects skirt drape)
- Work skirt rounds slightly looser
Problem: Striped dress stripes aren’t even
Solutions:
- Count rounds carefully for each color
- Ensure each color gets exactly 2 rounds
- Cut yarn and rejoin for clean color changes (don’t carry)
- Keep tension consistent across all colors
- Mark round beginnings with stitch marker
Problem: Arms won’t hold embrace position
Solutions:
- Ensure pipe cleaners are inserted in arms
- Bend pipe cleaners to desired curve before final stuffing
- Add more stitches connecting arms to children
- Don’t overstuff upper arms (should be flexible)
- May need to add wire support in addition to pipe cleaners
Problem: Legs don’t dangle naturally
Solutions:
- Ensure knees are bent at proper angle (90-100 degrees)
- Don’t stuff above knee too firmly
- Pipe cleaners must be bent at correct location
- Check that legs aren’t stitched in sitting position
- Legs should hang freely, not be supported
Problem: Safety eyes keep coming loose
Solutions:
- Ensure washers are pushed on very firmly
- May need to add small drop of craft glue to washer before closing
- Insert eyes at correct time (before closing head rounds)
- Don’t overstuff head initially (makes insertion harder)
- Check washer size matches eye size
🌟 FINAL THOUGHTS
This Grandma with Grandchildren amigurumi scene is truly a labor of love and a testament to the special bond between generations. Every detail – from Grandma’s textured grey hair and delicate cream glasses to the children’s sweet hairstyles and carefully coordinated outfits – comes together to create a piece that captures the warmth, security, and pure love of family.
What Makes This Pattern Special:
The Embrace: The key to this pattern’s emotional impact is the way Grandma holds her grandchildren. This isn’t just three dolls placed together – it’s a carefully constructed moment of connection. Her arms wrapped protectively around them, their small bodies nestled against hers, legs dangling in complete trust. This is what transforms yarn and stuffing into a story.
The Details Matter: Each element serves the larger narrative:
- The horizontal ridges in Grandma’s grey hair show the passage of time
- Her cream-colored glasses suggest wisdom and gentleness
- The layered clothing (blouse under cardigan) shows care in presentation
- The children’s smaller proportions emphasize vulnerability and youth
- The bent knees and dangling legs convey complete relaxation and trust
- The facial expressions – all gentle smiles – radiate contentment
Technical Achievement: This pattern pushes your skills:
- Wire work for structural integrity
- Complex layered assembly
- Sculptural shaping and proportions
- Detailed embroidery and finishing
- Multi-piece project management
- Creating emotion through pose and positioning
The Experience of Creating This Piece:
This is not a quick project. You’ll spend 35-44 hours bringing this scene to life. But those hours are meditative, meaningful work. With each stitch, you’re not just following a pattern – you’re building a memory keeper, a tribute to family love, a handmade heirloom.
You’ll challenge yourself with new techniques. You’ll problem-solve when pieces don’t immediately fit together. You’ll make creative decisions about colors, expressions, positioning. And when you finally stitch Grandma’s arms around those children and step back to see the completed embrace, you’ll feel the satisfaction that comes from creating something truly special.
Who This Is For:
- Grandmothers themselves – to honor their role and love
- Adult children – giving thanks for the grandmother in their lives
- Families – celebrating multi-generational bonds
- Anyone who wants to preserve memory in tangible form
- Makers – who understand that some projects feed the soul
The Impact:
When you give this piece to someone, you’re not just giving a crocheted toy. You’re giving:
- Recognition of a grandmother’s irreplaceable role
- Validation of family bonds
- A physical representation of love
- Hours of your time and skill
- Something that will be treasured for decades
- A potential family heirloom passed down
When you make this for yourself, you’re creating:
- A meditation on family and love
- A skill-building challenge
- A display piece that sparks conversation and joy
- A reminder of what matters most
Before You Begin:
Read through the entire pattern first. Understand the journey before you start. Note the critical points:
- The photo-accurate modifications (cream glasses, textured hair, proper proportions)
- The assembly sequence (very important)
- The key concept: children are HELD, not sitting
- The finishing touches that make it special
Gather all your materials. There’s nothing worse than running out of yarn mid-project. You need approximately 593g total.
Set realistic expectations. This is an advanced pattern. Some techniques may take practice. Be patient with yourself.
Trust the process. When you’re in the middle – hair cap done but no ridges yet, children made but not attached – it might not look like the photo. Trust that each step builds toward the final result.
The Joy of Completion:
When you finish, take a moment. Look at what your hands created. You took yarn – simple fiber – and created faces, expressions, emotion, story. You built hair texture strand by strand. You shaped tiny shoes and assembled miniature clothing. You bent wire into glasses and constructed an embrace.
You made something that didn’t exist before.
You made something that represents love.
You made something that will be treasured.
In Closing:
Whether you’re making this to honor your own grandmother, to gift to a grandmother you love, to celebrate becoming a grandmother yourself, or simply because you’re drawn to creating beautiful, meaningful work – thank you for choosing this pattern.
Take your time. Enjoy the process. Pour your love into every stitch. And when you’re done, I hope you’re as proud of your work as I am to share this pattern with you.
Happy crocheting, and may your stitches be filled with as much love as the grandmother and grandchildren in this scene share with each other.
With warmth and encouragement,
Your Fellow Maker 👵💕🧶✨
📧 PATTERN SUPPORT
If you have questions while working through this pattern:
- Read through the entire section you’re working on first
- Check the troubleshooting guide for common issues
- Review the photo for visual reference
- Reference the assembly instructions carefully – they’re very detailed
- Take your time – this is a complex project
Additional Resources:
- Amigurumi tutorials for basic techniques
- Wire wrapping tutorials for glasses construction
- Surface crochet tutorials for hair ridges
- Embroidery tutorials for facial features
Remember: Every maker has their own style. Your piece may vary slightly from the photo, and that’s not only okay – it’s what makes your creation unique and special.
💝 Enjoy creating your family heirloom! 💝