Welcome to the enchanting world of crochet, where every stitch weaves a tale of royalty! 👑✨ I’m thrilled to share my FREE crochet pattern for an Amigurumi Crown—a dazzling miniature masterpiece that’s perfect for dollhouse royalty, creative embellishments, or simply adding a touch of regal charm to your collection! 🧶💫
This pattern guides you step-by-step to craft a crown fit for kings and queens, featuring intricate details and a refined silhouette that sparkles with creativity. Whether you’re celebrating a special occasion or looking to infuse your projects with a dash of majesty, you’ll adore transforming simple yarn into a crown that exudes magic and elegance! 🎉🌟
So grab your favorite hooks, choose your most glittering yarns, and let’s stitch up some crown magic together! 🎨😍
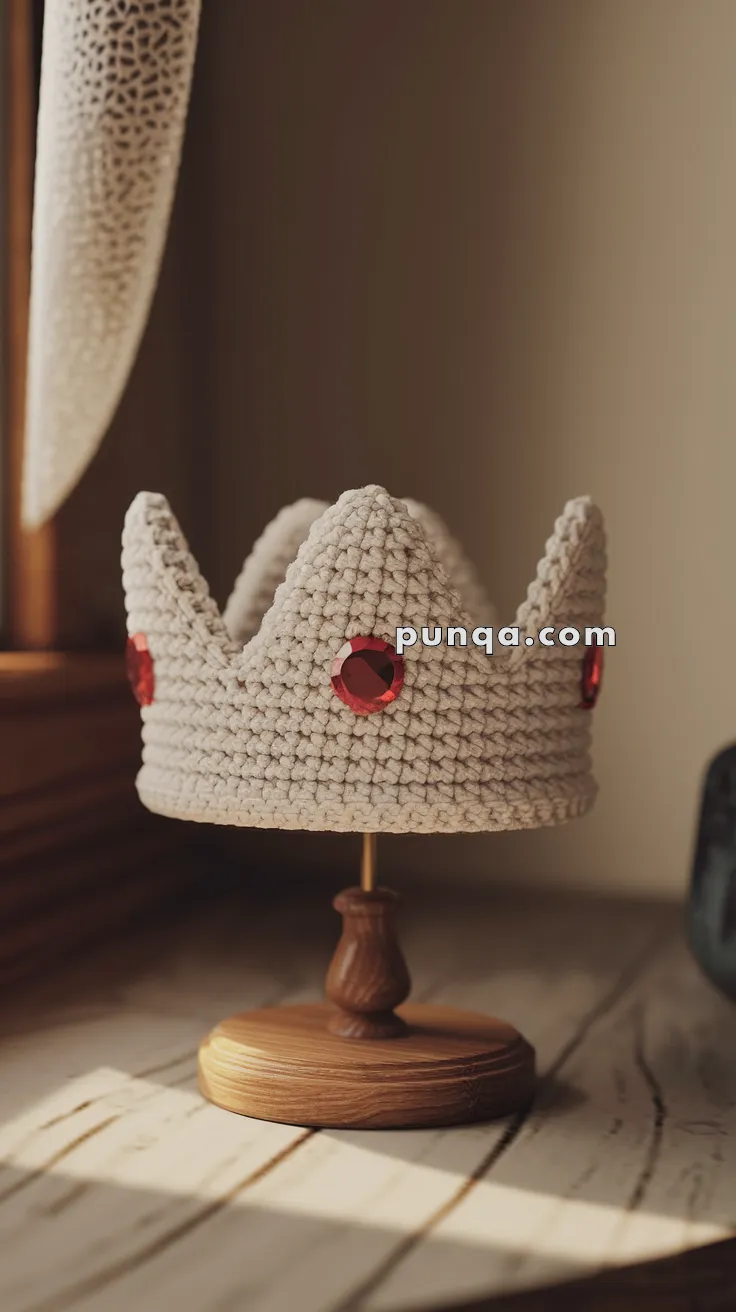
👑 Amigurumi Crown Crochet Pattern
Add a royal touch to your amigurumi dolls or make a soft crown for playtime with this beautifully structured crochet crown! Featuring bold points and jewel accents, it’s perfect for cosplay, decoration, or pretend play.
✨ Skill Level
Beginner to Intermediate – Simple stitches with shaping.
📏 Finished Size
Approx. 5–6 inches (12–15 cm) diameter and 3–4 inches (8–10 cm) tall using DK or worsted yarn with a 2.5–3.5 mm hook.
🧶 Materials
-
Worsted or DK weight yarn in light beige or gold
-
3.0 mm crochet hook
-
5–6 red faux gems or sew-on rhinestones
-
Fabric glue or needle and thread (for attaching gems)
-
Tapestry needle
-
Stitch marker
-
Optional: light interfacing or stiffener for structure
🧵 Abbreviations (US Terms)
MR – Magic Ring
sc – Single Crochet
inc – Increase (2 sc in 1 stitch)
dec – Decrease (sc2tog)
sl st – Slip Stitch
ch – Chain
st(s) – Stitch(es)
FO – Fasten Off
🧷 Base of the Crown
Using main color:
-
Ch 72 (or multiple of 6 for larger/smaller sizes), sl st to join in a ring (be careful not to twist)
-
Round 1: ch 1, sc in each st around (72)
-
Rounds 2–5: sc in each st around (72)
(You can adjust height by adding/removing rounds)
Do not FO. Continue directly to point section.
🔺 Crown Points (6 total)
Each point is worked over 12 stitches:
-
(sc in next 12 sts, ch 1, turn)
-
Row 1: sc 12
-
Row 2: dec, sc 8, dec (10)
-
Row 3: dec, sc 6, dec (8)
-
Row 4: dec, sc 4, dec (6)
-
Row 5: dec, sc 2, dec (4)
-
Row 6: dec, dec (2)
-
Row 7: dec (1)
FO.
Skip 1 st between points and attach yarn to begin the next point. Repeat for all 6 points.
💎 Gem Attachment
-
Evenly space 5–6 faux red gems or rhinestones between points.
-
Attach with strong fabric glue or securely sew with thread.
🧷 Optional: Stabilizing the Crown
If you’d like a stiffer crown for display:
-
Lightly block the crown with steam.
-
Apply spray starch or diluted white glue.
-
Alternatively, stitch a round of plastic canvas inside the base band.
✨ Customization Ideas
-
Use glitter yarn for sparkle.
-
Make each point a different color for a fun, playful crown.
-
Add picot edge (ch 3, sl st into first ch) along each crown point.
This crown is a charming accessory fit for royalty—whether it’s for a doll, a costume, or your little one’s imagination! 👑💫