Oh, the joy of diving into the world of amigurumi! These adorable crochet creations have taken the crafting world by storm, and it’s easy to see why. There’s something uniquely satisfying about transforming a simple skein of yarn into a delightful little creature. One of my favorites to make is the amigurumi antelope, especially the baby version. 🦌 With their dainty legs and charming horns, these antelope babies capture the essence of nature’s grace in a cuddly form. The process of creating them not only hones your crochet skills but also allows for a delightful journey through creativity and imagination.
Let’s talk about the process, shall we? Starting with the softest yarn in earthy tones, I begin by following a pattern that guides me through each step, like a gentle roadmap to cuteness. From crafting the delicate little ears to shaping the tiny hooves, every stitch is a blend of anticipation and excitement. The best part? Adding those playful little eyes and stitching on a whimsical smile. 😊 Even if you’re a beginner, the process is incredibly forgiving, allowing room for personal touches and variations. By the time I finish, I have not just an antelope, but a heartwarming creation that’s ready to charm anyone who meets it.
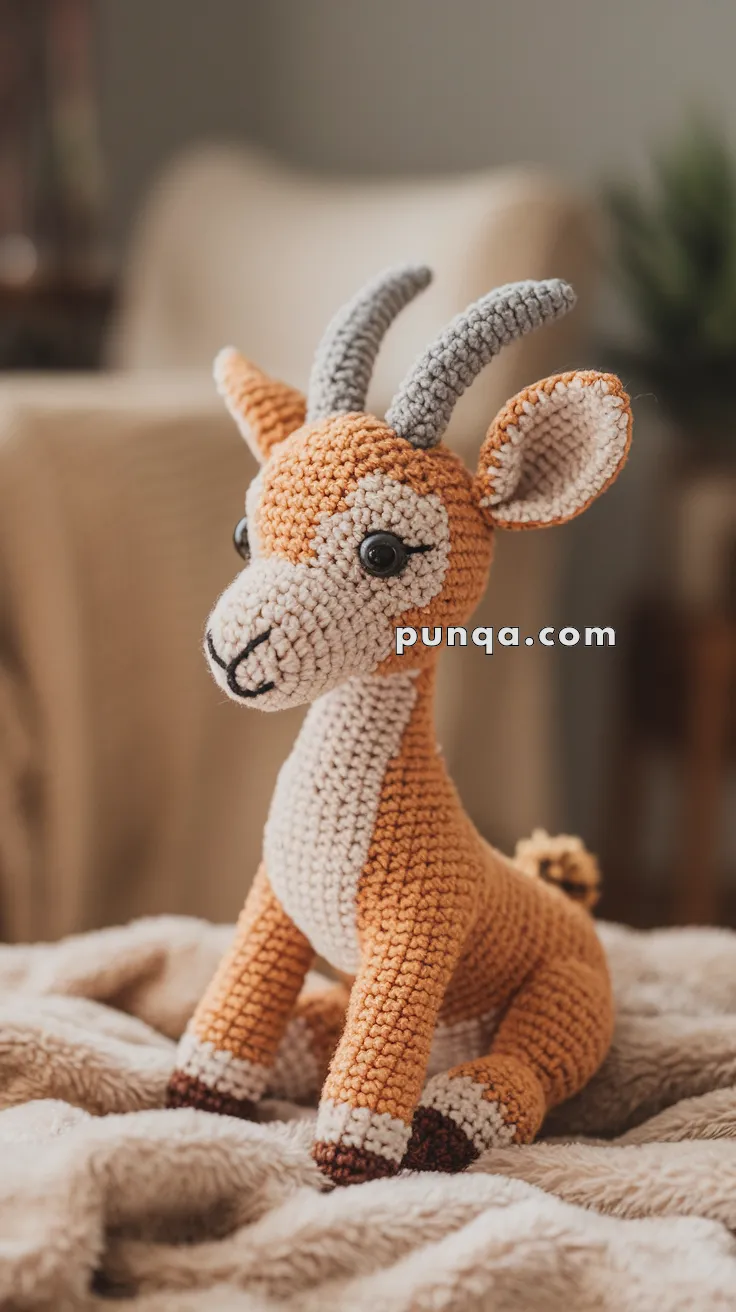
🦌 Amigurumi Antelope Baby Crochet Pattern
This adorable baby antelope brings safari sweetness to your handmade collection! With gentle curves, sweet eyes, and detailed little horns, this soft and cuddly creature is perfect for nursery décor, wildlife lovers, or as a thoughtful handmade gift. The antelope’s elegant look is balanced with beginner-friendly shaping.
✨ Skill Level
Easy to Intermediate – Uses basic shaping, minimal color changes, and simple stitching.
📏 Finished Size
Approx. 9–10 inches (23–25 cm) tall when made with DK or worsted yarn and a 2.5–3.5 mm hook.
🧶 Materials
Yarn (DK or Worsted Weight):
-
Light brown/tan (main body)
-
Cream or off-white (belly, face, legs)
-
Dark brown (hooves, nose)
-
Gray (horns)
-
Pink or blush (inner ears, optional)
Other Supplies:
-
10–12 mm safety eyes
-
Crochet hook (2.5–3.5 mm)
-
Tapestry needle
-
Stitch markers
-
Polyfill stuffing
-
Black embroidery thread (for mouth and lashes)
🧵 Abbreviations (US Terms)
MR – Magic Ring
sc – Single Crochet
inc – Increase (2 sc in same stitch)
dec – Decrease (sc 2 together)
sl st – Slip Stitch
ch – Chain
FO – Fasten Off
BLO – Back Loop Only
🧠 Head (Tan + Cream)
-
MR with cream, 6 sc
-
inc x6 (12)
-
(1 sc, inc) x6 (18)
-
(2 sc, inc) x6 (24)
-
(3 sc, inc) x6 (30)
6–8. sc around (30) -
Switch to tan: sc around (30)
10–15. sc (30) -
(3 sc, dec) x6 (24)
-
(2 sc, dec) x6 (18)
– Place safety eyes between R10–11, approx. 6 sts apart
– Embroider mouth, nose, and lashes if desired -
(1 sc, dec) x6 (12)
-
dec x6 (6), FO and close
🐐 Body (Tan + Cream)
-
MR with cream, 6 sc
-
inc x6 (12)
-
(1 sc, inc) x6 (18)
-
(2 sc, inc) x6 (24)
-
(3 sc, inc) x6 (30)
6–9. sc with cream (30) -
Switch to tan: sc (30)
11–18. sc around (30) -
(3 sc, dec) x6 (24)
-
(2 sc, dec) x6 (18)
– Stuff firmly -
(1 sc, dec) x6 (12)
-
dec x6 (6), FO and close
🦵 Legs (Make 4, Brown → Cream → Tan)
-
MR with brown, 6 sc
-
inc x6 (12)
3–4. sc (12) -
Switch to cream: sc (12)
-
Switch to tan: sc (12)
7–12. sc (12), stuff lightly
– FO and leave long tail for sewing
🦌 Ears (Make 2 Tan + 2 Inner Pink)
Outer (Tan):
-
Ch 6
-
sc in 2nd ch, sc x3, 3 sc in last st
-
Rotate and sc x3, inc (12)
-
sc around (12), FO and shape into triangle
Inner (Pink or cream):
Repeat same pattern, but stop at Round 3
– Sew pink to tan, fold and stitch onto sides of head
🐏 Horns (Make 2, Gray)
-
MR, 6 sc
2–10. sc around (6), lightly stuff
– FO and sew to top of head in a slightly curved pose
🐾 Tail (Tan with cream tip)
-
MR, 5 sc
-
sc (5)
-
Switch to cream, sc (5), FO and sew to back
✂️ Assembly
-
Sew head to body
-
Attach legs evenly, 2 in front and 2 in back
-
Stitch ears and horns to top of head
-
Sew tail in back center
-
Add embroidered details and shape carefully
💡 Optional Add-ons
-
Add a tiny felt flower crown or bow for charm
-
Embroider light spots on the back for a fawn-like appearance
-
Use brushed yarn for a fuzzy baby antelope look
🧶 Finishing Touch
Your baby antelope is complete — calm, sweet, and utterly huggable! Whether it’s destined for a nursery, a wildlife display, or someone special’s arms, this soft friend is sure to melt hearts. 🦌💕