Welcome to the inventive world of amigurumi! 🔬✨ Today, I’m excited to share my free crochet pattern for a Scientist Doll—a brilliant and imaginative creation perfect for celebrating curiosity, discovery, and the pursuit of knowledge! 🧪 Whether you love crafting unique character dolls, enjoy making educational-themed designs, or simply want to stitch up a tribute to scientific brilliance, this pattern will guide you through creating a charming scientist with all the details that bring innovation to life! ⚗️
This design embraces expressive details, from lab coats to glasses, to capture the essence of a passionate researcher or curious inventor! 🧶🔍 I’ve carefully outlined each step to ensure your Scientist Doll turns out just right—ideal for display, gifting to science enthusiasts, or adding a touch of intellectual charm to your handmade collection! 🌎 So grab your hooks, choose classic white and vibrant accent colors, and let’s stitch up a tribute to the minds that shape the future! ✨
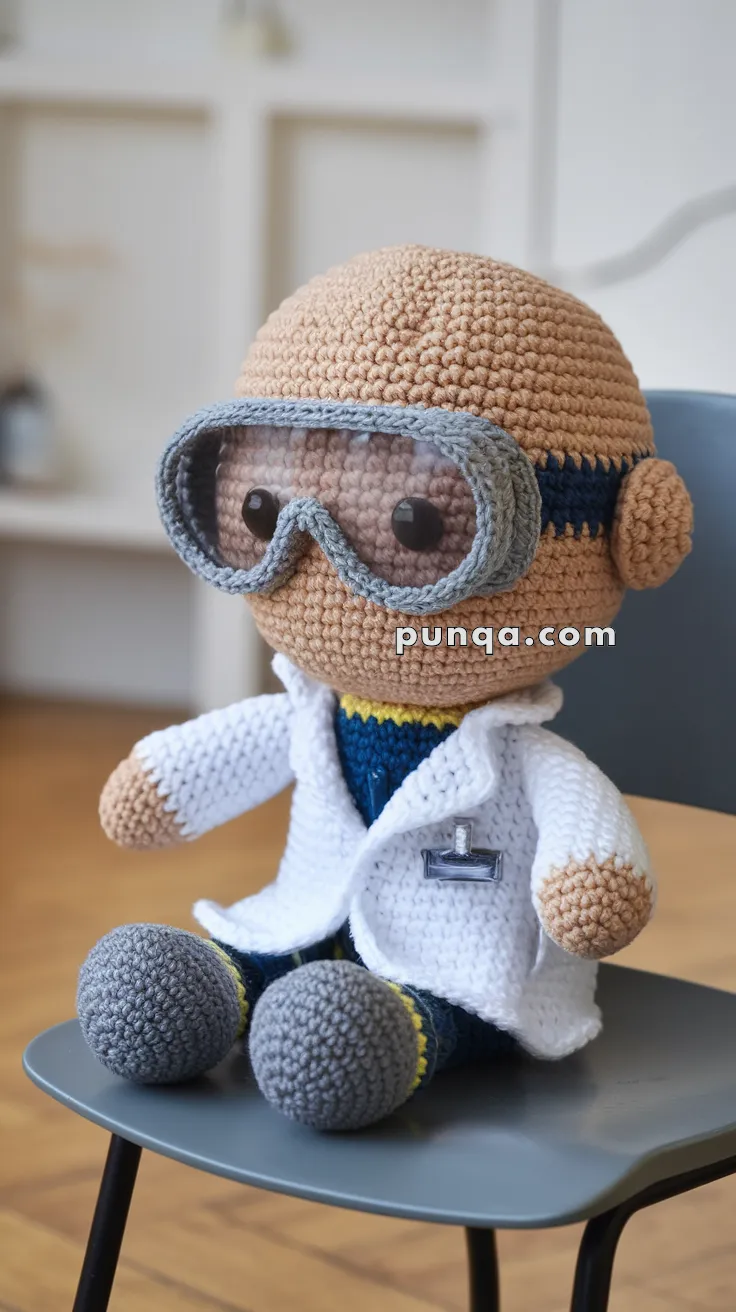
🧪 Amigurumi Scientist Doll Crochet Pattern
Celebrate curiosity and innovation with this adorable amigurumi scientist doll! Complete with a white lab coat, goggles, and a name badge, this clever character makes the perfect handmade gift for science lovers, teachers, or STEM kids.
✨ Skill Level
Intermediate – Includes shaping, clothing, and multiple attachments.
📏 Finished Size
Approx. 25 cm (10 inches) tall using DK yarn and a 2.75 mm hook.
🧵 Materials
-
Yarn (DK weight)
-
Skin tone (head, hands, ears)
-
Navy blue (pants, shirt)
-
Gray (goggles, shoes)
-
Yellow (shirt accent)
-
White (lab coat)
-
-
2.75 mm crochet hook
-
12 mm safety eyes
-
Fiberfill stuffing
-
Tapestry needle
-
Black embroidery thread (badge, goggle straps)
-
Clear plastic (optional for goggle lenses)
🧶 Abbreviations (US Terms)
MR – Magic Ring
sc – Single Crochet
inc – Increase
dec – Decrease
ch – Chain
sl st – Slip Stitch
BLO – Back Loop Only
FO – Fasten Off
🧠 Head
With skin tone yarn:
-
MR, 6 sc
-
inc x6 (12)
-
(1 sc, inc) x6 (18)
-
(2 sc, inc) x6 (24)
-
(3 sc, inc) x6 (30)
-
(4 sc, inc) x6 (36)
7–14. sc around (36) -
(4 sc, dec) x6 (30)
-
(3 sc, dec) x6 (24)
-
(2 sc, dec) x6 (18)
– Insert safety eyes between Rounds 9–10, about 6 stitches apart
– Stuff firmly -
(1 sc, dec) x6 (12)
-
dec x6 (6), FO and close
👂 Ears (Make 2)
-
MR, 5 sc
-
sc around, sl st to finish
– Flatten and sew to sides of the head
🧤 Arms (Make 2)
Start with skin tone:
-
MR, 6 sc
2–3. sc around -
Switch to white (lab coat sleeve), sc around
5–11. sc around
– Lightly stuff
– Flatten and FO, leaving tail for sewing
👕 Body
Start with navy blue:
-
MR, 6 sc
-
inc x6 (12)
-
(1 sc, inc) x6 (18)
-
(2 sc, inc) x6 (24)
5–6. sc around -
Switch to yellow, sc around
-
Switch to navy again, sc around
-
sc around
-
Switch to white (coat), BLO sc around
11–14. sc around (24)
– Stuff firmly -
(2 sc, dec) x6 (18)
-
(1 sc, dec) x6 (12), FO, leave long tail for sewing head
👖 Legs (Make 2)
With gray (shoes):
-
MR, 6 sc
-
inc x6 (12)
-
sc around
-
(1 sc, dec) x4 (8)
-
Switch to navy (pants), sc around
6–10. sc around
– Stuff and FO, sew both legs to body base
🥼 Lab Coat (Worked separately)
With white yarn:
-
Ch 25, turn
-
sc across (24)
3–6. sc across -
Ch 1, turn, sc 6 (left front)
8–12. sc across, FO -
Attach yarn to opposite side, repeat for right front
-
Back: Rejoin yarn in center, sc across 12 for 6 rows
-
Sleeves: Join at each armhole edge, ch 10, sc 10 rows in round
– FO, weave in ends and sew to body
– Optional: add small rectangle with gray or black for name badge
🥽 Goggles
With gray yarn:
-
Ch 20, sl st to join
-
sc around for 2 rounds
– Make two of these
– Ch 6 to connect frames at bridge
– Optionally cut and sew plastic piece inside frame for lenses
– Sew goggles onto head, embroider black straps around back
✂️ Finishing Touches
-
Attach arms at shoulder height
-
Sew head to body
-
Use black thread to embroider tiny smile
-
Add goggle straps and badge outline
-
Adjust stuffing to keep upright posture
💡 Customization Ideas
-
Make a female version with longer hair or lab skirt
-
Use fun-colored lab coats for school spirit
-
Add a clipboard or test tube as an accessory
Celebrate your love for science with this thoughtful and inspiring amigurumi scientist! It’s a brilliant handmade project perfect for classrooms, labs, or gift-giving. 🧬🧤