Say it once, say it twice, say it three times—it’s Amigurumi Beetlejuice time! This mischievous little doll brings the iconic ghost with the most to life in yarn form, complete with wild hair, striped suit, and that unmistakable grin. Whether you’re crafting for a Tim Burton fan, adding a spooky twist to your amigurumi collection, or just love turning quirky characters into cuddly companions, this pattern is a playful way to stitch up some afterlife charm. 🧶🖤👻
Designed for bold detail and eerie fun, this pattern invites you to play with high-contrast colors, expressive features, and extras like mossy textures or a tiny sandworm sidekick. Add a mini tombstone, a stitched-on smirk, or even a little handbook for the recently deceased to complete the look. Whether perched on a shelf or gifted to a fellow fan, this Beetlejuice Amigurumi is a delightfully creepy and satisfying project—perfect for bringing a touch of handmade haunt to every stitch! 💀✨🎬
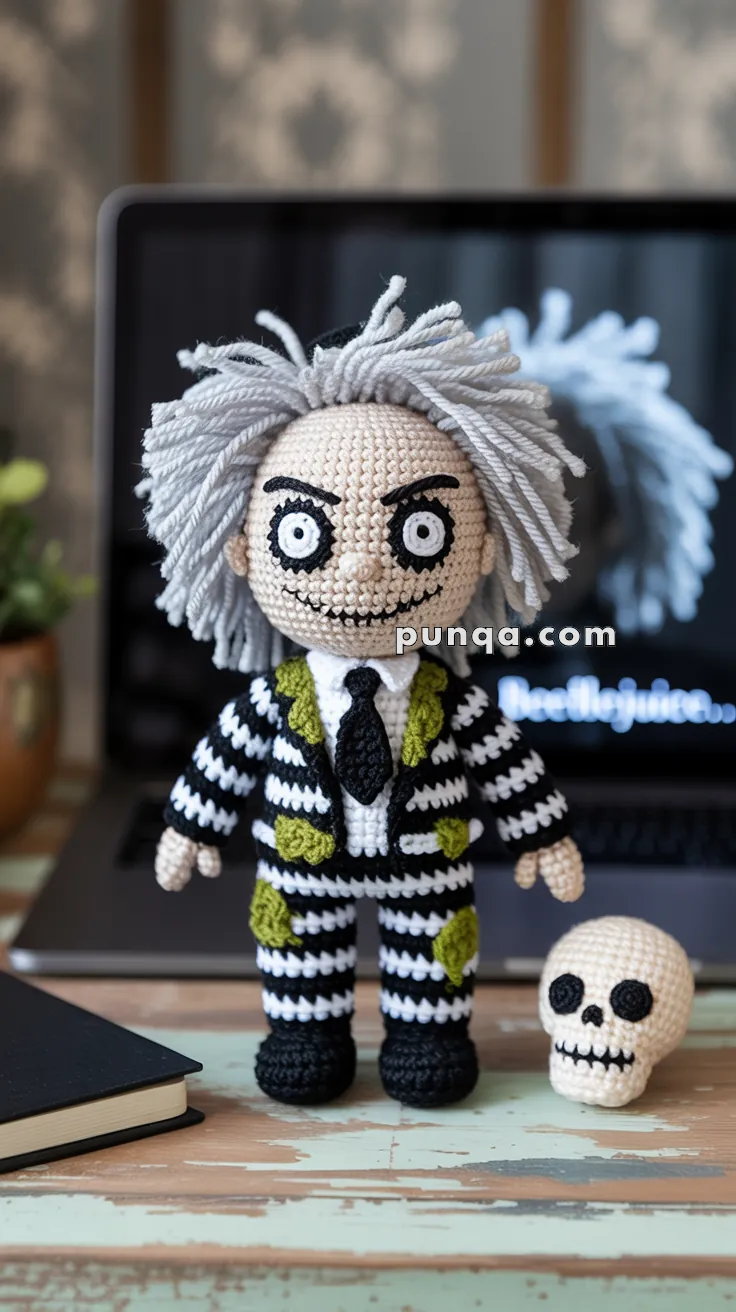
🪦 Amigurumi Beetlejuice Crochet Pattern
It’s showtime! Bring everyone’s favorite chaotic spirit to life with this spooky-fun Beetlejuice crochet pattern. This version captures every eerie detail — embroidered eyes, wild gray hair, black-and-white striped suit, mossy green patches, and that mischievous grin. A perfect project for Halloween or any fan of strange and unusual things.
✂️ Skill Level
Intermediate – involves color changes, dense hair attachment, surface embroidery, and layered suit details.
📏 Finished Size
Approximately 20–22 cm (8–9 inches) tall when made with DK yarn and a 2.5 mm crochet hook.
🧺 Materials
DK or light-worsted weight yarn in the following colors:
- Beige or light peach – head, ears, hands
- Black – stripes, shoes, tie, eyebrows, mouth, pupils
- White – shirt, stripes, eye base, collar
- Green – moss patches
- Gray – hair
Other supplies:
- 2.5 mm crochet hook
- Black embroidery thread
- Polyester fiberfill stuffing
- Yarn needle
- Scissors
- Stitch markers
- Optional: pet slicker brush (for fluffing hair)
🧵 Abbreviations (US Terms)
MR – Magic Ring
sc – single crochet
inc – increase (2 sc in same stitch)
dec – decrease (sc 2 together)
ch – chain
sl st – slip stitch
BLO – back loop only
FLO – front loop only
FO – fasten off
🧠 Head (Beige)
R1 – MR, 6 sc (6)
R2 – inc × 6 (12)
R3 – (sc, inc) × 6 (18)
R4 – (2 sc, inc) × 6 (24)
R5 – (3 sc, inc) × 6 (30)
R6–R12 – sc around (30)
R13 – (3 sc, dec) × 6 (24)
R14 – (2 sc, dec) × 6 (18)
Stuff firmly.
R15 – (sc, dec) × 6 (12)
R16 – dec × 6 (6), FO and weave in end.
👁 Eyes (Embroidered)
With white yarn, embroider two large white circles directly on the face between R8–R10, spaced about 6 stitches apart.
Use black yarn or embroidery thread to add small pupils at the centers.
Outline each white circle with thick black thread for a bold cartoon-style eye ring.
👃 Nose
Create a small subtle nose:
MR, 4 sc, FO and flatten slightly, sew between the eyes (R10–R11).
Alternatively, you may simply embroider a short horizontal stitch using beige yarn.
👂 Ears (Make 2)
MR, 6 sc → 1 round sc → FO.
Sew to sides of the head between R7–R9.
😈 Brows and Mouth
Eyebrows: Using black yarn, embroider thick, heavy arched brows using satin stitch, about 3–4 rows wide. Angle them upward toward the center for a mischievous, expressive look.
Mouth: Embroider a crooked grin with black thread below the nose. Add short vertical stitches across the line to mimic his jagged teeth.
💇 Hair (Gray)
Cut approximately 80–100 strands of gray yarn, each 10–12 cm long.
Attach densely with lark’s head knots starting from the crown and spiraling outward for full coverage.
Fluff the strands using your fingers or a pet slicker brush to achieve that frizzy, explosive Beetlejuice hairstyle.
Trim uneven ends lightly to shape.
👕 Body (White → Black/White Stripes)
R1 – MR, 6 sc (6)
R2 – inc × 6 (12)
R3 – (sc, inc) × 6 (18)
R4 – (2 sc, inc) × 6 (24)
R5–R7 – white sc (24) ← shirt section
R8–R14 – alternate black and white yarn every round for horizontal stripes (24)
R15 – (sc, dec) × 6 (18)
R16 – dec × 6 (12), FO and stuff firmly.
Maintain stripe sequence consistently so the pattern aligns with arms and legs.
👖 Legs (2)
Start with black for shoes.
R1 – MR, 6 sc (6)
R2 – (sc, inc) × 3 (9)
Switch to alternating black and white each round.
R3–R10 – sc around (9)
Stuff lightly. FO first leg; keep yarn attached to second leg.
Join Legs:
Ch 3, join the first leg.
R11 – sc around both legs and across chain (24)
R12–R16 – continue alternating black and white stripes to match the body.
Stuff and FO.
Ensure stripe alignment continues seamlessly from legs into the torso.
🥿 Shoes
Work the first 2–3 rounds in solid black before switching to stripes.
Optional: embroider thin horizontal lines with black yarn for sole detail.
👔 Arms (2)
Begin with beige for hands.
R1 – MR, 6 sc (6)
R2 – (sc, inc) × 3 (9)
R3–R4 – sc (9)
Switch to alternating black and white yarn every row.
R5–R10 – sc (9), FO and stuff lightly.
Sew to body sides ensuring stripes line up with torso pattern.
Embroider two or three vertical stitches on hands to define fingers.
👕 Shirt Collar
With white yarn:
Ch 14, sc across for 2 rows.
FO and sew flat around the neckline, overlapping slightly at the front for a pointed collar look.
🧥 Jacket & Moss Patches
To preserve the clean horizontal stripe flow, attach arms and legs aligned to body striping.
Moss Patches (Green 3D Detail)
Make 6–7 small patches for a balanced look:
Ch 4, work back along chain (sl st, sc, hdc), FO.
Shape slightly curved and sew randomly:
- One on each lapel
- Two on jacket front
- Two on pant legs
- Optional one on back or shoulder for texture
These small raised patches give a realistic “mossy decay” texture.
👔 Tie
Ch 10 in black, sl st back to starting point.
Wrap the center once with yarn to form a small knot.
Sew under the collar centered over the shirt.
🧷 Assembly
- Sew head firmly onto the body.
- Attach arms and legs, matching stripe positions.
- Sew ears and nose.
- Embroider eyes, brows, and mouth.
- Attach dense gray hair and brush it for volume.
- Sew the white collar neatly around neckline.
- Add moss patches and final tie.
☠️ Skull Accessory (Optional)
R1 – MR, 6 sc (6)
R2 – inc × 6 (12)
R3 – (sc, inc) × 6 (18)
R4 – (2 sc, inc) × 6 (24)
R5 – (3 sc, inc) × 6 (30)
R6–R9 – sc around (30)
R10 – (3 sc, dec) × 6 (24)
R11 – (2 sc, dec) × 6 (18)
R12 – (sc, dec) × 6 (12)
R13 – dec × 6 (6), FO and close.
Embroider black eye sockets, a small “V” nose, and a stitched grin with vertical lines for teeth.
🎬 Finishing Touch
Fluff Beetlejuice’s hair to maximum madness, tweak his thick brows for expression, and arrange moss patches for an uneven, decayed look. With his striped suit, ghostly grin, and wild energy, this crochet Beetlejuice is ready to raise a little mischief on your shelf — no chanting required!