Welcome to the cozy and festive world of amigurumi! 🏠✨ Today, I’m excited to share my free crochet pattern for a Gingerbread House—a delightful and decorative piece perfect for holiday displays, seasonal gifts, or anyone who loves crafting charming and whimsical designs! 🎄 Whether you enjoy stitching up festive-themed creations, making playful and detailed structures, or simply want to add a cozy gingerbread house to your handmade collection, this pattern will guide you through crafting a beautifully textured plush home with icing details, candy accents, and a touch of holiday magic! 🍬
This design embraces warm tones, intricate shaping, and cheerful embellishments to bring a heartwarming touch to your crochet projects! 🧶❄️ I’ve carefully outlined each step to ensure your Amigurumi Gingerbread House turns out just right—ready to brighten up your holiday décor or become a treasured handmade keepsake! 🎁 So grab your hooks, pick out rich browns, snowy whites, and vibrant candy colors, and let’s stitch up a delightful little gingerbread house! ✨
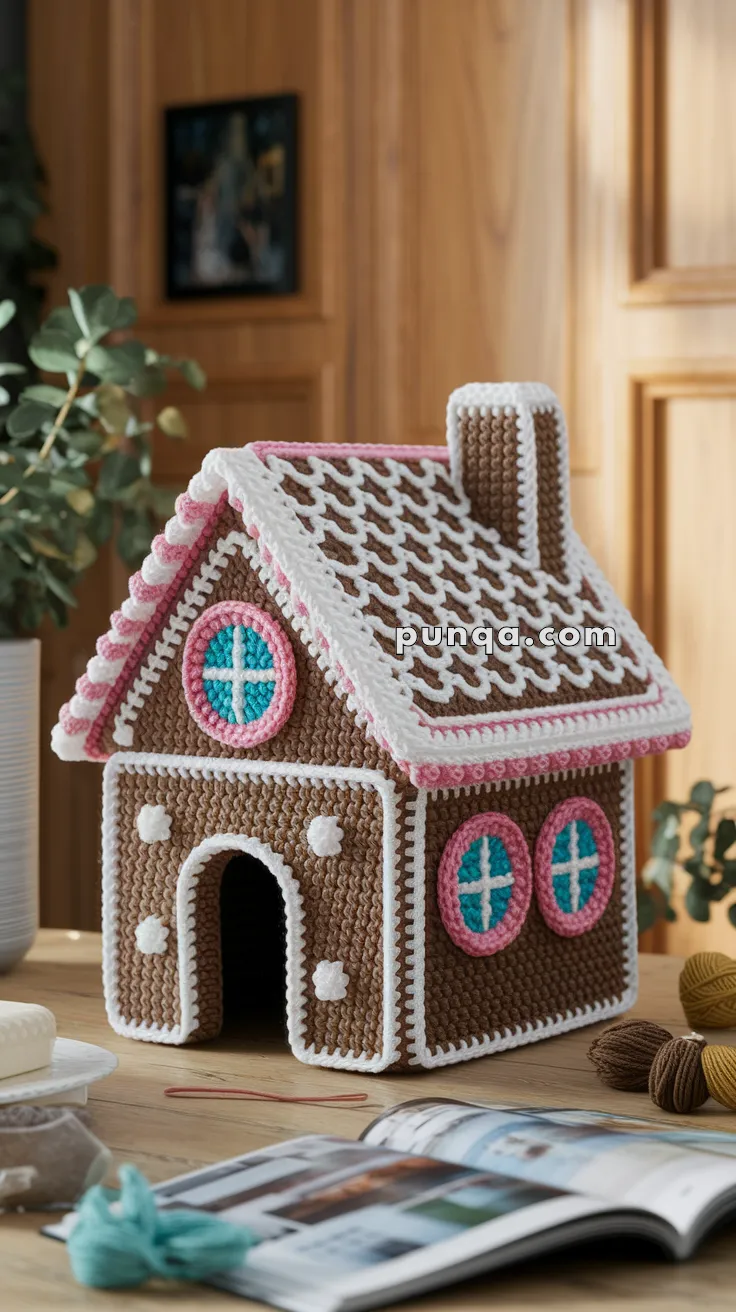
🍭 Amigurumi Gingerbread House Crochet Pattern
A sweet holiday masterpiece that never melts!
This charming crochet gingerbread house features thick “icing” trim, pink-and-white roof edges, circular candy windows, and a cozy chimney — the perfect handmade centerpiece for your festive décor.
✨ Skill Level
Intermediate – involves panel construction, surface embroidery, colorwork, and assembly with optional structural inserts.
📏 Finished Size
Approx. 8–10 in (20–25 cm) tall and wide when using worsted-weight yarn and a 3.5 mm crochet hook.
🧶 Materials
-
Yarn (Worsted weight)
-
Brown – main walls and roof (approx. 180–200 g)
-
White – icing borders, roof lattice, chimney trim (approx. 100 g)
-
Pink – roof border, window trim (approx. 50 g)
-
Aqua Blue – window glass (approx. 25 g)
-
-
Hook: 3.5 mm
-
Plastic canvas or sturdy cardboard for reinforcement (essential)
-
Tapestry needle
-
Scissors
-
Stitch marker
-
Hot glue (optional) for securing panels
-
Polyfill (optional for padded roof or chimney)
🧵 Abbreviations (US Terms)
MR – Magic Ring
sc – single crochet
inc – increase (2 sc in one stitch)
dec – decrease (sc 2 together)
ch – chain
sl st – slip stitch
FO – fasten off
🧱 MAIN HOUSE STRUCTURE
You will make 4 wall panels, 2 roof panels, and 1 base panel.
🏠 Front and Back Walls (x2 – Brown)
Ch 21
Row 1: sc in 2nd ch from hook and across (20), ch 1, turn
Rows 2–26: sc in each st (20)
FO, leaving a long tail.
Optional doorway (front panel only):
Mark a U-shape near the bottom center (approx. 8 sts wide × 8 rows tall).
With white yarn, surface crochet along the marked U to form a thick icing arch.
For a deeper 3D effect, go around twice with (sc, ch 1, sc) in each stitch.
🧱 Side Walls (x2 – Brown)
Ch 16
Row 1: sc in 2nd ch and across (15), ch 1, turn
Rows 2–26: sc in each st (15)
FO, leaving a long tail.
🍬 Base (x1 – Brown)
Ch 21
Row 1: sc in 2nd ch and across (20), ch 1, turn
Rows 2–16: sc in each st (20)
FO.
Add white border:
Join white yarn and work (sc, ch 1, sc) evenly around for an icing-piped look.
🪟 WINDOWS (x4 – Round, Aqua + Pink)
With Aqua:
MR, 6 sc (6)
Round 2: inc ×6 (12)
Round 3: (1 sc, inc) ×6 (18)
Round 4: (2 sc, inc) ×6 (24)
FO.
Join Pink:
Round 5: sc around in Pink (24).
Round 6 (optional for thicker border): sc around again.
Frosting Cross:
Using white yarn, embroider a plus sign (+) through the center.
Sew or glue windows centered on each wall panel.
🍫 ROOF PANELS (x2 – Brown)
Ch 26
Row 1: sc in 2nd ch and across (25), ch 1, turn
Rows 2–22: sc in each st (25)
FO.
Roof Decoration:
-
Using white yarn, surface crochet diagonal lines to form a lattice pattern (like frosting).
-
For puffed icing effect:
Chain 8 diagonally, tack ends with small stitches instead of slip-stitching directly. -
Add Pink border around all edges.
-
Then edge with White scallops: (sc, ch 2, sc) in every 3rd stitch for raised icing trim.
🌬️ CHIMNEY (Brown)
Ch 8
Row 1: sc in 2nd ch and across (7), ch 1, turn
Rows 2–14: sc in each st (7)
FO, join short edges to form a tube.
Trim top with 2 rounds of white single crochet for frosting edge.
Attach to roof corner (use glue for stability if needed).
Optionally stuff lightly with polyfill for shape.
❄️ ICING DETAILS (White)
Add decorative frosting lines using surface crochet or raised border technique:
Along every wall edge, work:(sc, ch 1, sc) evenly to create piped icing lines.
Repeat along base and roof join seams for 3D edges.
🧱 ASSEMBLY
-
Insert structure:
Cut plastic canvas or cardboard to match each wall and roof panel.
Insert before joining.
(Optional: glue panels around insert for extra rigidity.) -
Join panels:
With white yarn, sc or whipstitch front, back, and side panels together forming a box.
Ensure icing seams face outward. -
Attach base:
Sew or crochet-join base to bottom edges using white yarn. -
Attach roof:
Join two roof panels together along long edge with white sc seam.
Then place over house and whipstitch edges securely along top edges of walls. -
Add chimney:
Sew to one roof panel, aligning base flush to slope.
🍥 EXTRA DECOR OPTIONS
-
Add small bobble stitches on walls for gumdrop effect: (dc 5 in same st, sl st in next st).
-
Sew or glue mini pom-poms or beads as candy buttons.
-
Embroider pink swirls or white zig-zags on edges.
✂️ FINISHING TOUCHES
-
Weave in all ends neatly inside.
-
Lightly block or steam each panel before assembly for crisp edges.
-
Optional: lightly stuff the roof for puffiness.
-
Add a tealight or small LED string inside for magical glow.
🎁 Final Words
Your crocheted gingerbread house is now complete — sturdy, festive, and irresistibly sweet!
With its frosted edges, pink candy trim, and sugary roof, it brings handmade holiday joy to any room. Display it proudly on your mantel or table, and enjoy a gingerbread creation that never goes stale. 🍬✨