✨ Skill Level
Intermediate — shaping, colorwork, appliqué wings, and assembly.
📏 Finished Size
Approx. 26–28 cm (10–11 inches) tall
Sitting height
🧶 Materials
Worsted / DK yarn:
-
Cream — body & belly
-
Navy — head cap, face stripes, wings, tail
-
Red — crown patch & lower body
-
White — wing feather edging
-
Grey — beak & feet
Tools:
-
3.0 mm crochet hook
-
12 mm safety eyes
-
Fiberfill
-
Yarn needle
-
Stitch marker
-
Scissors
🧵 Abbreviations (US)
MR – magic ring
sc – single crochet
inc – increase
dec – decrease
sl st – slip stitch
ch – chain
FO – fasten off
🔘 Head & Body (One Seamless Piece)
Start with navy
MR 6
inc x6 (12)
(1 sc, inc) x6 (18)
(2 sc, inc) x6 (24)
(3 sc, inc) x6 (30)
(4 sc, inc) x6 (36)
(5 sc, inc) x6 (42)
(6 sc, inc) x6 (48)
Rounds 9–13: sc around (48)
Add eye stripe shaping using surface colorwork later.
Switch to cream
Rounds 14–24: sc around (48)
Switch to red
Rounds 25–27: sc around (48)
Switch back to cream
Round 28: (6 sc, dec) x6 (42)
Round 29: (5 sc, dec) x6 (36)
Round 30: (4 sc, dec) x6 (30)
Round 31: (3 sc, dec) x6 (24)
Round 32: (2 sc, dec) x6 (18)
Insert safety eyes between rounds 11–12.
Stuff firmly.
Round 33: (1 sc, dec) x6 (12)
Round 34: dec x6 (6)
FO and close.
🪶 Beak (Grey)
MR 6
Round 2: sc around (6)
Round 3: (1 sc, inc) x3 (9)
Rounds 4–6: sc around (9)
Round 7: (1 sc, dec) x3 (6)
Lightly stuff.
Sew centered between eyes.
👁 Face Mask & Stripes (Navy)
Surface crochet navy bands from each eye wrapping around head sides.
Add small stitched eyebrow curves above eyes.
🪽 Wings (Make 2)
With navy:
MR 6
inc x6 (12)
(1 sc, inc) x6 (18)
(2 sc, inc) x6 (24)
Rounds 5–10: sc around (24)
Flatten. Do not stuff.
Attach white feather edging:
Join white yarn and work:
(sl st, ch 2, sl st) repeatedly around outer edge.
Sew wings flat to sides of body.
🐾 Feet (Make 2 – Grey)
MR 6
inc x6 (12)
Rounds 3–10: sc around (12)
Lightly stuff.
Flatten slightly at top and sew to front bottom of body for perching pose.
🦴 Tail (Navy)
MR 6
(1 sc, inc) x3 (9)
Rounds 3–8: sc around (9)
Flatten. Sew vertically at back base.
🔴 Crown Patch (Red)
MR 6
inc x6 (12)
Round 3: sc around (12)
FO
Flatten and sew to back of head.
🪡 Final Assembly
-
Shape belly into rounded oval
-
Position feet forward for branch sitting
-
Align wings flat and symmetrical
-
Adjust face stripes
-
Secure all ends
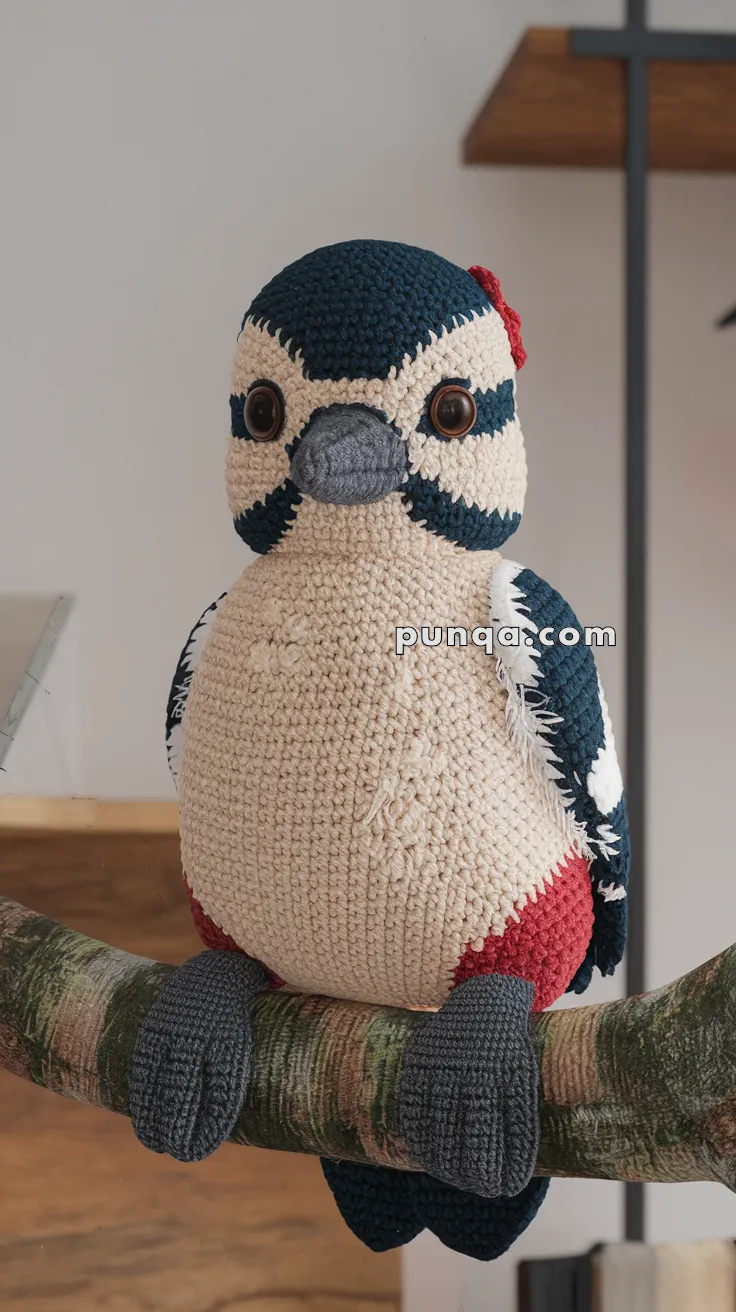
🌲 Final Touch
Your baby woodpecker is now ready to perch! With his chunky belly, bold markings, and soft feathered wings, he looks straight out of a cozy woodland nursery scene. Whether perched on a shelf, branch, or baby’s room décor, this little forest friend brings warmth, charm, and handmade magic wherever he lands.
Happy crocheting! 🧶🐦✨