Bring the playful charm of Woody Woodpecker to life with this Amigurumi Woody Woodpecker crochet pattern! 🐦✨ With his bright red crest, mischievous grin, and classic blue-and-white feathers, this design captures the essence of the beloved cartoon character in yarn form. Whether you’re crafting for a nostalgic décor piece, a fun gift, or simply love character-inspired amigurumi, this FREE pattern is a fantastic addition to your collection.
Designed for intermediate crocheters, this pattern allows for customization in facial details, feather textures, and even tiny accessories like a miniature tree stump or a cheeky pose to enhance Woody’s personality. Choose classic reds, blues, and whites for an authentic look or experiment with bold hues for a creative twist! Whether displayed as part of a cartoon-themed setup or gifted to a fellow crochet enthusiast, this amigurumi Woody Woodpecker is sure to bring smiles. Grab your hook, select your favorite yarn, and let’s bring this iconic character to life—one stitch at a time! 🧶✨
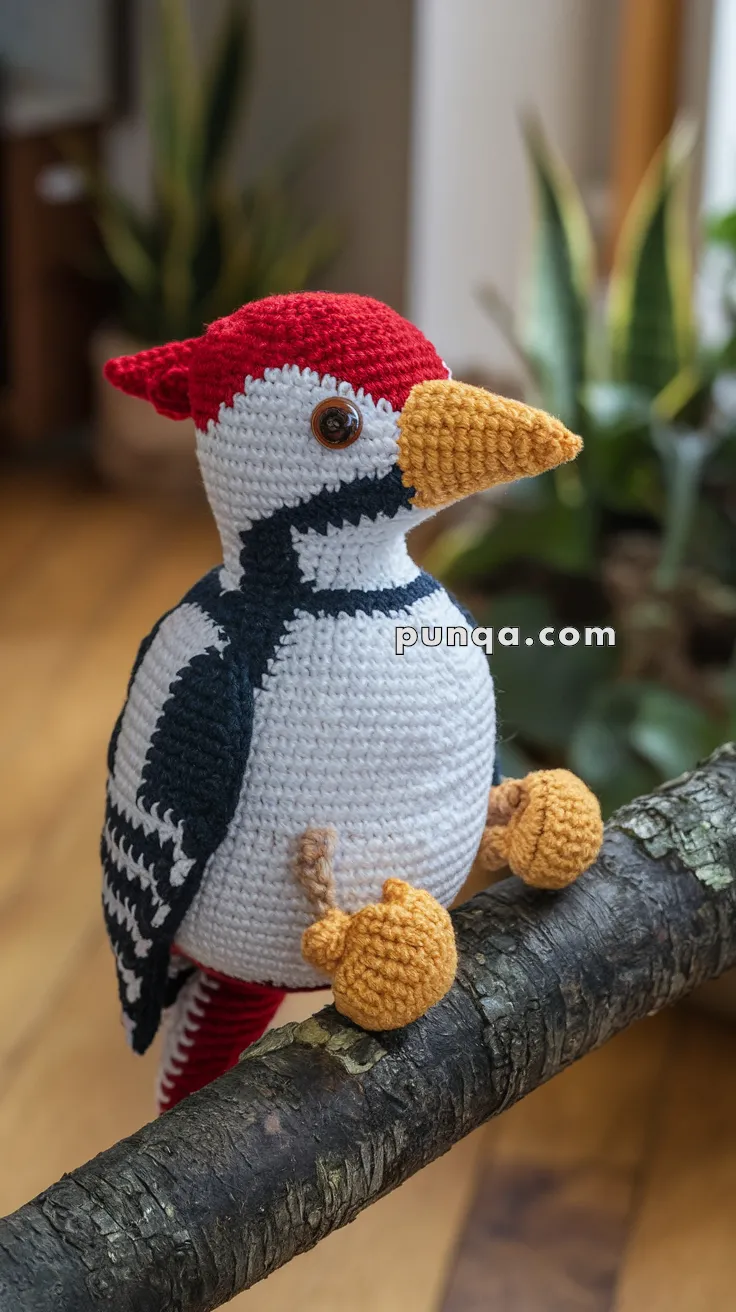
🪵 Amigurumi Woodpecker Crochet Pattern
Bring the forest to life with this striking amigurumi woodpecker! With its bold red crest, long yellow beak, and black-and-white plumage, this handmade bird is full of character. Perched on a branch, it makes a wonderful display piece for nature lovers, bird watchers, or anyone who enjoys unique amigurumi projects.
✨ Skill Level
Intermediate – includes color changes, shaping, and small detail work for feet, crest, and wings.
📏 Finished Size
Approx. 9–10 inches (23–25 cm) tall when using worsted weight yarn and a 3.5 mm crochet hook.
🧶 Materials
-
Worsted weight yarn:
-
Red (Head & crest)
-
White (Face, belly, tail edge)
-
Black (Wings, back, body stripes)
-
Yellow (Beak, feet)
-
Brown (Legs)
-
-
3.5 mm crochet hook
-
Safety eyes or round buttons (10–12 mm brown or amber)
-
Polyfill stuffing
-
Yarn needle
-
Stitch marker
-
Scissors
Optional: thin wire or pipe cleaner (for poseable legs)
🧵 Abbreviations (US Terms)
-
MR – Magic Ring
-
sc – Single Crochet
-
inc – Increase (2 sc in one stitch)
-
dec – Decrease (sc two stitches together)
-
sl st – Slip Stitch
-
ch – Chain
-
FO – Fasten Off
🪡 Pattern Instructions
Body & Head (White, Black, Red – worked as one piece)
Start with white (belly).
-
MR, 6 sc (6)
-
inc around (12)
-
(sc, inc) around (18)
-
(2 sc, inc) around (24)
-
(3 sc, inc) around (30)
-
(4 sc, inc) around (36)
7–14. sc around (36)
👉 This forms the lower white belly.
Switch to black (back & wings base).
15–20. sc around (36)
21. (4 sc, dec) x6 (30)
22. (3 sc, dec) x6 (24)
Switch to red (head).
23. (sc, inc) around (36)
24–28. sc around (36)
29. (4 sc, dec) x6 (30)
30. (3 sc, dec) x6 (24)
31. (2 sc, dec) x6 (18) → insert safety eyes between Rounds 26–27, spaced 6–7 sts apart.
32. (sc, dec) around (12)
33. dec around (6) → FO, close.
Stuff firmly as you go.
Crest Feathers (Red – Make 3–4)
-
Ch 10.
-
sc in 2nd ch from hook, sc across (9).
-
dec, sc 5, dec (7).
-
dec, sc 3, dec (5).
-
sc across (5).
-
sc2tog, sc, sc2tog (3).
-
sc3tog (1). FO.
Make 3–4 of these. Sew layered at back/top of head, sweeping backward.
Beak (Yellow)
-
MR, 6 sc (6)
-
(sc, inc) x3 (9)
-
sc around (9)
-
(2 sc, inc) x3 (12)
5–10. sc around (12) -
(2 sc, dec) x3 (9)
-
sc around (9) → Stuff lightly, FO.
Sew to front of face, centered under eyes.
Wings (Black with White Stripes – Make 2)
-
Ch 13.
-
Row 1: sc in 2nd ch from hook, sc across (12).
3–6. sc across (12).
👉 On Row 7, switch to white and sc 6, then black sc 6 (stripe effect).
8–12. Continue with black only.
FO and sew to each side of body. Wings should angle slightly back.
Tail Feathers (Red with White Edge – Make 3)
With red:
-
Ch 9.
-
sc in 2nd ch from hook, sc across (8).
3–4. sc across (8).
Switch to white: -
sc across (8).
FO. Make 3 and sew together at base, pointing downward. Attach to back of bird.
Legs (Brown – Make 2)
-
Ch 7.
-
sl st across (6). FO.
Sew under body, angled forward.
Feet (Yellow – Make 2)
Toes (Make 3 per foot):
-
MR, 6 sc (6).
-
sc around (6).
FO. Stuff lightly.
Sew 3 toes side by side, then attach to leg ends to form gripping claws.
🧩 Assembly
-
Attach beak to face, just below eyes.
-
Sew crest feathers layered backward on head.
-
Sew wings to body sides, positioned to overlap belly and back.
-
Attach tail feathers to back base.
-
Sew legs under body, then attach clawed feet gripping slightly outward.
🎀 Finishing Touches
-
Embroider or surface-crochet additional black/white details on wings if desired.
-
Pose feet so your woodpecker can grip a branch or perch.
-
Add a tiny stitch of white embroidery to the eyes for sparkle.
✅ Your amigurumi woodpecker is complete! With its bright crest, bold stripes, and charming little claws, it looks ready to peck at the nearest tree. Display it on a branch for a woodland touch, or gift it to someone who loves birds.