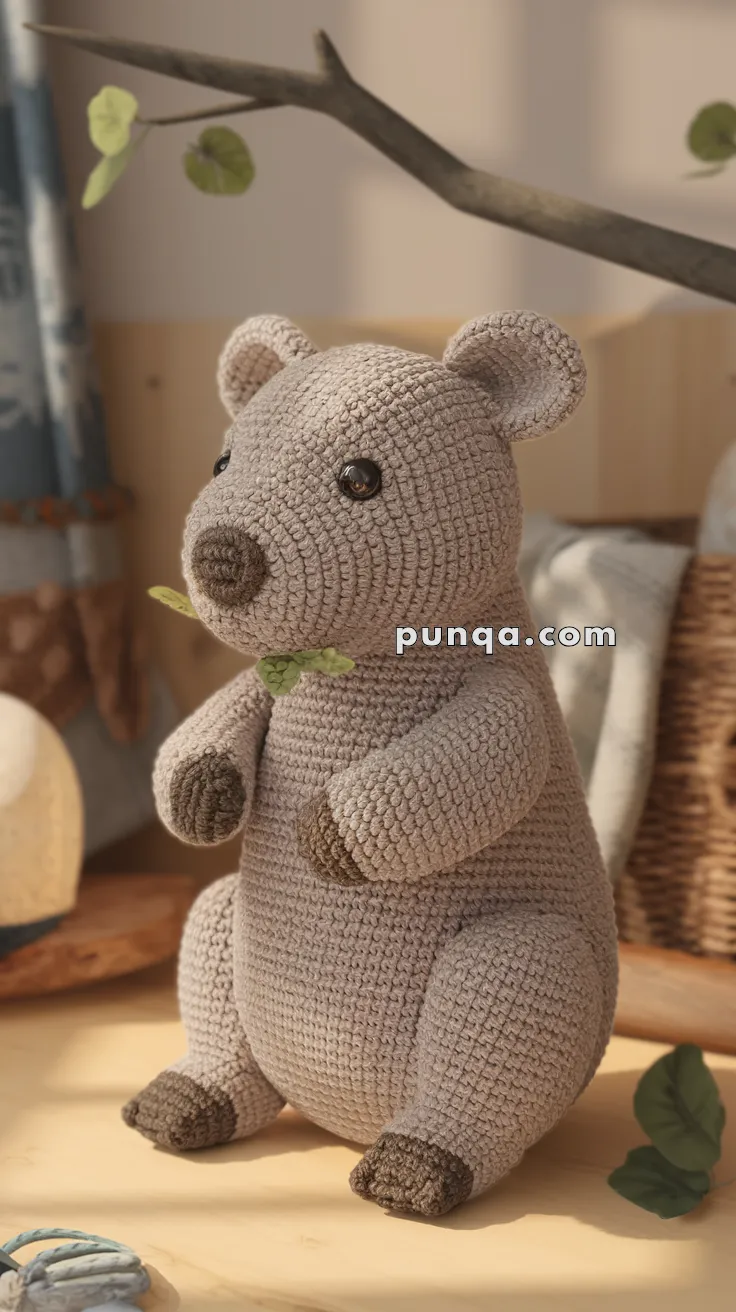
Say hello to the cuddliest critter from Down Under—the Amigurumi Wombat is here to burrow straight into your heart! 🐾🧶 With its chunky body, stubby legs, and sweet little snout, this plush marsupial captures all the charm of Australia’s beloved underground dweller. Whether you’re a wildlife enthusiast or just love crafting unique animal friends, this pattern is a cozy way to celebrate nature through stitches.
Perfect for customizing with earthy tones, fuzzy yarns, or even a tiny scarf for extra personality, your wombat can be as wild or whimsical as you like. It’s a satisfying project for crocheters of all levels, offering a fun mix of shaping and detail that brings this adorable creature to life. Whether perched on a shelf, gifted to a fellow animal lover, or added to your amigurumi zoo, the Amigurumi Wombat is ready to snuffle its way into your handmade collection—one loop at a time! 🌿🧵
🐾 Amigurumi Wombat Crochet Pattern
Bring the charm of the Australian bush into your home with this cuddly Amigurumi Wombat! With its rounded body, little ears, big nose, and sweet details, this soft plushie is perfect for wildlife lovers and makes a wonderful handmade gift.
This pattern uses simple amigurumi techniques with some shaping for realism.
✨ Skill Level
Intermediate – basic amigurumi skills required plus shaping techniques.
📏 Finished Size
Approximately 22–25 cm (9–10 in) tall using velvet or plush yarn with a 3.5–4.0 mm hook.
🧶 Materials
-
Light brown / beige yarn – main body
-
Dark brown yarn – nose, paw pads
-
3.5–4.0 mm crochet hook
-
12 mm safety eyes (black)
-
Polyester fiberfill stuffing
-
Yarn needle & scissors
-
Stitch marker
🧵 Abbreviations (US Terms)
-
MR – Magic Ring
-
sc – Single Crochet
-
inc – Increase (2 sc in same st)
-
dec – Decrease (sc2tog)
-
ch – Chain
-
sl st – Slip Stitch
-
FO – Fasten Off
Worked in continuous rounds unless otherwise stated.
🐨 Pattern Instructions
🟤 Head (Light Brown)
-
MR, 6 sc (6)
-
inc x6 (12)
-
(sc, inc) x6 (18)
-
(2 sc, inc) x6 (24)
-
(3 sc, inc) x6 (30)
-
(4 sc, inc) x6 (36)
7–14. sc around (36)
👉 Insert safety eyes between Rounds 9–10, spaced 10–11 sts apart. -
(4 sc, dec) x6 (30)
-
(3 sc, dec) x6 (24)
-
(2 sc, dec) x6 (18)
-
(sc, dec) x6 (12)
Stuff firmly. -
dec x6 (6) → FO and close.
🟤 Nose (Dark Brown)
-
MR, 6 sc (6)
-
inc x6 (12)
-
(sc, inc) x6 (18)
4–5. sc around (18)
FO and stuff lightly. Sew centered to face, just under the eyes.
🟤 Ears (Make 2, Light Brown)
-
MR, 6 sc (6)
-
(sc, inc) x3 (9)
-
(2 sc, inc) x3 (12)
-
sc around (12)
Flatten and FO. Sew to top sides of head.
🟤 Body (Light Brown)
-
MR, 6 sc (6)
-
inc x6 (12)
-
(sc, inc) x6 (18)
-
(2 sc, inc) x6 (24)
-
(3 sc, inc) x6 (30)
-
(4 sc, inc) x6 (36)
-
(5 sc, inc) x6 (42)
-
(6 sc, inc) x6 (48)
9–22. sc around (48)
👉 Stuff as you go. -
(6 sc, dec) x6 (42)
-
(5 sc, dec) x6 (36)
-
(4 sc, dec) x6 (30)
-
(3 sc, dec) x6 (24)
-
(2 sc, dec) x6 (18)
-
(sc, dec) x6 (12)
FO and close.
🟤 Arms (Make 2, Light Brown with Dark Brown Paws)
Start with dark brown (paw):
-
MR, 6 sc (6)
-
inc x6 (12)
-
(sc, inc) x6 (18)
4–5. sc around (18)
Switch to light brown:
6–12. sc around (18) -
(sc, dec) x6 (12)
Stuff lightly. FO and sew to body sides, slightly forward.
🟤 Legs (Make 2, Light Brown with Dark Brown Feet)
Start with dark brown (foot):
-
MR, 6 sc (6)
-
inc x6 (12)
-
(sc, inc) x6 (18)
4–6. sc around (18)
Switch to light brown:
7–15. sc around (18) -
(sc, dec) x6 (12)
Stuff firmly and FO. Sew angled at base for a sitting pose.
🟤 Tail (Light Brown)
-
MR, 6 sc (6)
-
(sc, inc) x3 (9)
-
sc around (9)
Stuff and sew to back bottom of body.
🌿 Leaf Accessory (Optional)
-
With green yarn, ch 8.
-
sc in 2nd ch, hdc, dc, tr, dc, hdc, sc.
-
FO, weave in ends.
-
Sew or glue near mouth to mimic chewing leaves.
🪡 Assembly
-
Attach head securely to body.
-
Sew ears to head.
-
Attach arms and legs symmetrically.
-
Position tail at back base.
-
Add nose, safety eyes, and embroider mouth if desired.
-
Sew small leaf near mouth for realistic detail.
🎉 Finishing Touches
-
Brush lightly with a pet slicker brush for fluffier wombat fur (if using velvet yarn).
-
Embroider eyebrows for extra expression.
-
Make in different shades of brown for a wombat family!
💡 Final Thoughts
Your Amigurumi Wombat is complete – soft, cuddly, and photo-accurate! This little Aussie is ready to sit proudly on a shelf or snuggle with a child.