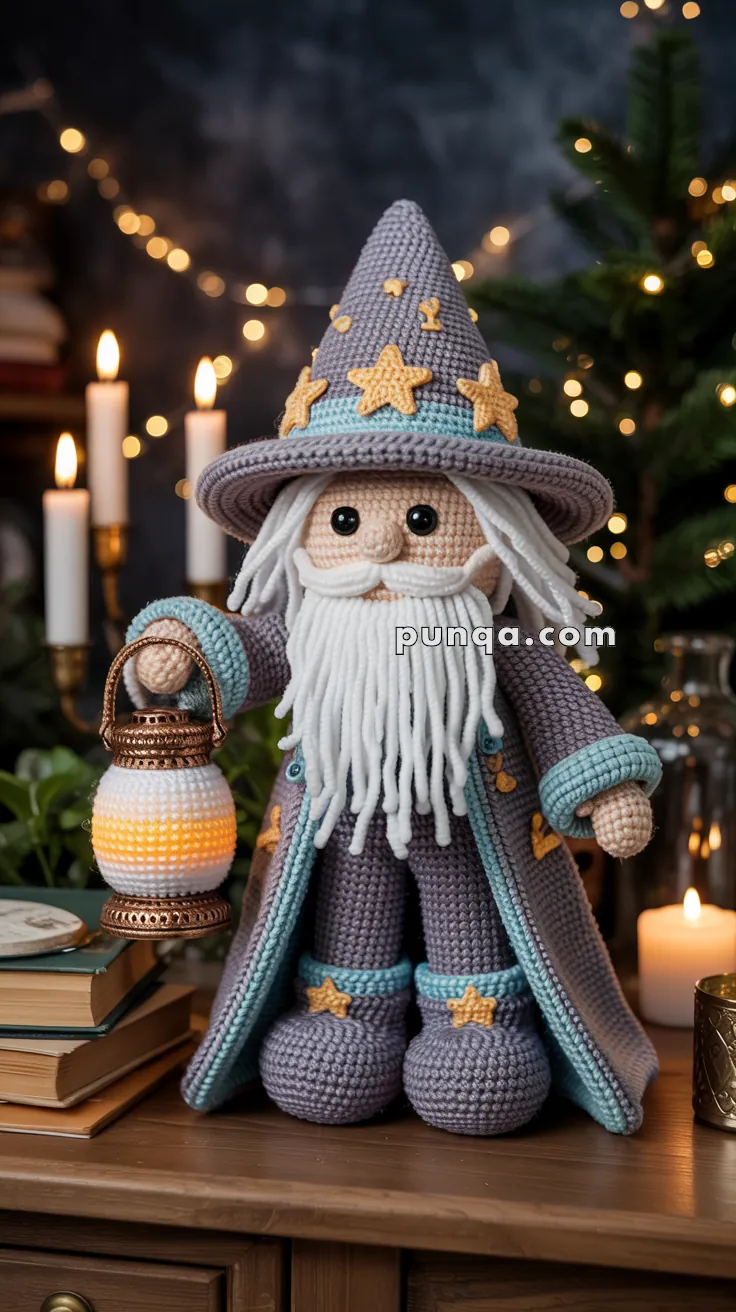
Illuminate your imagination with this Amigurumi Wizard With Lantern crochet pattern! With his flowing robes, wise expression, and glowing lantern in hand, this magical figure is ready to guide you through enchanted forests and mystical realms—all in soft, squishy stitches. Whether you’re crafting a fantasy-themed gift, adding to your magical amigurumi lineup, or simply love stitching up characters full of charm and mystery, this wizard is sure to cast a spell on your crochet hook. 🧙🧶✨
Designed for detail and storytelling, this pattern invites you to play with rich yarn tones, expressive features, and whimsical extras like a pointed hat, staff, or even a tiny spellbook. Customize his lantern with a touch of sparkle or add stars to his cloak for extra enchantment. Whether perched on a shelf, gifted to a fellow fantasy fan, or guarding your craft corner, this Wizard With Lantern Amigurumi is a joyful and satisfying project—perfect for stitching up a little handmade magic, one loop at a time! 💖🌟🕯️
🔮 Amigurumi Wizard With Lantern Crochet Pattern
Bring a spark of magic to your handmade collection with this whimsical amigurumi wizard! Complete with a starry cloak, flowing beard, lantern-holding hand, and pointed hat, this doll makes a charming centerpiece for your fantasy-themed decor or a magical gift.
✨ Skill Level
Intermediate to Advanced – Includes shaping, color changes, hand/finger detail, and accessories.
📏 Finished Size
Approximately 10–12 inches (25–30 cm) tall using DK or worsted weight yarn and a 2.5–3.0 mm crochet hook.
🧶 Materials
- DK or Worsted Weight Yarn in the following colors:
- Skin: Light Beige
- Hair & Beard: White
- Robe & Hat: Purple or Lavender
- Robe Trim: Light Blue
- Stars: Yellow or Gold
- Lantern: White, Orange Gradient, Bronze
- 2.5–3.0 mm crochet hook
- 8–10 mm Safety Eyes
- Yarn needle
- Stitch marker
- Polyfill stuffing
- Optional: Wire for fingers, small LED tea light
🧵 Abbreviations (US Terms)
MR – Magic Ring
sc – Single Crochet
inc – Increase (2 sc in one stitch)
dec – Decrease (sc two stitches together)
sl st – Slip Stitch
ch – Chain
hdc – Half Double Crochet
BLO – Back Loop Only
FO – Fasten Off
👨🦳 Head
With skin color:
Rnd 1: MR, 6 sc
Rnd 2: inc ×6 (12)
Rnd 3: (1 sc, inc) ×6 (18)
Rnd 4: (2 sc, inc) ×6 (24)
Rnd 5: (3 sc, inc) ×6 (30)
Rnd 6–11: sc around (30)
Rnd 12: (3 sc, dec) ×6 (24)
Rnd 13: (2 sc, dec) ×6 (18)
Rnd 14: (1 sc, dec) ×6 (12)
Rnd 15: dec ×6 (6), FO and close
Stuff firmly.
Nose:
MR, 6 sc, sc around for 2 rounds, FO and sew just below the eyes.
Eyes:
Place safety eyes between Rnd 7–8, approx. 6–7 stitches apart.
🧔 Beard, Mustache, and Hair
Mustache:
Ch 15, sc in each ch back (14), FO. Make 2. Twist slightly and sew under nose.
Beard:
Cut 20–30 strands of white yarn (~10–12 cm long). Use lark’s head knot to attach under the chin and down the neck. Trim and shape the beard with scissors.
Hair:
Attach white yarn strands across the back and sides of the head using lark’s head knots. Optionally brush slightly with a slicker brush for more texture.
🎩 Wizard Hat
With purple yarn:
Rnd 1: MR, 6 sc
Rnd 2: (1 sc, inc) ×3 (9)
Rnd 3: sc around
Continue increasing gradually each round until you reach 60–66 sts for the base.
Switch to trim color and work 2–3 rounds BLO for the brim. Optional: add a few inc in brim rows to flare outward. FO.
Stars (make 6–8):
Ch 4, join to form ring. [Ch 3, sl st in 2nd ch from hook, sc in next, sl st in ring] ×5. FO and sew around hat.
🧥 Robe and Body
Legs (make 2):
Rnd 1: MR, 6 sc
Rnd 2: inc ×6 (12)
Rnd 3–6: sc (12)
FO first leg. Repeat for second, do not FO.
Join legs:
Ch 2, attach both legs and work around (26)
Rnd 7–20: sc around
Change to robe color
Rnd 21–30: sc
Switch to trim color
Rnd 31–32: sc
FO and stuff.
Robe Detail:
Add small yellow stars randomly to robe using same star pattern as above.
👢 Shoes (optional flare cuffs)
Work in shoe color:
Rnd 1: MR, 6 sc
Rnd 2: inc ×6 (12)
Rnd 3–5: sc
Optional: add trim band around ankle
Add a crocheted star near each shoe’s outer side.
👕 Arms (make 2)
With skin color:
Rnd 1: MR, 6 sc
Rnd 2: inc ×6 (12)
Rnd 3–5: sc (12)
Rnd 6: ch 3, sl st in 2nd and 3rd ch from hook (thumb), continue sc (12)
Rnd 7–8: sc
Change to sleeve color, work 5 more rounds.
Change to trim color, 2 rows. FO and lightly stuff.
✋ How to Make a Hand with Fingers (Right Hand Holding Lantern)
- Finger 1: MR, 4 sc, 2 rows, FO
- Finger 2–3: same as above
- Thumb: MR, 4 sc, 1 row, FO
Sew fingers together in a slight curve, positioning thumb to one side. Stitch securely to wrist hole. Insert floral wire or pipe cleaner for gentle shaping.
Tip: Angle the hand so the thumb and index finger form a circular grip. You can sew or wrap around the lantern handle so it stays in place.
🧥 Robe Coat
Make flat piece:
Ch ~30
Work sc rows until desired length (~8–10 inches).
Leave gaps for arms.
Work sleeves separately and attach.
Sew robe onto back and sides of body.
🕯️ Lantern
Base:
MR, 6 sc, inc to 18
Work 4–5 rounds of sc.
Switch to orange gradient
Work 3–4 rounds
Switch to white
Continue to top and taper with (dec every 6th st)
FO
Top Cap:
Bronze yarn, MR, 6 sc, 2 rounds, FO
Add tiny chain loop on top
Bottom ring:
Work flat circle to fit base
Optional: insert small LED tea light
Attach lantern to hand using bronze yarn or wire
🪄 Assembly & Final Details
- Attach robe sleeves to arms
- Sew arms slightly tilted forward
- Add stars to robe and hat
- Sew mustache, beard, hair
- Position hat and stitch in place
- Position lantern between thumb and fingers
- Add glow effect with LED if desired!
💡 Customization Tips
- Swap stars for moons or runes
- Use glitter or metallic yarn for a magical sparkle
- Add a staff or potion bottle accessory
- Embroider initials or symbols on the robe
This wizard is sure to light up any room with mystical charm! 🕯️✨