Oh, the joy of creating amigurumi! There’s something so delightful about crocheting these adorable little figures, and when it comes to crafting a Winston Churchill amigurumi, the excitement is palpable. 🎉 The idea of transforming the iconic British leader into a cuddly and whimsical crochet figure is both amusing and challenging. I love how amigurumi taps into my creative side, allowing me to bring historical figures to life with just yarn and a hook. The process is a bit like sculpting, where each stitch builds upon the last, gradually shaping into a recognizable form that holds a dash of personality and charm. 🎨
Embarking on the journey of designing a Winston Churchill amigurumi pattern starts with a vision and some planning. I begin by studying photos of Churchill to capture his essence—the round glasses, ever-present cigar, and bow tie. 🕶️💼 Armed with my sketchpad, I sketch out my interpretation, imagining how each feature can be replicated in crochet. Then comes the best part: picking the perfect yarn colors and textures that will bring my Churchill to life. 🧶 The process involves a little trial and error, tweaking stitches here and there until everything aligns just right. Watching the character emerge from a ball of yarn is nothing short of magical, and it fills me with a sense of accomplishment and joy. 🎈
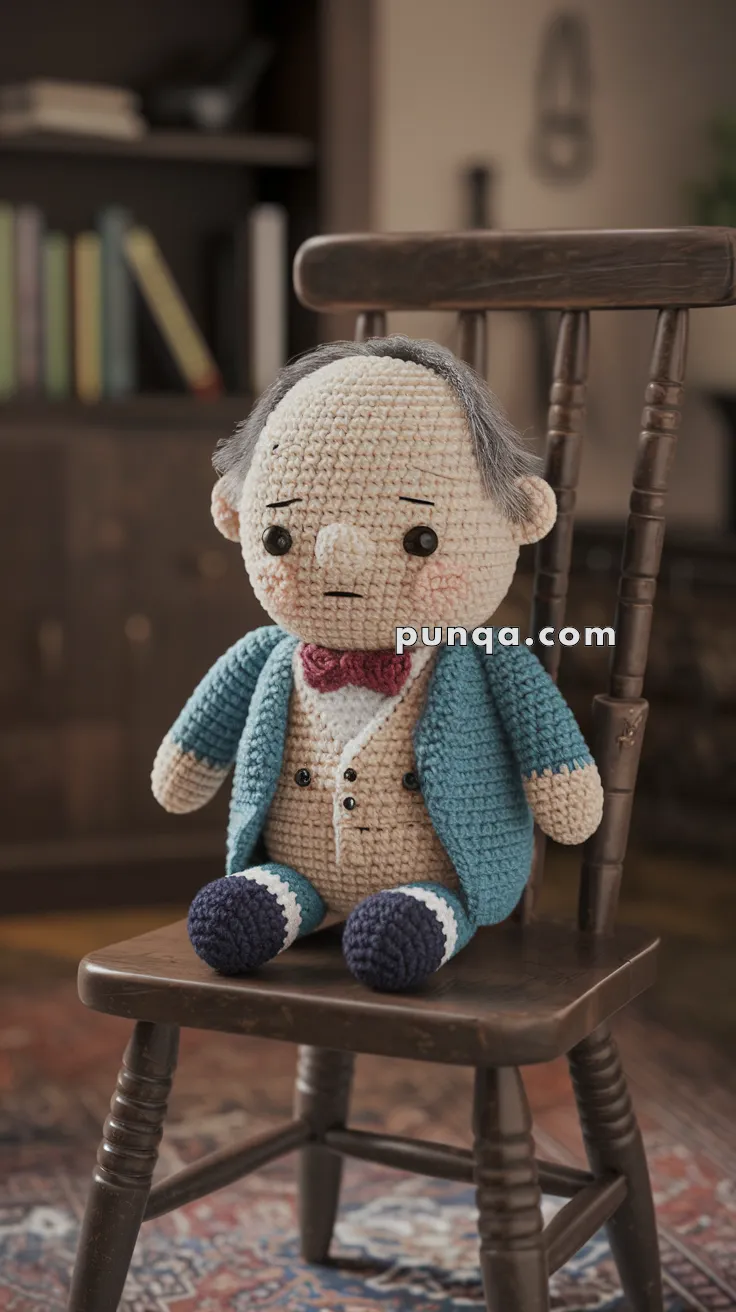
👴Amigurumi Winston Churchill Doll – FREE Crochet Pattern
This sweet and dapper amigurumi grandpa is full of charm with his thoughtful expression, tailored coat, and fuzzy gray hair. He’s a cozy gift for grandparents, a storytelling companion, or a display-worthy project to show off your crochet skills.
🧶 Materials:
-
Worsted weight yarn in:
-
Beige (skin)
-
Gray (hair)
-
Teal (jacket)
-
Dark blue (pants and shoes)
-
Cream (shirt)
-
Burgundy (bow tie)
-
-
2.5 mm or 3.0 mm crochet hook
-
Safety eyes (10–12 mm)
-
Fiberfill stuffing
-
Tapestry needle
-
Stitch marker
-
Optional: blush for cheeks, black embroidery floss for eyebrows and shirt buttons
✨ Abbreviations (US Terms):
-
MR – Magic Ring
-
sc – Single Crochet
-
inc – Increase
-
dec – Decrease
-
ch – Chain
-
sl st – Slip Stitch
-
BLO – Back Loops Only
-
FO – Fasten Off
📏 Finished Size:
Approx. 28–30 cm (11–12 in) tall using a 3.0 mm hook.
🧠 Skill Level:
Intermediate – Includes color changes, embroidery, and detailed clothing.
✂️ Pattern Instructions
👴 Head
Using beige yarn:
-
MR, sc 6
-
(inc) x6 → (12)
-
(sc, inc) x6 → (18)
-
(2 sc, inc) x6 → (24)
-
(3 sc, inc) x6 → (30)
-
(4 sc, inc) x6 → (36)
7–15. sc around -
(4 sc, dec) x6 → (30)
-
(3 sc, dec) x6 → (24)
-
(2 sc, dec) x6 → (18)
Insert safety eyes between rounds 10–11, 6–7 sts apart.
Stuff firmly and FO.
👂 Ears (Make 2)
-
MR, sc 6
-
(sc, inc) x3 → (9)
-
sc around, flatten and sew to sides of head.
💈Hair
-
Use gray yarn to create strands of hair. Cut many pieces approx. 8–10 cm long.
-
Attach using lark’s head knot around top and sides of the scalp.
-
Brush lightly to fluff, then trim and style with side part. Leave crown bald.
👔 Body & Shirt
Start with beige for neck:
-
MR, sc 6
2–3. sc around
🔄 Switch to cream yarn:
4–12. Work even in cream for shirt
🔄 Switch to teal for jacket bottom: -
sc around
-
(4 sc, inc) x6 → (36)
15–22. sc around
Stuff and FO.
👖 Legs (Make 2)
Using navy blue (shoes):
-
MR, sc 6
-
(inc) x6 → (12)
3–5. sc around
🔄 Switch to cream for socks:
6–8. sc
🔄 Switch to beige (legs):
9–18. sc
FO and stuff.
🦵 Arms (Make 2)
Start with beige:
-
MR, sc 6
-
(inc) x6 → (12)
3–5. sc
🔄 Switch to teal for sleeves:
6–15. sc
FO and stuff lightly.
🧥 Jacket Panels (Make 2)
-
Ch 9, turn
2–10. sc across, ch 1, turn
FO and attach as front jacket flaps on either side of shirt
Use small black yarn stitches for jacket buttons
🎀 Bow Tie
With burgundy yarn:
-
Ch 5
2–6. sc rows
FO and pinch center, wrap with yarn to shape into bow
Sew under chin
🧵 Assembly
-
Sew head to top of shirt
-
Attach arms at sides under jacket line
-
Sew legs at bottom edge
-
Embroider eyebrows with black floss
-
Optional: Add blush on cheeks with fabric paint or chalk
-
Secure hair if necessary with extra yarn stitches
✨ Finishing Touches
-
Add tiny buttons to vest area using black yarn
-
Embroider a small belly line to show character
-
Style hair for volume and character
-
Seat grandpa on a wooden chair for a storytelling scene!