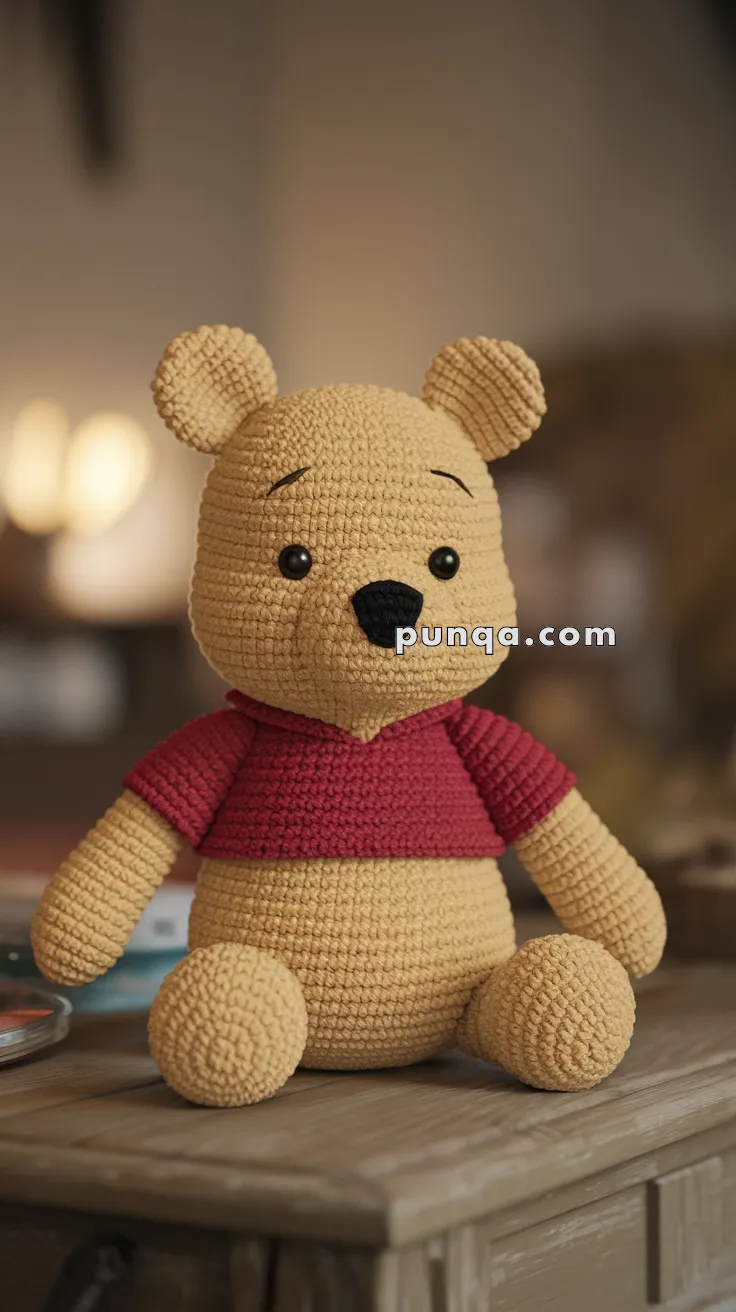
Step into the Hundred Acre Wood with the Amigurumi Winnie the Pooh, a honey-loving crochet companion who’s as cuddly as he is classic! 🍯🐻 With his round belly, gentle smile, and iconic red shirt, this little bear brings timeless charm to your amigurumi collection. Whether he’s daydreaming about snacks or waiting patiently for a hug, Pooh is the perfect project for fans of sweet stories and cozy stitches.
Ideal for crocheters who adore character-based designs and nostalgic flair, this pattern invites you to play with soft yarns, warm colors, and tiny details that capture Pooh’s lovable personality. Pair him with other woodland friends or let him shine solo on a shelf or gift box. The Amigurumi Winnie the Pooh is a heartwarming way to stitch up joy, friendship, and a whole lot of handmade hugs—one loop at a time! 🧶🌼

🍯 Amigurumi Pooh Bear Crochet Pattern
This cuddly Pooh Bear amigurumi captures the soft, classic look seen in the photo — a gently rounded golden body, minimal facial features, small rounded ears, and a short red shirt that sits high on the belly. Designed to sit naturally with chunky feet and relaxed arms, this bear has a timeless plush feel that’s perfect for display, gifting, or collecting.
✨ Skill Level
Intermediate – simple shaping, clean color changes, and light embroidery.
📏 Finished Size
Approx. 26–28 cm (10–11 in) tall
(using DK / light-worsted yarn with a 3.0 mm hook)
🧶 Yarn Amount (Approximate)
- Mustard / honey yellow: 85–90 g
- Red (shirt): 35–40 g
- Black (nose, brows): 2–3 g
🧶 Materials
- DK or light-worsted cotton yarn
- Mustard yellow – body, head, arms, legs, ears
- Red – shirt only
- Black – embroidery
- 10–12 mm black safety eyes
- Polyester fiberfill
- Tapestry needle, stitch marker, scissors
- Optional: blush for cheeks
🧵 Abbreviations (US)
MR – Magic Ring
sc – Single Crochet
inc – Increase
dec – Decrease (sc2tog)
sl st – Slip Stitch
FO – Fasten Off
Work in continuous rounds unless stated.
🐻 Head (Mustard Yellow)
R1: MR 6 (6)
R2: inc ×6 (12)
R3: (sc, inc) ×6 (18)
R4: (2 sc, inc) ×6 (24)
R5: (3 sc, inc) ×6 (30)
R6: (4 sc, inc) ×6 (36)
R7: (5 sc, inc) ×6 (42)
R8–16: sc around (42)
👉 Insert safety eyes between R9–10, about 8 sts apart
👉 Stuff firmly, keeping the head round (no muzzle bulge)
R17: (5 sc, dec) ×6 (36)
R18: (4 sc, dec) ×6 (30)
R19: (3 sc, dec) ×6 (24)
R20: (2 sc, dec) ×6 (18)
R21: (sc, dec) ×6 (12)
R22: dec ×6 (6)
FO, close tightly.
🐽 Nose & Face (No Separate Snout)
Important: The photo shows no protruding muzzle — the nose is embroidered directly on the head.
- Embroider a small vertical oval nose centered between the eyes
- Add a short straight vertical line beneath the nose
- Stitch two very subtle eyebrow curves slightly angled
Keep expression gentle and minimal.
👂 Ears (Make 2)
R1: MR 6 (6)
R2: inc ×6 (12)
R3: sc around (12)
FO, flatten slightly (do not fold fully).
Sew wide apart on top of the head, sitting low and rounded.
🧍 Body (Yellow → Short Red Shirt → Yellow)
Start in mustard yellow:
R1: MR 6 (6)
R2: inc ×6 (12)
R3: (sc, inc) ×6 (18)
R4: (2 sc, inc) ×6 (24)
R5: (3 sc, inc) ×6 (30)
R6–7: sc around (30)
Red Shirt (Short – Photo Accurate)
Switch to red:
R8–12: sc around (30)
👉 Shirt should cover only the upper torso, stopping well above the belly curve.
Switch back to mustard yellow:
R13–15: sc around (30)
R16: (3 sc, dec) ×6 (24)
R17: (2 sc, dec) ×6 (18)
Stuff firmly, keeping belly rounded
R18: (sc, dec) ×6 (12)
R19: dec ×6 (6)
FO, close.
💪 Arms (Make 2 – Yellow with Red Sleeve Cap)
Start in red (sleeve only):
R1: MR 6 (6)
R2: inc ×6 (12)
R3–4: sc around (12)
Switch to mustard yellow:
R5: (2 sc, dec) ×3 (9)
R6–10: sc around (9)
Stuff lightly (arms are soft and relaxed).
FO, leave tail for sewing.
Sew arms slightly forward on the body, aligned with the shirt edge.
🦵 Legs (Make 2 – Large Rounded Feet)
R1: MR 6 (6)
R2: inc ×6 (12)
R3: (sc, inc) ×6 (18)
R4–6: sc around (18)
R7: (sc, dec) ×6 (12)
R8–9: sc around (12)
Stuff firmly to keep feet plump.
FO, flatten slightly and sew wide apart for seated pose.
🪡 Assembly
- Attach head securely to body (head slightly larger than torso)
- Sew arms at shirt level, angled gently downward
- Attach legs so Pooh sits naturally with feet forward
- Add facial embroidery last for best placement
✨ Finishing Details
- Keep stitches tight for a smooth plush surface
- Shirt edge can be refined with surface slip stitch if desired
- Light blush on cheeks adds warmth (optional)
🍯 Final Thoughts
Your Pooh Bear is now ready — soft, rounded, and instantly recognizable. With his short red shirt, gentle expression, and cuddly seated pose, this bear feels timeless and comforting, just like the character we all know and love. Whether displayed on a shelf, gifted to someone special, or kept close as a handmade keepsake, this Pooh brings warmth and quiet joy with every stitch.


