Show off your patriotic spirit with this Amigurumi Uncle Sam Doll crochet pattern! Whether you’re crafting for Independence Day, adding a touch of Americana to your collection, or simply love creating iconic character dolls, this free pattern lets you stitch up a charming Uncle Sam full of personality. With his signature top hat, star-spangled outfit, and distinguished beard, this amigurumi figure embodies the classic symbol of American pride. Perfect for festive decor, thoughtful gifts, or celebrating national holidays, this crochet creation brings history and charm to life—one stitch at a time!
Designed for customization, this pattern allows you to personalize Uncle Sam with embroidered details, different outfit variations, or even tiny accessories like a miniature flag or bow tie for extra flair. Experiment with bold red, white, and blue hues, craft a playful expression, or even create a matching set with other patriotic figures! Whether displayed as a centerpiece for celebrations, gifted to a fellow crochet enthusiast, or stitched up simply for the joy of crafting, this Amigurumi Uncle Sam Doll is a delightful and spirited project that honors tradition with handmade charm! 🇺🇸🧶✨
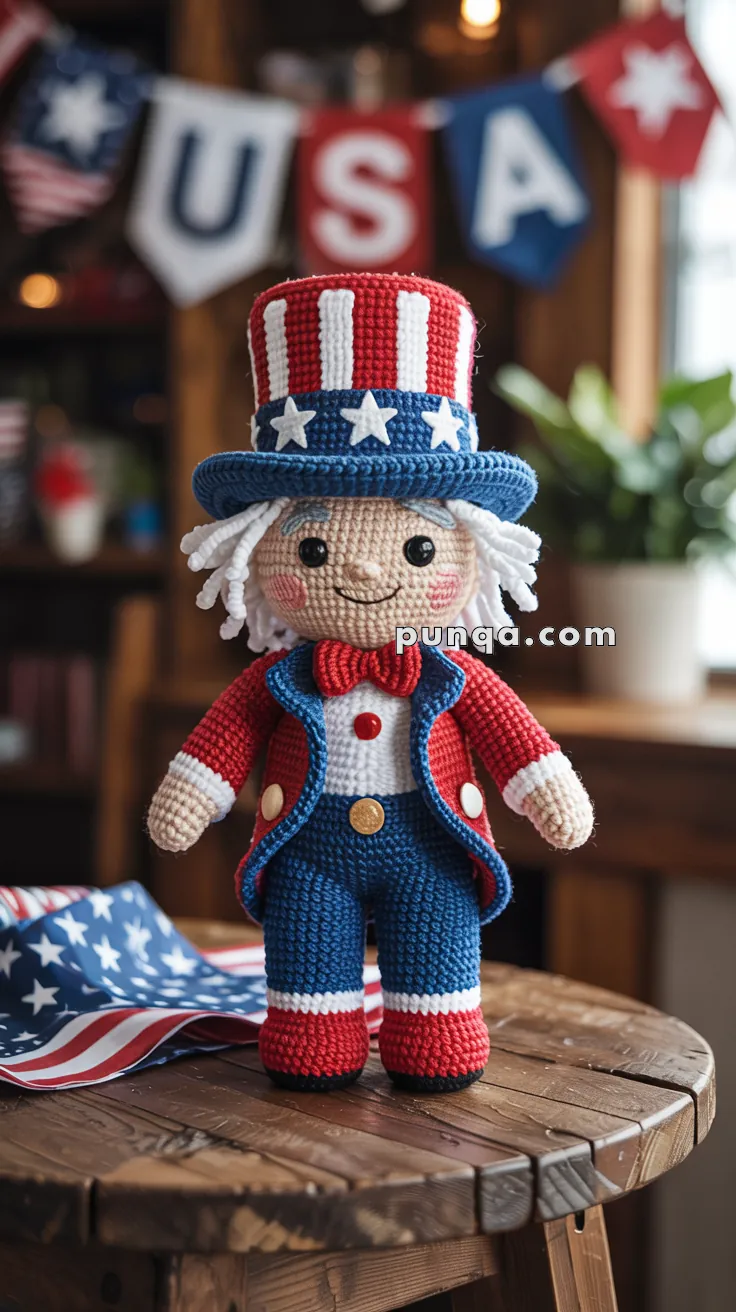
🎆 Amigurumi Uncle Sam – FREE Crochet Pattern
Celebrate freedom with this charming and detailed Uncle Sam amigurumi doll! With his iconic red, white, and blue outfit, tall striped top hat, and endearing smile, he’s the perfect handmade decoration for the 4th of July, Memorial Day, or any patriotic event.
✨ Skill Level
Intermediate – Includes shaping, color changes, surface details, and sewing pieces together.
📏 Finished Size
Approx. 10–12 inches (25–30 cm) tall with hat, using DK yarn and a 2.5–3.0 mm hook.
🧶 Materials
- Yarn (DK or Sport weight):
- Beige (Skin)
- Red, White, Blue (Clothing & Hat)
- Black (Shoes)
- Gold (Buttons & Belt)
- Grey or White (Eyebrows, Hair)
- 2.5–3.0 mm crochet hook
- 8mm safety eyes
- Fiberfill stuffing
- Tapestry needle
- Stitch markers
- Felt stars or embroidered stars (hat decoration)
- Small red and gold buttons
🧵 Abbreviations (US Terms)
MR – Magic Ring
sc – Single Crochet
inc – Increase
dec – Decrease
sl st – Slip Stitch
ch – Chain
FO – Fasten Off
BLO – Back Loop Only
🧔♂️ Head
With Beige:
- MR, 6 sc (6)
- inc x6 (12)
- (1 sc, inc) x6 (18)
- (2 sc, inc) x6 (24)
- (3 sc, inc) x6 (30)
- (4 sc, inc) x6 (36)
7–12. sc around (36) - (4 sc, dec) x6 (30)
- (3 sc, dec) x6 (24)
- (2 sc, dec) x6 (18)
– Insert safety eyes between Rnds 8–9, about 8 sts apart
– Embroider nose and eyebrows
– Stuff firmly - (1 sc, dec) x6 (12)
- dec x6 (6), FO
🎩 Hat (Worked from top down)
Stripe section
Start with Red:
- MR, 6 sc (6)
- inc x6 (12)
- (1 sc, inc) x6 (18)
- (2 sc, inc) x6 (24)
5–12. Alternate colors each round between Red and White - Switch to Blue: sc around (24)
14–15. sc around (24) - inc in each st around (48)
- (1 sc, inc) x24 (72)
- sl st around to shape brim, FO
– Add felt stars or embroider white stars on blue band.
💇 Hair & Eyebrows
Using White or Grey Yarn:
- Cut strands of yarn approx. 6–7 cm and loop around head sides.
- For eyebrows, embroider gently arched stitches above eyes.
🎽 Body
Start with White:
- MR, 6 sc (6)
- inc x6 (12)
- (1 sc, inc) x6 (18)
- (2 sc, inc) x6 (24)
- (3 sc, inc) x6 (30)
6–10. sc around (30)
Switch to Blue:
11–18. sc around (30)
– FO, leave long tail for sewing to head
Embroider a red dot (shirt button) in center of white shirt section.
🧥 Jacket Panels (Make 2)
With Blue:
- ch 7, sc in 2nd ch and across (6)
2–6. ch 1, turn, sc across (6) - ch 1, turn, dec, 2 sc, dec (4)
- ch 1, turn, dec twice (2)
- ch 1, dec (1), FO
– Attach red border around front edges
– Sew one on each side of white chest panel
– Add tiny white or gold button to each panel
👖 Legs (Make 2)
Start with Red:
- MR, 6 sc (6)
- inc x6 (12)
3–5. sc around (12)
Switch to White:
6–7. sc around (12)
Switch to Blue:
8–14. sc around (12), FO first leg.
Second leg: Repeat same and do not FO.
Join legs:
15. ch 2, join to first leg with sc, sc around both legs and across chs (26)
16–22. sc around (26), FO and leave tail.
👞 Shoes (Make 2)
With Black:
- MR, 6 sc (6)
- inc x6 (12)
3–5. sc around (12) - sl st around (12), FO
Sew under legs, matching stripe.
🧤 Arms (Make 2)
Start with Beige:
- MR, 6 sc (6)
- inc x6 (12)
3–6. sc around (12)
Switch to Red:
7–12. sc around (12), FO and leave tail.
Stuff lightly and sew to sides.
🎀 Bowtie
With Red:
- ch 7, sc in 2nd ch and across (6)
2–3. ch 1, turn, sc across (6)
FO and wrap yarn around center to pinch.
Sew below head on shirt.
⭐ Buttons & Belt
- Use small gold circles (crocheted or real buttons)
- Sew one to front of trousers as belt
- Add another to each jacket panel front
✂️ Finishing Touches
- Stitch head securely onto body
- Sew arms to body below neck line
- Place and attach hat slightly tilted back
- Adjust hair strands and trim if needed
- Use light blush or embroidery thread for cheek blush
This cheerful Uncle Sam amigurumi is a joyful tribute to American heritage and is sure to steal the show at any patriotic celebration. Whether displayed on a mantle, used as a centerpiece, or given as a handmade gift, he’ll bring stars, stripes, and smiles all around! 🎇🇺🇸