🐯 Amigurumi Tigger Crochet Pattern
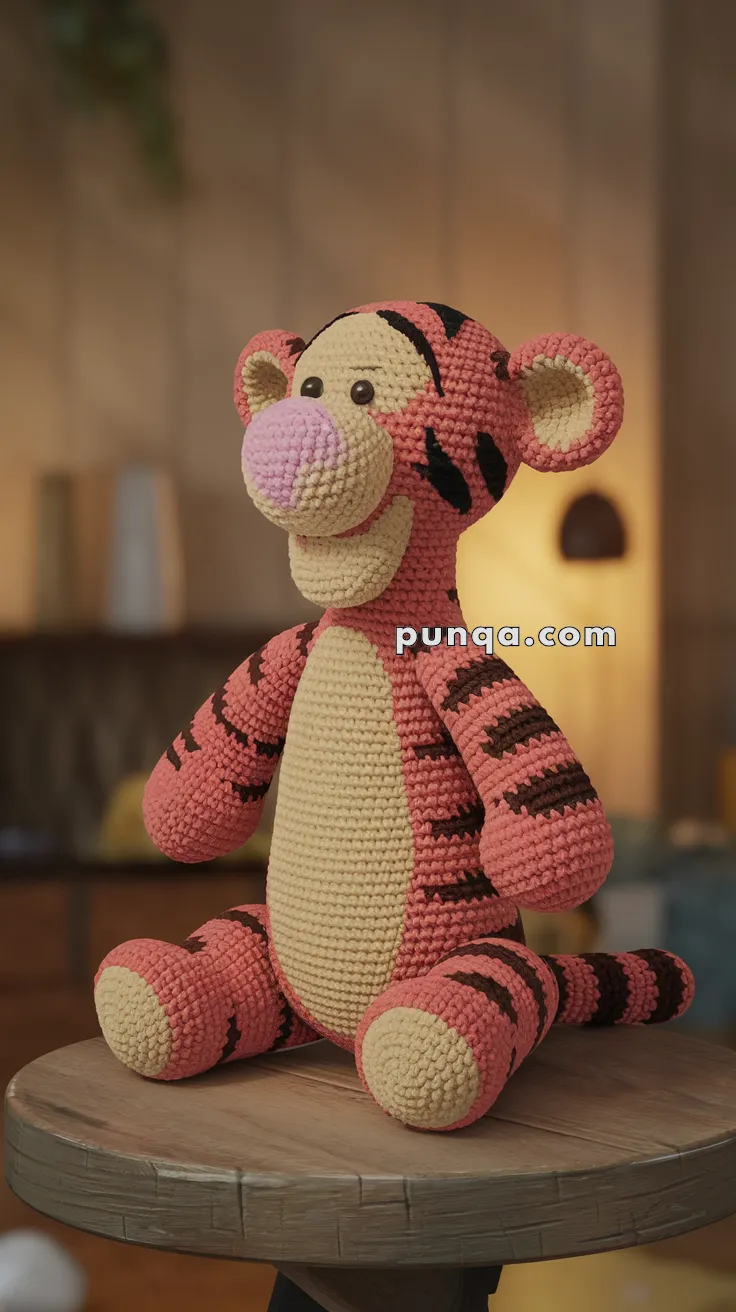
If there’s one character who’s always full of bounce and fun, it’s Tigger! With his cheerful stripes, pink snout, and curled tail, this handmade amigurumi Tigger will bring smiles to kids and adults alike. Perfect for any Winnie the Pooh fan, this project is both playful and rewarding to make. Let’s hop right in!
✨ Skill Level
Intermediate — shaping, color changes, surface embroidery, and clean assembly.
📏 Finished Size
Approx. 30–32 cm (12–12.5 inches) seated
Using worsted weight yarn and a 3.0–3.25 mm hook.
🧶 Materials
Worsted weight yarn:
-
Coral Orange – head, body, arms, legs, ears, tail
-
Light Beige / Cream – belly panel, muzzle, paw pads, inner ears, tail tip
-
Soft Pink – snout top
-
Dark Brown / Black – stripes, facial embroidery
Supplies:
-
10–12 mm safety eyes
-
3.0–3.25 mm crochet hook
-
Polyester fiberfill
-
Yarn needle
-
Stitch marker
-
Scissors
🧵 Abbreviations (US)
MR – magic ring
sc – single crochet
inc – increase
dec – invisible decrease
ch – chain
sl st – slip stitch
FO – fasten off
🧠 Head (Orange)
R1: MR 6 (6)
R2: inc x6 (12)
R3: (sc, inc) x6 (18)
R4: (2 sc, inc) x6 (24)
R5: (3 sc, inc) x6 (30)
R6: (4 sc, inc) x6 (36)
R7–R15: sc around (36)
Insert eyes between R10–11, 7 stitches apart.
R16: (4 sc, dec) x6 (30)
R17: (3 sc, dec) x6 (24)
R18: (2 sc, dec) x6 (18)
Stuff firmly
R19: (sc, dec) x6 (12)
R20: dec x6 (6)
FO and close.
Head is slightly oval, not perfectly round — matching the plush.
🐽 Muzzle Base (Beige)
R1: MR 6
R2: inc x6 (12)
R3: (sc, inc) x6 (18)
R4–R5: sc around (18)
Lightly stuff and FO.
Sew low on the face.
🩷 Snout Top (Pink)
R1: MR 6
R2: inc x6 (12)
R3: (sc, inc) x6 (18)
R4: (2 sc, inc) x6 (24)
R5–R6: sc around (24)
Lightly stuff and FO.
Sew layered on top of beige muzzle to form the protruding rounded nose.
👂 Ears (Make 2)
Outer Ear (Orange)
R1: MR 6
R2: inc x6 (12)
R3–R4: sc around (12)
FO
Inner Ear (Beige)
R1: MR 6
R2: inc x6 (12)
FO
Sew inner onto outer.
Fold slightly and attach high on head angled outward.
🧥 Body (Orange)
R1: MR 6
R2: inc x6 (12)
R3: (sc, inc) x6 (18)
R4: (2 sc, inc) x6 (24)
R5: (3 sc, inc) x6 (30)
R6–R15: sc around (30)
R16: (3 sc, dec) x6 (24)
R17–R18: sc around (24)
R19: (2 sc, dec) x6 (18)
R20: (sc, dec) x6 (12)
Stuff firmly
R21: dec x6 (6)
FO and close.
Body is tall and cylindrical — not round or squat.
🟨 Belly Panel (Beige – Sewn On)
Ch 10
Row 1: sc in 2nd ch from hook and across (9)
Rows 2–15: ch 1, turn, sc 9
FO.
Shape into a long oval and sew centered on body.
💪 Arms (Make 2)
Start with Beige:
R1: MR 6
R2: inc x6 (12)
R3: sc around (12)
Switch to Orange:
R4–R12: sc around (12)
Lightly stuff, flatten top, FO.
Arms are long and slim.
🦵 Legs (Make 2)
Start with Beige:
R1: MR 6
R2: inc x6 (12)
R3–R4: sc around (12)
Switch to Orange:
R5–R13: sc around (12)
Stuff firmly. Flatten top slightly. FO.
Legs are long and cylindrical with flat paw pads.
🐾 Tail (Orange with Beige Tip)
R1: MR 5
R2–R18: sc around (5)
Switch to Beige:
R19–R20: sc around (5)
Lightly stuff and FO.
Curve tail gently when sewing.
🧵 Facial Embroidery
With dark brown / black yarn:
No heavy eyebrows — the plush has a soft, friendly expression.
⚫ Stripes (Surface Embroidery)
Embroider rounded plush-style stripes:
Keep them rounded and soft — not sharp or pointed.
🧷 Assembly
-
Sew head to body
-
Attach legs to front bottom for seated pose
-
Attach arms slightly forward
-
Attach ears high on head
-
Sew tail low on back and curve outward
🎉 Finished Tigger
Your amigurumi Tigger is complete — seated, cuddly, and bursting with personality. With his oversized snout, soft belly, playful stripes, and cheerful smile, he’s ready to bounce straight into any handmade collection. 🐯💛