Welcome to the nostalgic and charming world of amigurumi! ☎️✨ Today, I’m excited to share my free crochet pattern for a Telephone Booth—a delightful and iconic miniature piece perfect for vintage décor, whimsical collections, or adding a touch of classic city charm to your handmade creations! 🏙️ Whether you love crafting architectural-inspired designs, enjoy making fun decorative accents, or simply want to stitch up a tiny retro phone booth, this pattern will guide you through creating a beautifully detailed structure with bold lines and signature elements! ❤️
This design embraces structured stitches, vibrant hues, and nostalgic appeal to bring a timeless look to your crochet collection! 🧶📞 I’ve carefully outlined each step to ensure your Telephone Booth turns out just right—ready to stand as a fun display piece, serve as a charming handmade gift, or add a pop of vintage elegance to your space! 🎁 So grab your hooks, pick out classic reds, deep blues, or playful alternative shades, and let’s stitch up an amigurumi telephone booth with timeless flair! ✨
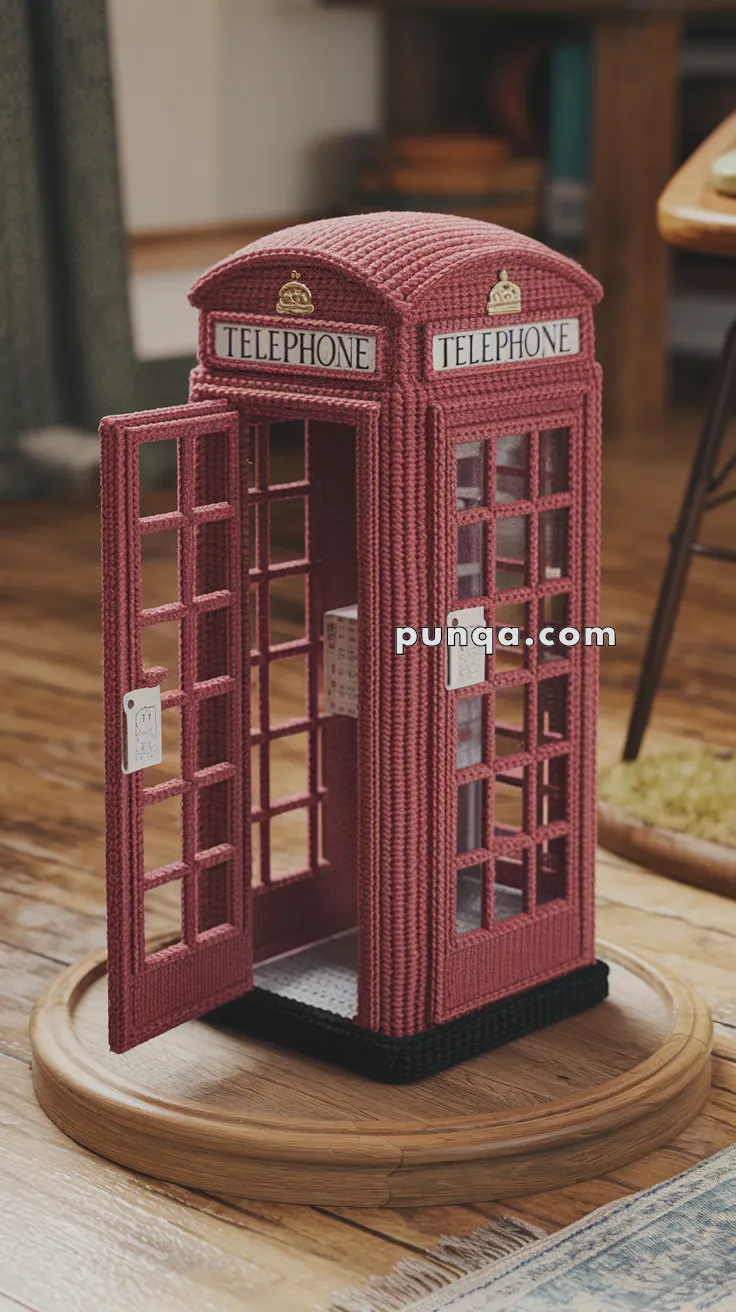
☎️ Amigurumi Telephone Booth – Free Crochet Pattern
Bring a bit of classic British charm to your decor with this iconic red telephone booth! This intermediate project features structured sides, windows, and a removable door — perfect as a gift box, display piece, or unique conversation starter.
✨ Skill Level
Intermediate – Includes shaping, sewing panels, and working with wire or plastic canvas for structure.
📏 Finished Size
Approx. 8–10 inches (20–25 cm) tall using DK or worsted yarn and a 3.5 mm hook.
🧶 Materials
-
Worsted weight yarn in:
-
Red (main body)
-
Black (base)
-
White (window backing and sign)
-
Gold or yellow (crown detail)
-
-
3.5 mm crochet hook
-
Clear plastic canvas or thin cardboard (for structure)
-
Tapestry needle
-
Fabric glue (optional)
-
Stitch marker
-
Small black buttons or felt circles (optional for detail)
🧵 Abbreviations (US Terms)
sc – Single Crochet
ch – Chain
sl st – Slip Stitch
inc – Increase
dec – Decrease
BLO – Back Loop Only
FLO – Front Loop Only
FO – Fasten Off
🟥 Base Panel (Make 1)
With black yarn:
-
Ch 20
-
Row 1: sc in 2nd ch from hook and across (19)
3–28. ch 1, turn, sc across (19)
FO and weave in ends.
Cut a plastic canvas to the same size and glue or sandwich inside.
🟥 Side Panels (Make 4)
With red yarn:
-
Ch 20
-
Row 1: sc in 2nd ch from hook and across (19)
3–40. ch 1, turn, sc across (19)
FO and weave in ends.
Windows (Optional):
Use surface crochet or sew a grid using white yarn. You can also crochet frames using chain loops and sew on clear plastic or tulle behind.
Repeat on all 4 panels.
🟥 Roof Panel (Make 1 Rectangular + 1 Arched Top)
Rectangular Roof:
-
Ch 20
-
Row 1: sc in 2nd ch and across (19)
3–6. ch 1, turn, sc across (19)
FO.
Arched Top (Make 4 small panels to curve the top corners):
-
Ch 10
-
Row 1: sc in 2nd ch and across (9)
-
ch 1, turn, sc across (9)
-
ch 1, turn, dec, sc 5, dec (7)
-
ch 1, turn, dec, sc 3, dec (5)
-
ch 1, turn, dec, sc 1, dec (3)
-
ch 1, turn, dec, dec (1)
FO and shape into arch.
Sew one on top of each side panel to round the roof.
🚪 Door Panel (Same as side panel)
Leave one panel unattached or hinge it using yarn to make it openable. Attach a small yarn loop or felt patch as the handle.
🏷 “TELEPHONE” Signs (Make 2)
With white yarn:
-
Ch 10
-
Row 1: sc in 2nd ch and across (9)
3–4. ch 1, turn, sc across (9)
FO and embroider “TELEPHONE” with black thread or use iron-on letters.
Sew on to the top center of front and back.
👑 Crown Appliqué (Optional)
With gold or yellow yarn:
-
Embroider or create a tiny crown shape using simple stitches.
-
Or use a gold button or charm for realism.
🔧 Assembly
-
Sew the 4 red panels together vertically into a box.
-
Insert plastic canvas panels before joining to keep the sides stiff.
-
Sew black base on bottom.
-
Sew roof panel and arched tops in place.
-
Attach signage and crown details.
-
Leave one panel open or attach with a yarn hinge for a functional door.
💡 Tips
-
For structure, you can also line the interior with cardboard cut to panel size.
-
Add fairy lights inside to turn it into a cozy night lamp.
-
Add felt window panes for a translucent effect.
Your amigurumi British telephone booth is now ready to stand proudly on display! 🇬🇧☎️