Oh, the joys of crafting! There’s something truly delightful about bringing a beloved character like Suneo from “Doraemon” to life through amigurumi. For me, it’s like weaving a bit of magic with each stitch, transforming simple yarn into a three-dimensional figure that brings smiles to anyone’s face. 😊 It’s all about the journey of creation, the soft texture of the yarn, and the vibrant colors that capture Suneo’s playful personality. The art of amigurumi offers a whimsical way to express creativity, and the satisfaction that comes from completing a piece is truly unmatched.
Creating an amigurumi Suneo pattern is an adventure in itself! The process begins with selecting the perfect yarn and colors to match Suneo’s distinctive look. You start by crocheting the basic shapes like the head, body, and limbs, then carefully assemble them to give him his signature mischievous stance. The tiny details, such as his cheeky grin and spiky hair, bring Suneo to life, turning a simple craft project into a delightful character that seems ready to jump into adventure. Each step, from the first chain stitch to sewing on the final details, is filled with anticipation and joy, making the whole experience incredibly rewarding. 🧶✨
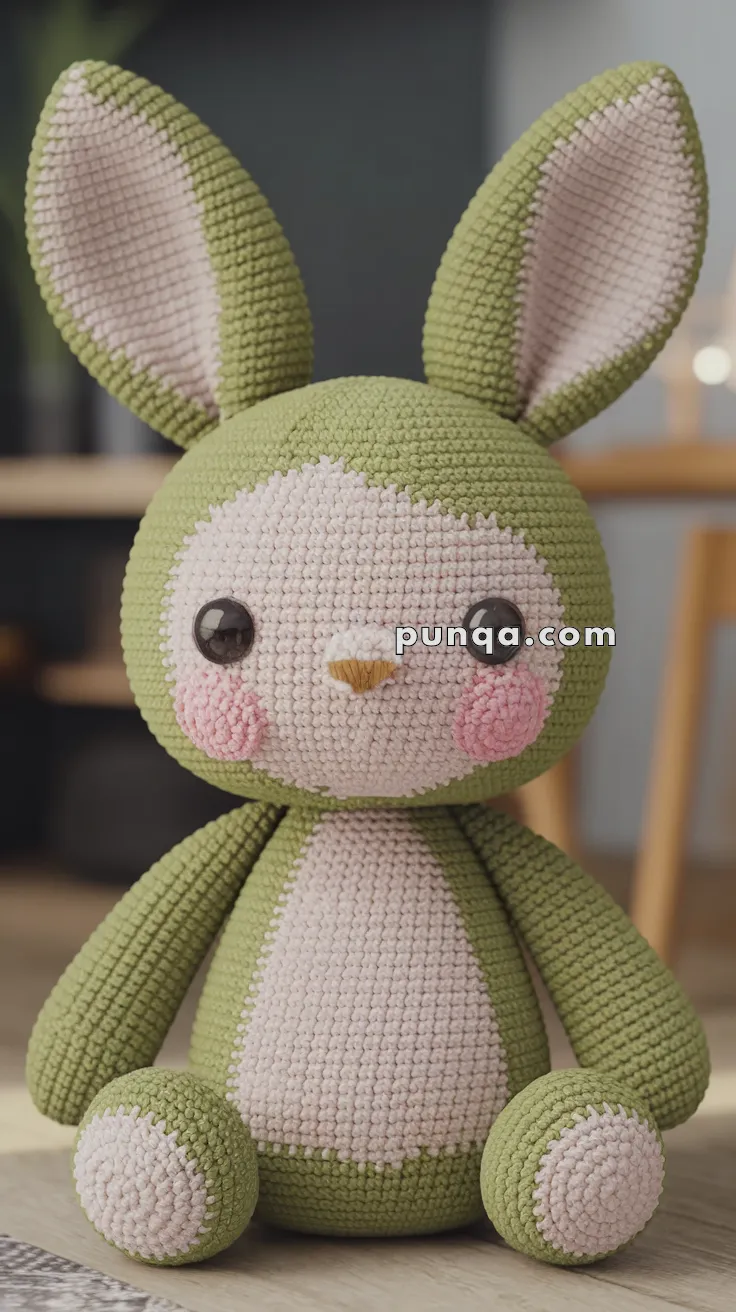
🐰 Amigurumi Suneo Bunny Crochet Pattern
Meet Suneo, the softest little bunny with a gentle expression and the fluffiest cheeks! With tall ears, big sparkling eyes, and a cuddly round belly, this bunny is the perfect snuggle buddy or springtime gift for any age.
✨ Skill Level
Beginner to Intermediate – Simple shaping, minimal sewing, and a few color changes.
📏 Finished Size
Approx. 10–12 inches (25–30 cm) tall when using worsted yarn and a 2.5–3.5 mm hook.
🧶 Materials
-
Yarn (Worsted or DK Weight):
-
Light green (body, outer ears, arms, legs, back of head)
-
Pale pink or cream (face, belly, inner ears, paw pads)
-
Pink (cheeks)
-
Brown or yellow (nose)
-
-
Crochet Hook: 2.5–3.5 mm
-
Safety Eyes: 10–12 mm black
-
Tapestry Needle
-
Polyfill Stuffing
-
Stitch Marker
🧵 Abbreviations (US Terms)
MR – Magic Ring
sc – Single Crochet
inc – Increase (2 sc in one stitch)
dec – Decrease (sc two together)
ch – Chain
sl st – Slip Stitch
FO – Fasten Off
BLO/FLO – Back/Front Loops Only
🐰 Head (Start with Pink/Cream)
-
MR, 6 sc
-
inc x6 (12)
-
(1 sc, inc) x6 (18)
-
(2 sc, inc) x6 (24)
-
(3 sc, inc) x6 (30)
-
(4 sc, inc) x6 (36)
7–12. sc (36) -
Switch to green, sc around (36)
14–18. sc (36) -
(4 sc, dec) x6 (30)
-
(3 sc, dec) x6 (24)
– Insert safety eyes between R10–11, approx. 7 stitches apart
– Embroider cheeks and nose -
(2 sc, dec) x6 (18)
-
(1 sc, dec) x6 (12)
-
dec x6 (6), FO and close
👂 Ears (Make 2 – Work Inner First)
Inner Ear (Pink/Cream)
-
MR, 6 sc
-
inc x6 (12)
-
(1 sc, inc) x6 (18)
-
(2 sc, inc) x6 (24)
5–7. sc (24), FO
Outer Ear (Green)
Repeat as above but do not FO.
Place inner ear on top, sc through both layers to join around.
Leave long tail to sew on top of head.
🧸 Body (Green → Pink Front Belly Patch)
-
MR, 6 sc
-
inc x6 (12)
-
(1 sc, inc) x6 (18)
-
(2 sc, inc) x6 (24)
-
(3 sc, inc) x6 (30)
6–10. sc (30) -
Switch to cream and sc 12 across front only
– Continue rest of round in green (18 sts)
12–16. Repeat above to create oval belly panel -
sc around entire round (30)
-
(3 sc, dec) x6 (24)
-
(2 sc, dec) x6 (18)
-
(1 sc, dec) x6 (12), FO and close
🐾 Arms (Make 2 – Green)
-
MR, 6 sc
-
inc x6 (12)
3–6. sc (12) -
(1 sc, dec) x4 (8)
8–11. sc (8), FO
– Do not overstuff; sew to sides of body
🐾 Legs (Make 2 – Green with Pink Pads)
Pad (Pink/Cream):
-
MR, 6 sc
-
inc x6 (12), FO
Leg (Green):
-
MR, 6 sc
-
inc x6 (12)
-
Attach pad to bottom with sl st
4–6. sc (12) -
(2 sc, dec) x3 (9), FO
– Sew to base of body
🐽 Nose (Brown/Yellow Yarn)
-
MR, 4 sc
-
sc (4), FO
– Sew between cheeks at R11 on face
✂️ Assembly Instructions
-
Sew head to body securely
-
Stitch arms to upper body sides
-
Position and attach legs at the base
-
Attach ears standing upright
-
Add blush to cheeks for extra cuteness (optional)
Suneo Bunny is ready to hop into your heart with those big ears and squishy body! Whether gifted or kept, this bunny is sure to spread cozy joy. 💚🐰