Welcome to the majestic and mysterious world of amigurumi! 🏺✨ Today, I’m excited to share my free crochet pattern for an Amigurumi Sphinx of Giza—a legendary and awe-inspiring creation perfect for history lovers, Egyptian mythology enthusiasts, or anyone who enjoys crafting intricate and symbolic plush designs! 🧶 Whether you love stitching up ancient wonders, experimenting with sculpted details, or simply want to add a mythical guardian to your handmade lineup, this pattern will guide you through crafting a beautifully structured plush with a regal lion body, pharaoh-like face, and a touch of timeless grandeur! 🌞
This design embraces sandy hues, bold shaping, and thoughtful details to bring a powerful and captivating presence to your crochet projects! 🧶✨ I’ve carefully outlined each step to ensure your Amigurumi Sphinx of Giza turns out just right—ready to guard your collection or become a treasured handmade gift! 🎁 So grab your hooks, pick out warm golds, soft browns, and deep blues, and let’s stitch up an iconic Sphinx! 🏺
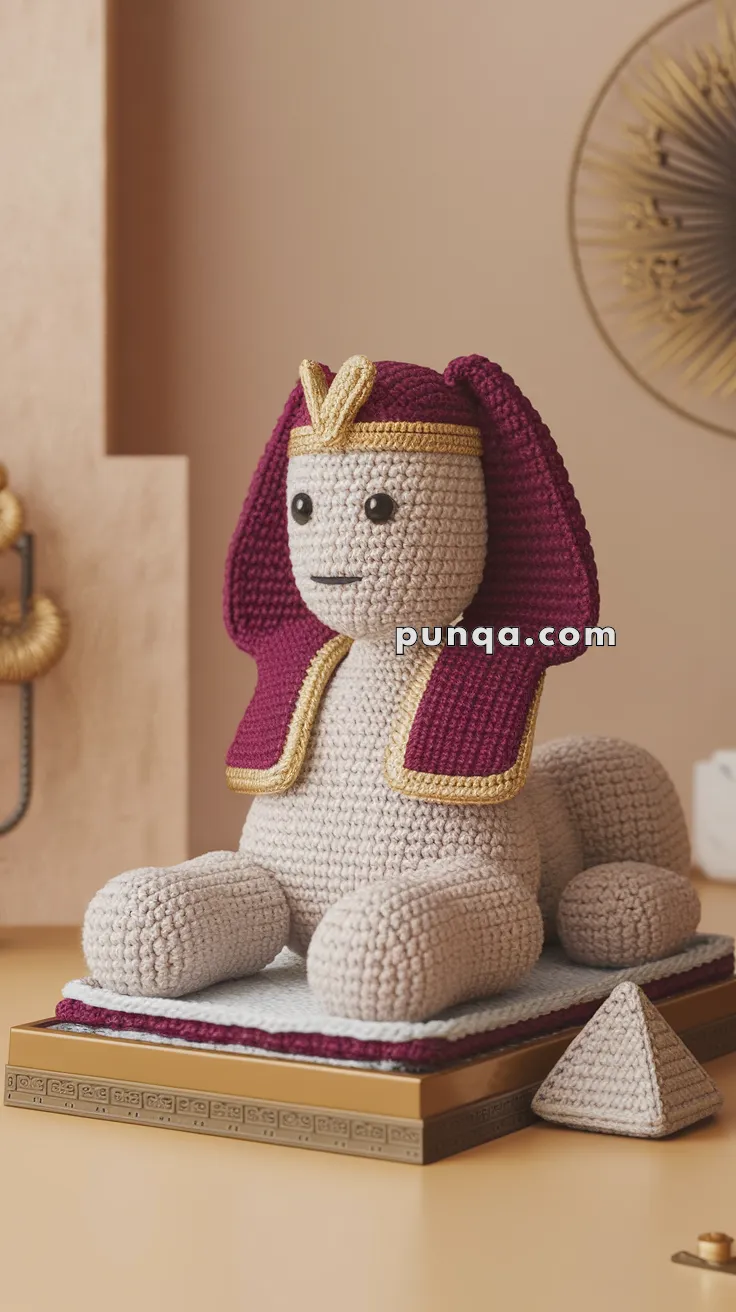
🦁 Amigurumi Sphinx of Giza – Free Crochet Pattern
Inspired by the legendary monument, this cute and majestic Sphinx amigurumi includes its human head, lion’s body, and a royal Egyptian headdress.
🧶 Skill Level
Intermediate
📏 Finished Size
Approx. 20–22 cm (8–9 inches) long
✂️ Materials Needed
-
Yarn (Worsted or DK) in:
-
Sand/Beige (body & head)
-
Dark burgundy (headdress)
-
Gold/yellow (trim)
-
Black (mouth detail)
-
-
2.5 mm or 3.0 mm crochet hook
-
8 mm safety eyes
-
Yarn needle
-
Stitch markers
-
Polyester stuffing
-
Optional: small cardboard base for shaping underside
🧵 Abbreviations (US Terms)
-
MR = magic ring
-
sc = single crochet
-
inc = increase
-
dec = decrease
-
sl st = slip stitch
-
ch = chain
-
FO = fasten off
-
BLO = back loop only
🗿 Head (Beige)
-
MR, 6 sc
-
inc x6 (12)
-
(sc, inc) x6 (18)
-
(2 sc, inc) x6 (24)
-
(3 sc, inc) x6 (30)
6–12. sc around (30) -
(3 sc, dec) x6 (24)
-
(2 sc, dec) x6 (18)
Insert safety eyes between Rnds 7–8, about 6–7 sts apart -
(sc, dec) x6 (12)
-
dec x6 (6)
FO and close
🧍 Upper Body (Beige)
-
MR, 6 sc
-
inc x6 (12)
-
(sc, inc) x6 (18)
4–9. sc around (18) -
(2 sc, inc) x6 (24)
11–15. sc around (24)
Stuff firmly. FO.
🦁 Hindquarters (Beige)
-
MR, 6 sc
-
inc x6 (12)
-
(sc, inc) x6 (18)
-
(2 sc, inc) x6 (24)
5–10. sc around (24) -
(2 sc, dec) x6 (18)
-
sc around (18)
-
(sc, dec) x6 (12)
-
dec x6 (6)
FO and close
🐾 Front Legs (Make 2 – Beige)
-
MR, 6 sc
-
inc x6 (12)
3–5. sc around (12) -
(2 sc, dec) x3 (9)
7–9. sc around (9)
FO, stuff lightly
🐾 Back Legs (Make 2 – Beige)
-
MR, 6 sc
-
inc x6 (12)
3–5. sc around (12) -
dec x6 (6)
-
sc around
FO, stuff lightly
👑 Egyptian Headdress (Dark Burgundy)
Panel A (left flap):
-
Ch 16
2–10. sc across (15)
Change to gold on last row -
sc across, FO and weave in
Panel B (right flap):
Repeat Panel A
Top band:
-
Ch enough to wrap around head circumference (~35 ch)
-
sc across (34), FO
Uraeus (snake emblem):
-
With gold, ch 10
-
sc in 2nd ch from hook, sc x8
-
Sl st back and forth to shape a curve
Sew onto center top of band
Assembly:
-
Sew side panels to each side of head
-
Sew band around forehead, covering flap edges
-
Attach Uraeus to center
😺 Facial Embroidery
-
Use black yarn to embroider a small mouth
-
Add small stitch lines above eyes for brows (optional)
📏 Base Pad (Optional for Display)
Make a flat square:
-
With beige, ch 26
2–26. sc across (25), ch 1, turn
Change colors at edges to add maroon/gold borders.
Optional: place on stiff cardboard for structure.
🧩 Assembly
-
Attach head to front of upper body
-
Attach hindquarters to back
-
Sew front legs to each side of front body
-
Attach back legs
-
Place figure on base pad
-
Add headdress securely to head
🎉 Done!
You’ve completed the Amigurumi Sphinx of Giza 🏛️
This magnificent creature will watch over your yarn kingdom for centuries to come!