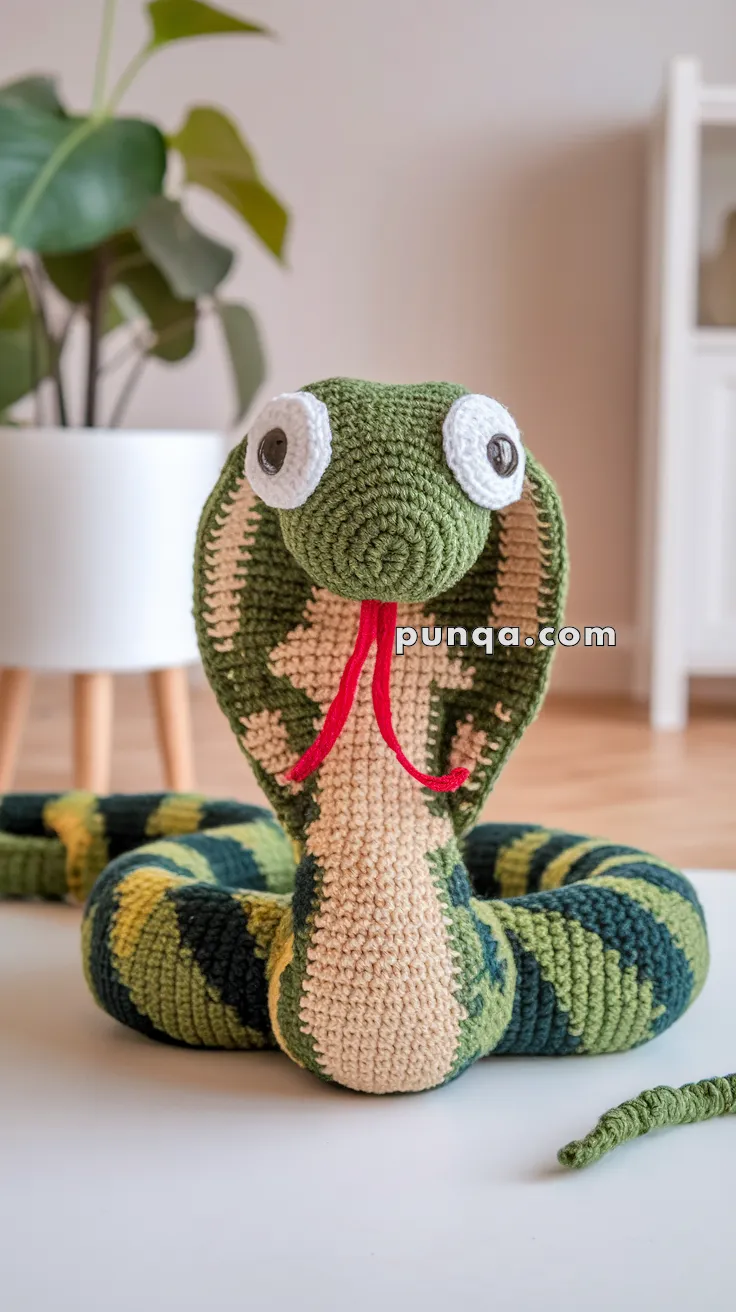
Slither into creativity with this Amigurumi Snake crochet pattern! 🐍✨ With its coiled body, playful tongue, and expressive eyes, this design captures the charm of these fascinating reptiles in yarn form. Whether you’re crafting for a nature-inspired décor piece, a fun gift, or simply love animal-themed amigurumi, this FREE pattern is a fantastic addition to your collection.
Designed for crocheters of all skill levels, this pattern allows for customization in body length, scale textures, and even tiny accessories like embroidered patterns or a miniature habitat to enhance its personality. Choose classic greens and browns for a realistic look or experiment with vibrant hues for a whimsical twist! Whether displayed as part of a wildlife setup or gifted to a fellow crochet enthusiast, this amigurumi snake is sure to impress.
Grab your hook, select your favorite yarn, and let’s bring this slithering wonder to life—one stitch at a time! 🧶✨
🐍 Amigurumi Snake Crochet Pattern
Slither into the world of amigurumi with this vibrant and playful snake design! Featuring a wide cobra-style hood, bold eyes, and a curled body, this coiled companion is perfect for adventurous crafters and kids who love reptiles.
✨ Skill Level
Intermediate – suited for crocheters comfortable with shaping, selective increases, color changes, and stuffing for pose control.
📏 Finished Size
Approx. 50–55 cm (20–22 in) long when uncoiled
(using worsted-weight yarn and a 3.5 mm hook)
🧶 Materials
Worsted-weight yarn
-
Olive Green (C1) – main body & hood
-
Dark Green (C2) – body color variation
-
Peach / Tan (C3) – belly & throat
-
White (C4) – eye whites
-
Black or Dark Brown (C5) – pupils
-
Red (C6) – tongue
Notions
-
3.5 mm crochet hook
-
Light polyfill stuffing
-
Yarn needle, scissors
-
Stitch markers
🧵 Abbreviations (US)
MR – Magic Ring
sc – Single Crochet
inc – Increase
dec – Decrease
ch – Chain
sl st – Slip Stitch
FO – Fasten Off
🧠 HEAD & FACE (Integrated – Start of Snake)
Begin with olive green (C1).
R1 – MR, 6 sc (6)
R2 – inc ×6 (12)
R3 – (1 sc, inc) ×6 (18)
R4 – (2 sc, inc) ×6 (24)
R5 – (3 sc, inc) ×6 (30)
R6–8 – sc around (30)
👁 EYES (Flat Appliqué – Make 2)
Eye White (C4)
R1 – MR, 6 sc
R2 – inc ×6 (12)
R3 – sc around (12)
FO
Pupil (C5)
MR, 4 sc, FO
Sew pupil to white.
Attach eyes between R7–8, very high on the face, spaced wide apart and angled slightly outward.
🌀 COBRA HOOD (Shaped, Sloped & Tall)
Hood is formed by side-only increases, creating a narrow top and wider lower hood.
R9 – sc around (30)
R10 – sc 6, inc ×6, sc 18 (36)
R11 – sc around (36)
R12 – sc 8, inc ×6, sc 22 (42)
R13 – sc around (42)
R14 – sc 10, inc ×4, sc 28 (46)
R15 – sc around (46)
Lightly stuff only the hood edges.
Do not overstuff—the hood should curve naturally and slope downward.
🩶 THROAT & BELLY (Wide Central Panel)
Begin belly after hood shaping is complete.
Switch to peach (C3) for the center section only.
R16 – sc 18 (green), sc 10 (peach), sc 18 (green) (46)
R17–22 – repeat same color placement each round
This creates a wide, centered belly panel that begins below the hood, matching the photo.
🟢 BODY (Thick, Even, Organic Coloring)
Continue body in the round.
R23–40 – sc around (46)
Alternate between olive (C1) and dark green (C2) every 2–5 rounds, changing irregularly.
Avoid repeating patterns—color changes should feel soft and organic.
Stuff firmly as you go.
Pose body into a loose coil while stuffing.
🐍 TAPERING BODY & TAIL
R41 – (7 sc, dec) ×6 (48)
R42 – sc around (48)
R43 – (6 sc, dec) ×6 (42)
R44 – sc around (42)
R45 – (5 sc, dec) ×6 (36)
R46 – sc around (36)
R47 – (4 sc, dec) ×6 (30)
R48 – (3 sc, dec) ×6 (24)
R49 – (2 sc, dec) ×6 (18)
R50 – (sc, dec) ×6 (12)
R51 – dec ×6 (6)
FO and close.
👅 TONGUE (Red)
Ch 10
Sl st in 2nd ch, sl st 3
Ch 3, sl st back to split
Ch 3, sl st back to base
FO
Sew inside the mouth opening.
🪡 FINAL SHAPING & FINISHING
-
Gently flatten hood edges with fingers
-
Adjust coil shape before final stuffing closes
-
Ensure hood slopes downward at the sides
-
Eyes should sit high and calm, not aggressive
-
Steam lightly if desired (do not touch yarn directly)
🌿 Finished Cobra Snake
Your cobra is complete 🐍
With its tall sculpted hood, wide-set eyes, soft peach belly, and thick coiled body, this amigurumi snake feels calm, grounded, and beautifully handmade—an eye-catching yet friendly centerpiece.