Welcome to the dynamic and energetic world of amigurumi! 🛹✨ Today, I’m excited to share my free crochet pattern for a Skateboarder—a stylish and adventurous figure perfect for capturing the thrill of the streets, skateparks, and freestyle tricks! 🌆 Whether you love crafting character dolls, enjoy making urban-inspired designs, or simply want to stitch up a cool and expressive skater, this pattern will guide you through creating a detailed skateboarder with their board, outfit, and fearless attitude! 🤙
This design embraces movement, bold colors, and fun accessories to bring the skateboarding spirit to life! 🧶🏞️ I’ve carefully outlined each step to ensure your amigurumi skateboarder turns out just right—ready to roll into your collection or become a treasured handmade gift! 🎁 So grab your hooks, pick out vibrant streetwear shades, and let’s stitch up a skater who’s ready to ride! ✨
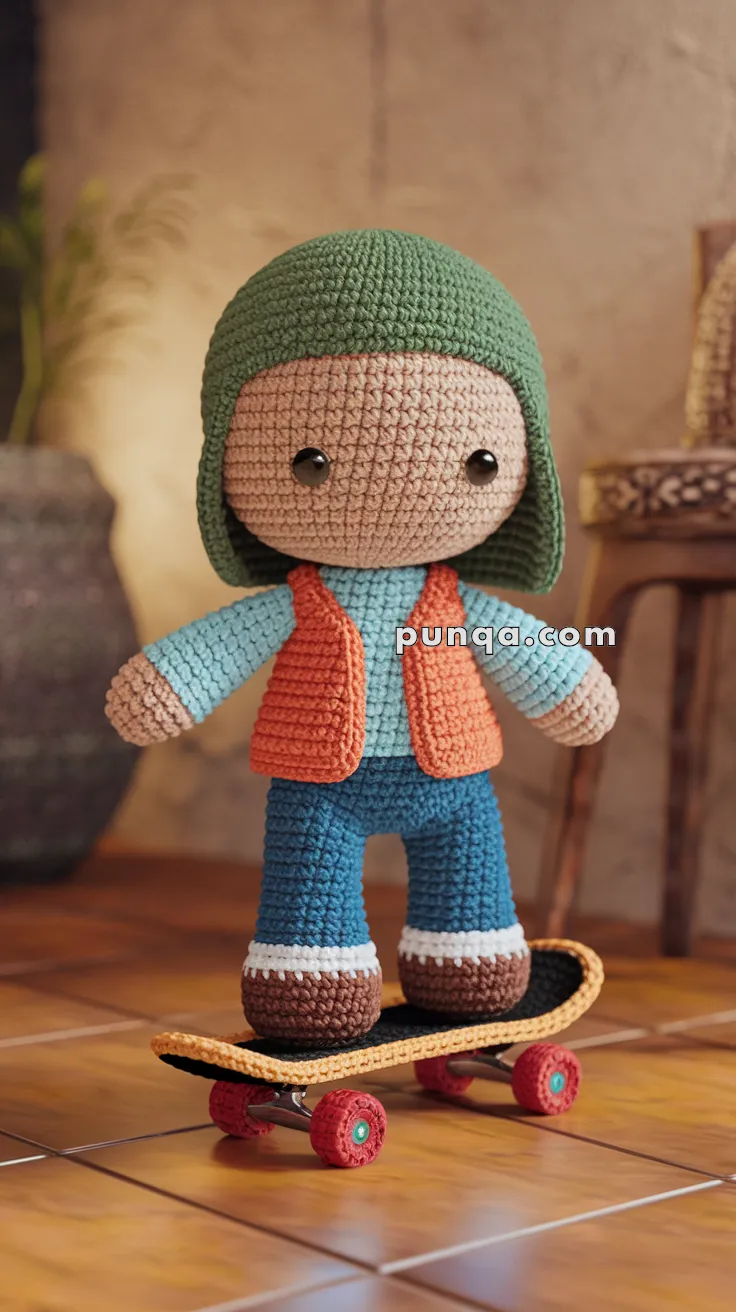
🛹 Amigurumi Skateboarder Pattern
This cool little character is ready to roll! With a crocheted helmet, vest, jeans, and a handmade skateboard, it’s a fun and colorful amigurumi for intermediate crafters.
🧵 Skill Level
Intermediate – involves color changes, sewing parts, and accessory construction.
📏 Finished Size
Approx. 22 cm (8.5 inches) tall when using DK or worsted-weight yarn and a 2.5–3.0 mm hook.
✂️ Materials Needed
-
DK/worsted yarn in:
-
2.5–3.0 mm crochet hook
-
6 mm safety eyes
-
Stitch marker
-
Fiberfill stuffing
-
Yarn needle
-
Embroidery thread (optional for details)
🧶 Abbreviations (US terms)
-
MR – Magic ring
-
sc – Single crochet
-
inc – Increase
-
dec – Decrease
-
ch – Chain
-
sl st – Slip stitch
-
BLO – Back loop only
-
FLO – Front loop only
-
FO – Fasten off
👦 Head
With skin tone yarn:
-
MR, 6 sc
-
inc x6 (12)
-
(sc, inc) x6 (18)
-
(2 sc, inc) x6 (24)
-
(3 sc, inc) x6 (30)
-
(4 sc, inc) x6 (36)
7–12. sc around (36) -
(4 sc, dec) x6 (30)
-
(3 sc, dec) x6 (24)
Insert safety eyes between rounds 9–10, approx. 6 stitches apart -
(2 sc, dec) x6 (18)
-
(sc, dec) x6 (12)
Stuff firmly -
dec x6 (6), FO
🧢 Helmet
With green yarn:
-
MR, 6 sc
-
inc x6 (12)
-
(sc, inc) x6 (18)
-
(2 sc, inc) x6 (24)
-
(3 sc, inc) x6 (30)
-
(4 sc, inc) x6 (36)
7–10. sc around (36)
FO and sew to top of head after head is attached.
🧍 Body (Shirt + Pants)
Start with light blue:
-
MR, 6 sc
-
inc x6 (12)
-
(sc, inc) x6 (18)
-
(2 sc, inc) x6 (24)
5–7. sc around
Change to blue (pants):
8–13. sc around (24) -
(2 sc, dec) x6 (18)
-
(sc, dec) x6 (12)
Stuff well -
dec x6 (6), FO
🦵 Legs (Make 2)
Start with brown (shoes):
-
MR, 6 sc
-
inc x6 (12)
-
(1 sc, inc) x6 (18)
-
sc around
Change to white (sock): -
sc around
Change to blue (pants):
6–10. sc around
Stuff and sew to base of body.
💪 Arms (Make 2)
Start with skin tone:
-
MR, 6 sc
-
inc x6 (12)
3–4. sc around
Change to light blue (shirt):
5–9. sc around
Stuff lightly
FO and sew to each side of body.
🦺 Vest (Orange)
Make 2 flat panels:
Back Panel
-
ch 9
-
sc in each ch (8)
3–7. sc rows
FO
Front Panels (Make 2)
-
ch 5
-
sc in each ch (4)
3–7. sc rows
FO and sew onto body, slightly overlapping back panel to sides. Leave arms free.
🛹 Skateboard (Oval Deck)
With yellow yarn:
-
ch 16
-
sc in 2nd ch from hook, sc across, 3 sc in last, rotate to bottom, sc across other side of chain, 3 sc in end (34)
-
sc around, inc at rounded ends (40)
-
sc around
FO and flatten
Wheels
Make 4 with red yarn:
-
MR, 6 sc
-
sc around (6)
FO and sew to base, two on each end
Add turquoise circle in center for bolts
🧷 Assembly
-
Sew head to body
-
Attach arms to shoulders
-
Attach legs under body, spaced evenly
-
Attach helmet and vest
-
Place figure on top of skateboard and stitch feet lightly for balance
-
Embroider smile or brows if desired
🎉 Done! Your Amigurumi Skateboarder is ready to roll into fun!
Don’t forget to tag your creation with #PunqaAmigurumi if you share it online!