Welcome to the ninja world of anime amigurumi! 🌀✨ Today, I’m excited to share my free crochet pattern for Amigurumi Sasuke—the brooding Uchiha prodigy in perfectly pocket-sized form! Whether you’re a Naruto superfan, love crafting complex characters, or simply want to add some shinobi edge to your collection, this pattern will guide you through stitching your very own avenger with his piercing Sharingan eyes, flowing blue robe, and that signature “I work alone” attitude.
This design captures Sasuke’s intensity through sharp details and dynamic shaping! 🧶💙 I’ve carefully outlined each step to help you create his spiky raven hair, uchiha crest headband, and optional chidori lightning effect. Perfect for display, cosplay accessories, or keeping watch over your yarn stash with silent superiority! So grab your hooks, pick out deep blues and bold purples, and let’s crochet a ninja who’s equal parts powerful and tragic! ✨
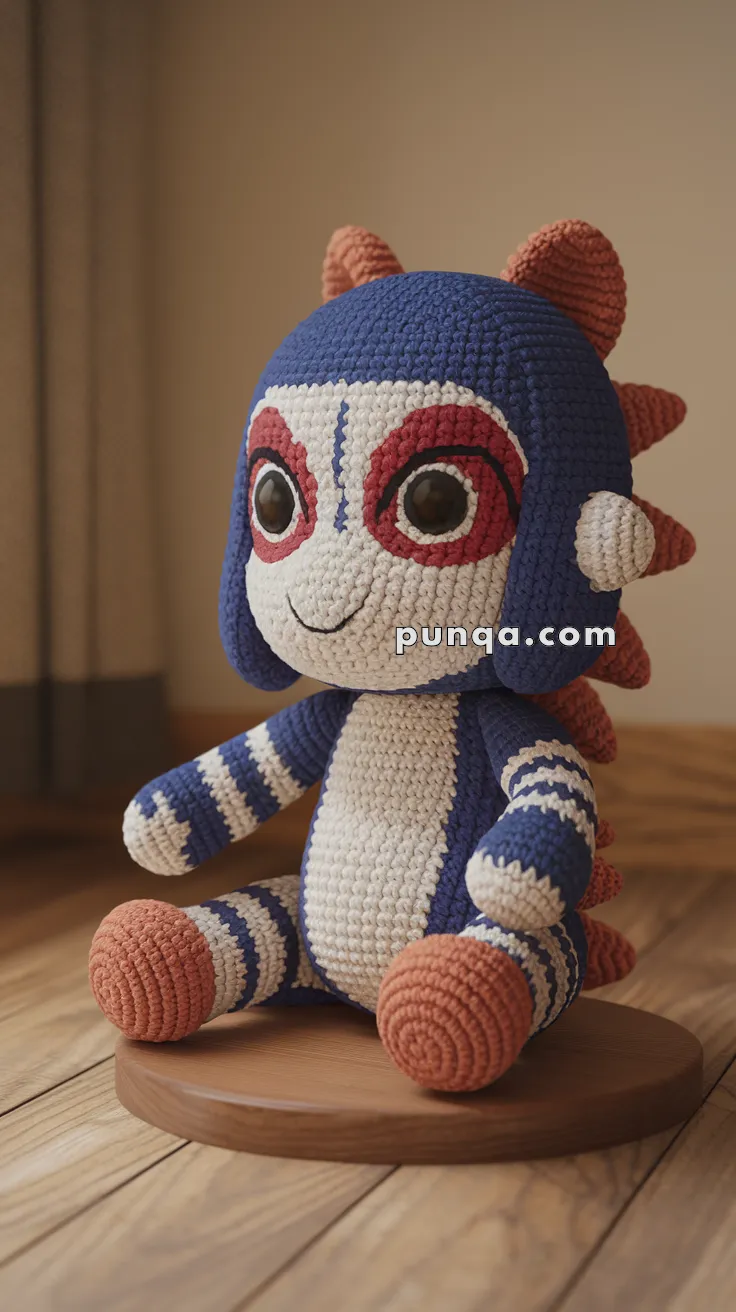
🌀 Amigurumi Sasuke-Inspired Plush Crochet Pattern
Unleash ninja vibes with this adorable chibi-style Sasuke-inspired amigurumi! With expressive anime-style eyes, iconic blue-and-white outfit, and spiked back details, this plush makes the perfect collectible for any fan of ninja legends and kawaii crafts. 🧵⚡
✨ Skill Level
Intermediate – involves color changes, shaping, embroidery for the face, and detailed assembly.
📏 Finished Size
Approx. 25–28 cm (10–11 inches) tall using worsted-weight yarn and a 3.5 mm hook.
🧶 Materials
-
Worsted-weight yarn:
-
Dark blue – main body, helmet, stripes
-
White – face, torso, stripes, eye accents
-
Rust red – shoes, hands, back spikes, eye patches
-
Black – eye details, mouth embroidery
-
-
3.5 mm crochet hook
-
10–12 mm safety eyes (or black felt circles)
-
Polyfill stuffing
-
Tapestry needle, stitch marker, scissors
🪡 Abbreviations (US Terms)
-
MR = Magic Ring
-
sc = single crochet
-
inc = increase (2 sc in one stitch)
-
dec = decrease (sc 2 together)
-
sl st = slip stitch
-
BLO = back loop only
-
FO = fasten off
🧍 Body (Start from bottom, dark blue)
-
MR, 6 sc [6]
-
inc ×6 [12]
-
(1 sc, inc) ×6 [18]
-
(2 sc, inc) ×6 [24]
-
(3 sc, inc) ×6 [30]
6–20. sc around [30]
Change to white:
21–26. sc around [30]
Stuff body firmly.
-
(3 sc, dec) ×6 [24]
-
(2 sc, dec) ×6 [18]
-
(1 sc, dec) ×6 [12] → leave open for head join.
FO.
🧠 Head (White base)
-
MR, 6 sc [6]
-
inc ×6 [12]
-
(1 sc, inc) ×6 [18]
-
(2 sc, inc) ×6 [24]
-
(3 sc, inc) ×6 [30]
-
(4 sc, inc) ×6 [36]
7–15. sc around [36] -
(4 sc, dec) ×6 [30]
-
(3 sc, dec) ×6 [24]
-
(2 sc, dec) ×6 [18]
-
(1 sc, dec) ×6 [12]
-
dec ×6 [6]
FO, weave end. Stuff firmly.
Sew head to body.
💪 Arms (Make 2 – striped)
Start with rust red (hands):
-
MR, 6 sc [6]
-
(1 sc, inc) ×3 [9]
-
sc around [9]
Switch to white:
4. sc around [9]
Switch to dark blue:
5. sc around [9]
Switch to white:
6. sc around [9]
Switch to dark blue:
7. sc around [9]
FO, stuff lightly. Sew to torso sides.
🦵 Legs (Make 2 – striped)
Start with rust red (feet):
-
MR, 6 sc [6]
-
inc ×6 [12]
-
sc around [12]
Switch to dark blue:
4. sc around [12]
Switch to white:
5. sc around [12]
Switch to dark blue:
6. sc around [12]
Switch to white:
7. sc around [12]
FO, stuff firmly. Sew to body bottom.
🌀 Helmet / Headpiece (Dark blue)
-
MR, 6 sc [6]
-
inc ×6 [12]
-
(1 sc, inc) ×6 [18]
-
(2 sc, inc) ×6 [24]
-
(3 sc, inc) ×6 [30]
-
(4 sc, inc) ×6 [36]
7–11. sc around [36]
FO. Place over head so the face remains uncovered. Let sides hang naturally like flaps. Sew lightly in place.
🔺 Spikes (Make 6–8, rust red)
-
MR, 5 sc [5]
-
(1 sc, inc) ×2 + 1 sc [7]
3–5. sc around [7]
Stuff lightly. FO.
Sew in a row from the top of helmet down the back.
👁 Eyes & Face Embroidery
-
Place safety eyes between rounds 9–10 of head.
-
Crochet or embroider rust red oval eye patches around each eye.
-
Embroider a thin blue vertical line down the forehead.
-
Add black embroidery for eye detail, brows, and lashes.
-
Use black thread to stitch a small curved smile.
✂️ Assembly Order
-
Sew head securely to body.
-
Attach arms and legs symmetrically.
-
Add helmet piece on top of head.
-
Sew spikes down the back.
-
Embroider final face details.
🌟 Final Thoughts
Your Ninja-Inspired Amigurumi Plush is complete! With its bold stripes, spiky back, and expressive anime eyes, this little warrior makes a fantastic handmade gift for fans of anime, cosplay, or unique collectibles.