🧪 Amigurumi Rick & Morty Crochet Pattern
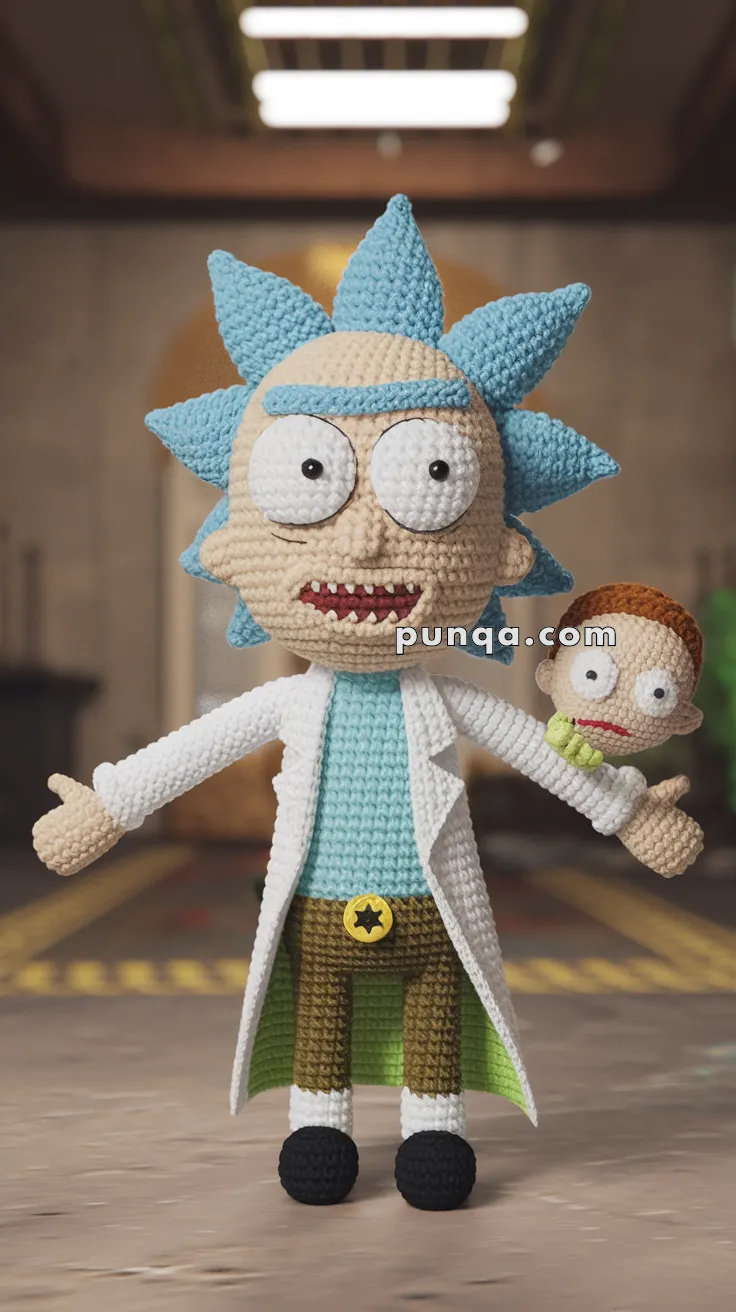
Bring the mad scientist and his nervous sidekick to life with this Amigurumi Rick & Morty crochet pattern. This design carefully matches Rick’s spiky blue hair, oversized expressive eyes, lab coat, belt badge, and Morty’s small head companion pose sitting on Rick’s arm.
Perfect for fans, collectors, or display décor, this pattern focuses on proportions, facial expressions, and outfit details for a true character likeness.
✨ Skill Level
Intermediate to Advanced
Includes shaping, clothing construction, facial embroidery, and multi-part assembly.
📏 Finished Size
Rick: approx. 28–30 cm (11–12 in) tall
Morty head: approx. 7–8 cm (3 in)
(using DK yarn with 3.0–3.25 mm hook)
🧶 Materials
Yarn (DK / light worsted):
-
Skin tone (beige/peach)
-
Light blue (hair + shirt + eyebrow)
-
White (eyes + lab coat)
-
Brown (pants + Morty hair)
-
Green (coat lining)
-
Light green (Morty collar)
-
Black (shoes + pupils + mouth outline)
-
Yellow (belt buckle)
-
Red (mouth interior)
Notions:
🧵 Abbreviations (US)
MR = magic ring
sc = single crochet
inc = increase
dec = decrease
sl st = slip stitch
ch = chain
FLO = front loop only
BLO = back loop only
🧠 RICK DOLL
Head (skin tone)
Rnd 1: MR 6
Rnd 2: inc x6 (12)
Rnd 3: (sc, inc) x6 (18)
Rnd 4: (2 sc, inc) x6 (24)
Rnd 5: (3 sc, inc) x6 (30)
Rnd 6: (4 sc, inc) x6 (36)
Rnd 7: (5 sc, inc) x6 (42)
Rnd 8–14: sc 42
Insert safety eyes between Rnds 9–10, very wide apart.
Rnd 15: (5 sc, dec) x6 (36)
Rnd 16: (4 sc, dec) x6 (30)
Rnd 17: (3 sc, dec) x6 (24)
Stuff firmly
Rnd 18: (2 sc, dec) x6 (18)
Rnd 19: (sc, dec) x6 (12)
Rnd 20: dec x6 (6)
Fasten off.
Eyes (make 2 – white)
Rnd 1: MR 6
Rnd 2: inc x6 (12)
Rnd 3: (sc, inc) x6 (18)
Fasten off leaving tail.
Sew onto face around safety eyes.
Embroider thin black outline and small black pupils.
Nose (small bump)
With skin yarn:
Insert hook between eyes, pull up loop, ch 2, sl st in same hole.
Creates tiny nose ridge.
Eyebrow (light blue – curved)
Ch 14
Row 1: sc 13
Row 2: (sc 3, inc) x3, sc 1
Fasten off.
Sew above eyes with slight curve.
Mouth (structured)
With black yarn embroider a wide oval outline.
Fill interior with red yarn.
Add 6–7 vertical white stitches for teeth.
Matches the photo’s open mouth shape.
Hair Spikes (make 7 – light blue, flat triangles)
Each spike:
Ch 2
Row 1: sc 2
Row 2: inc, sc, inc (4)
Row 3: inc, sc 2, inc (6)
Row 4: inc, sc 4, inc (8)
Row 5: sc 8
Fasten off.
Sew evenly around back of head forming starburst.
Body (top-down)
Start light blue (shirt)
Rnd 1: MR 6
Rnd 2: inc x6 (12)
Rnd 3: (sc, inc) x6 (18)
Rnd 4: (2 sc, inc) x6 (24)
Rnd 5–10: sc 24
Switch to brown (pants)
Rnd 11–15: sc 24
Stuff lightly.
Embroider yellow belt buckle circle with black star.
Legs (make 2)
Brown:
Rnd 1: MR 6
Rnd 2: inc x6 (12)
Rnd 3–8: sc 12
White (sock):
Rnd 9–10: sc 12
Black (shoe):
Rnd 11: (sc, inc) x6 (18)
Rnd 12–14: sc 18
Stuff and flatten, sew closed.
Shoes are rounded and wider than leg.
Arms (make 2)
Skin tone:
Rnd 1: MR 6
Rnd 2: inc x6 (12)
Rnd 3–5: sc 12
Switch to white (sleeve):
Rnd 6–18: sc 12
Stuff lightly and close.
Morty attaches to left arm.
🧥 LAB COAT (3D garment)
Worked separately.
Back Panel (white)
Ch 18
Rows 1–16: sc across, turn
Front Panels (make 2)
Ch 9
Rows 1–16: sc across, turn
Lining (green)
Ch 16
Rows 1–14: sc across
Sew lining inside coat so green shows at opening and bottom.
Lapels (white)
Ch 6
Row 1: sc 5
Row 2: dec, sc 3
Row 3: dec, sc 2
Sew to front edges.
Attach coat to shoulders and sides of body.
🧠 MORTY HEAD
Morty Head (skin tone, oval)
Rnd 1: MR 6
Rnd 2: inc x6 (12)
Rnd 3: (sc, inc) x6 (18)
Rnd 4: (2 sc, inc) x6 (24)
Rnd 5–6: sc 24
Insert eyes closer together than Rick’s.
Rnd 7: (2 sc, dec) x6 (18)
Rnd 8: (sc, dec) x6 (12)
Stuff
Rnd 9: dec x6 (6)
Fasten off.
Morty Hair (brown cap)
Attach brown yarn at back:
Rnd 1–2: sc 24
Fasten off.
Morty Mouth
Tiny red straight stitch showing worried expression.
Morty Collar (light green)
Ch 18
Row 1: sc 17
Wrap and sew around neck.
Attach Morty head to Rick’s left arm.
🧩 Assembly
-
Sew head to body
-
Attach legs
-
Attach arms
-
Sew hair spikes
-
Attach eyes and eyebrow
-
Add mouth and nose
-
Put on lab coat and lining
-
Attach Morty head to arm
-
Shape coat outward at bottom
✨ Finishing Touches
-
Shape hair spikes outward
-
Curve eyebrow slightly
-
Steam lightly for crisp coat edges
-
Pose arms open like reference
-
Ensure Morty head tilts slightly outward
❤️ Final Notes
This photo-accurate Rick & Morty Amigurumi captures the playful proportions and iconic details from the reference image — from Rick’s wild hair and lab coat to Morty’s anxious mini companion pose. A perfect collectible for fans and a fun challenge for crocheters who love character dolls.
Happy crocheting and wubba-lubba-dub-dub! 🧶🧪