Creating an amigurumi rattlesnake is a delightful journey into the world of yarn and creativity! 🧶🐍 There’s something so satisfying about transforming a simple skein of yarn into a charmingly coiled snake with a rattle that actually makes noise. The appeal lies in the tactile nature of the craft, as well as in the ability to infuse personality into each piece. The rattlesnake, with its distinctive patterns and iconic rattle, offers a fun challenge for amigurumi enthusiasts, blending realism with whimsy. The process is a joyful dance of stitches, where each loop and turn of the hook brings the creature to life.
The journey begins with choosing the perfect yarn colors to mimic the earthy tones of a rattlesnake, from sandy browns to deep greens and blacks. 🐍 Once the materials are ready, I dive into the pattern, which unfolds like a story—starting with a magic ring for the snake’s head and working my way through the body with simple increases and decreases. The exhilarating part is adding the rattle, either with a small container filled with beans or beads, to give it that authentic touch. Each stitch is an opportunity to play, enhance skills, and watch as a slithery friend emerges from the yarn right in my hands. 😊
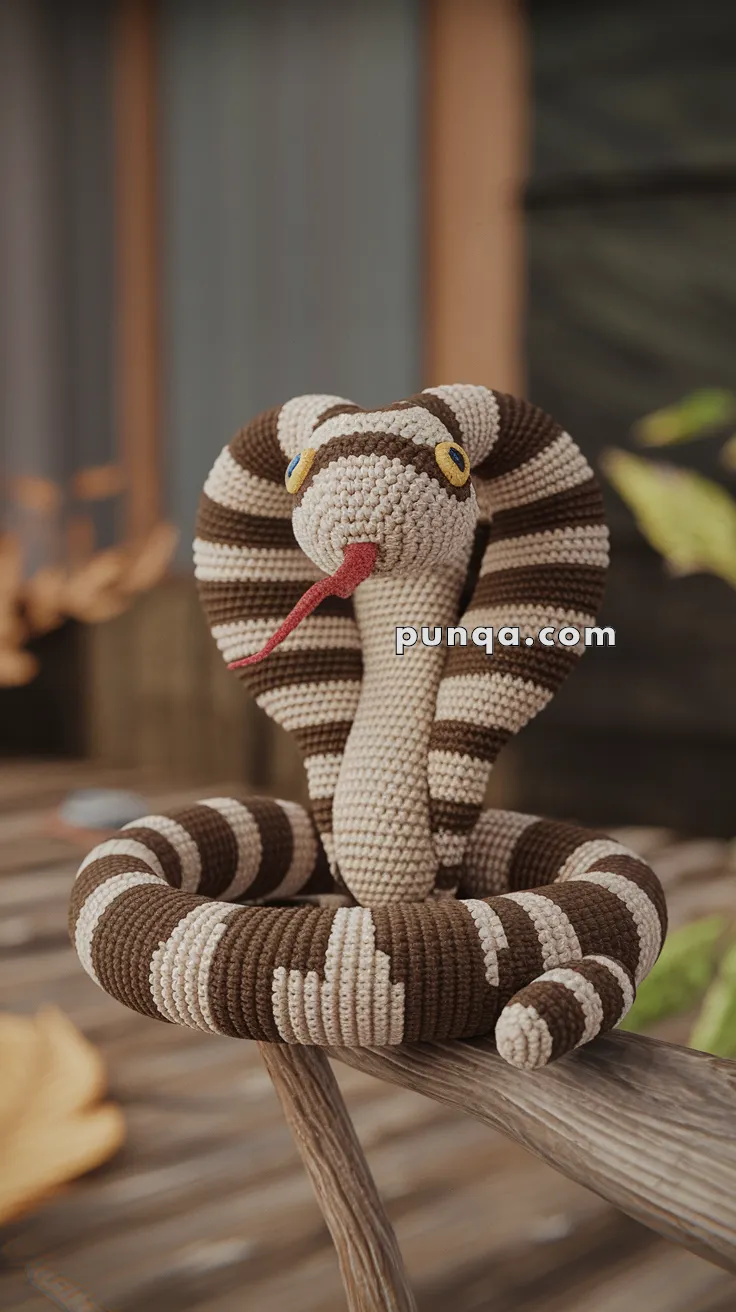
🐍 Amigurumi Rattlesnake Crochet Pattern
Bring some desert charm to your crochet collection with this adorable yet slightly sinister Amigurumi Rattlesnake! With striking stripes, a proud hood, and a flickering red tongue, this snake is ready to coil into your Halloween or animal-themed decor. Perfect for intermediate crafters who enjoy shaping and color changes.
🧵 Skill Level
Intermediate
📏 Finished Size
Approx. 10–12 inches (25–30 cm) long when coiled
🧶 Materials
-
Worsted weight yarn in:
-
Dark brown (main body stripes)
-
Beige or cream (contrasting stripes and underside)
-
Red (tongue)
-
Yellow and blue (eyes)
-
-
2.5–3.5 mm crochet hook (depending on your tension)
-
Safety eyes (or crochet felt eyes)
-
Fiberfill stuffing
-
Stitch markers
-
Tapestry needle
-
Pipe cleaners or flexible wire (optional, for shaping the body or hood)
✨ Abbreviations (US Terms)
-
sc – single crochet
-
inc – increase
-
dec – decrease
-
ch – chain
-
sl st – slip stitch
-
MR – magic ring
-
BLO – back loop only
-
FLO – front loop only
-
FO – fasten off
🐍 Head (Start with Beige)
-
MR, 6 sc
-
inc x6 (12)
-
(1 sc, inc) x6 (18)
-
(2 sc, inc) x6 (24)
5–10. sc around (24) -
(3 sc, inc) x6 (30)
12–16. sc around -
(3 sc, dec) x6 (24)
-
(2 sc, dec) x6 (18)
– Place safety eyes between R10–R11, about 5 sts apart
– Lightly stuff and continue
🧠 Hood Flare (Make 2 pieces – One on each side of the head)
Attach yarn to side of head around eye area, work in FLO:
-
sc 8 around outer curve
-
ch 1, turn, (1 sc, inc) repeat
-
ch 1, turn, sc across
-
FO and repeat for opposite side
– Embroider or surface crochet dark brown stripes
– Use a pipe cleaner if needed to shape
🧵 Body (Stripe Pattern Alternates Every 4 Rows)
Continue from head or join new yarn at neck base:
-
(3 sc, inc) x6 (30)
2–5. sc around with dark brown
6–9. switch to beige, sc around
10–13. switch to dark brown, sc around
– Repeat until desired length (~40–50 rows)
– Taper for tail:
Tail Decrease:
14. (3 sc, dec) x6 (24)
15–17. sc around
18. (2 sc, dec) x6 (18)
19. (1 sc, dec) x6 (12)
20. dec x6 (6)
– FO and close
🔔 Rattle (Optional)
Use beige yarn:
-
MR, 6 sc
-
inc x6 (12)
-
(1 sc, inc) x6 (18)
4–5. sc around -
(1 sc, dec) x6 (12)
-
dec x6 (6)
– FO and sew onto tail tip
😛 Tongue (Red)
-
ch 7
-
sl st in 2nd ch from hook, sc in next 5
-
ch 4, sl st back to center
– FO and stitch under center of mouth
👀 Eyes (Yellow/Blue Crochet Eyes – Optional)
Iris: MR, 6 sc with yellow
Pupil: Add blue French knot or 6mm safety eye
– Sew onto face if not using safety eyes
🧷 Assembly
-
Sew hood flaps flat to sides of head
-
Shape the coiled body and tack lightly with yarn
-
Attach rattle and tongue
-
Embroider nostrils, details if desired
-
Add blush or shading with fabric pencil
✨ Final Touches
-
Add wire inside body if you want to pose the coils
-
Stitch the mouth or add fangs for an extra spooky vibe
-
Display on a wooden base, tree branch, or beside your amigurumi adventurer