Welcome to the festive and whimsical world of amigurumi! 🎃🐱 Today, I’m excited to share my free crochet pattern for an Amigurumi Pumpkin Cat—a playful and seasonal creation perfect for Halloween lovers, autumn décor enthusiasts, or anyone who enjoys crafting adorable and expressive plush designs! 🧶 Whether you love stitching up quirky characters, experimenting with textured pumpkin details, or simply want to add a mischievous pumpkin cat to your handmade lineup, this pattern will guide you through crafting a beautifully sculpted plush with a round pumpkin body, tiny ears, and a touch of spooky charm! 🍂
This design embraces vibrant oranges, deep greens, and intricate shaping to bring a fun and festive presence to your crochet projects! 🧶✨ I’ve carefully outlined each step to ensure your Amigurumi Pumpkin Cat turns out just right—ready to brighten up your collection or become a treasured handmade gift! 🎁 So grab your hooks, pick out autumn-inspired hues, and let’s stitch up a delightful pumpkin cat! 🎃🐱
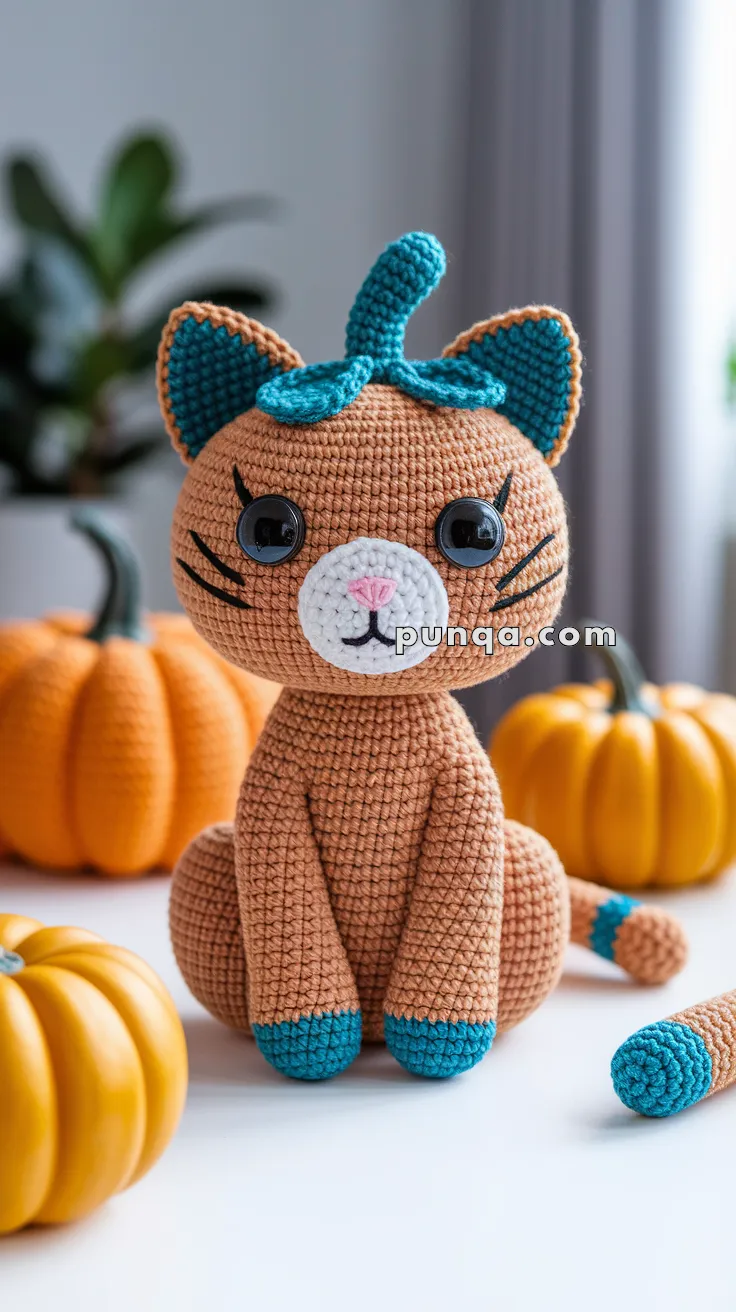
🎃 Amigurumi Pumpkin Cat – FREE Crochet Pattern
Add a sprinkle of autumn magic to your amigurumi collection with this whimsical pumpkin-inspired cat! 🧶🧡 With bright teal accents, an adorable curled stem, and pumpkin patch charm, this cozy kitty makes the perfect fall-time décor or Halloween companion. Great for intermediate crafters who love character-rich plushies.
✨ Skill Level
Intermediate – Involves shaping, color changes, facial embroidery, and assembly.
📏 Finished Size
Approx. 8–10 inches (20–25 cm) tall using DK or worsted weight yarn and a 2.5–3.5 mm hook.
🧶 Materials
-
DK or worsted weight yarn:
-
Color A: Pumpkin Orange (main body)
-
Color B: Teal (paws, inner ears, stem, tail tip)
-
Color C: White (snout)
-
Color D: Pink (nose)
-
Color E: Black (whiskers, mouth)
-
-
Crochet hook: 2.5–3.5 mm
-
Safety eyes (12 mm)
-
Tapestry needle
-
Stitch markers
-
Polyfill stuffing
🧵 Abbreviations (US Terms)
MR – Magic Ring
sc – Single Crochet
inc – Increase
dec – Decrease
ch – Chain
sl st – Slip Stitch
FO – Fasten Off
🐱 Head
With Color A:
-
MR, 6 sc (6)
-
inc x6 (12)
-
(1 sc, inc) x6 (18)
-
(2 sc, inc) x6 (24)
-
(3 sc, inc) x6 (30)
-
(4 sc, inc) x6 (36)
7–14. sc around (36) -
(4 sc, dec) x6 (30)
-
(3 sc, dec) x6 (24)
-
(2 sc, dec) x6 (18)
Insert safety eyes between Rounds 10–11, about 8 sts apart.
Stuff firmly. -
(1 sc, dec) x6 (12)
-
dec x6 (6)
FO and weave end to close.
🐾 Body
With Color A:
-
MR, 6 sc (6)
-
inc x6 (12)
-
(1 sc, inc) x6 (18)
-
(2 sc, inc) x6 (24)
-
(3 sc, inc) x6 (30)
6–15. sc around (30) -
(3 sc, dec) x6 (24)
17–19. sc around (24) -
(2 sc, dec) x6 (18)
-
sc around (18)
Stuff firmly. FO, leave tail to sew to head.
🐾 Front Legs (Make 2)
Start with Color B:
-
MR, 6 sc (6)
-
inc x6 (12)
-
sc around (12)
Change to Color A:
4–10. sc around (12)
Stuff lightly. FO, flatten top and sew to front base of body.
🐾 Back Legs (Make 2)
Repeat front leg steps, but make legs 1 round longer before sewing.
Attach to sides toward the back of the body.
🐱 Ears (Make 2)
With Color A:
-
MR, 4 sc (4)
-
(1 sc, inc) x2 (6)
-
(2 sc, inc) x2 (8)
-
sc around (8)
Switch to Color B for inner ear (optional) -
sc around (8)
FO, flatten and sew to top sides of the head.
🌀 Tail
Start with Color B:
-
MR, 6 sc (6)
-
sc around (6)
Switch to Color A:
3–14. sc around (6)
Stuff lightly as you go. FO and sew to back of body, curling tip slightly upward.
🌿 Stem & Leaf Tuft
Stem (Color B):
-
MR, 5 sc (5)
2–5. sc around (5)
FO, sew to center top of head.
Leaf Curl (Color B):
ch 15, 2 sc in each ch across (28), FO and attach next to stem for a curly leaf effect.
🐱 Face Details
-
Snout: With Color C
-
MR, 6 sc
-
inc x6 (12)
FO and sew to face just below eyes.
-
-
Nose & Mouth:
-
Embroider pink triangle nose with Color D
-
Use Color E to stitch a simple “W” mouth and three whiskers on each side.
-
💡 Customization Ideas
-
Add a pumpkin vine around the neck as a collar
-
Sew on tiny felt pumpkin leaves
-
Use safety eyes with glitter backing for extra personality!
Celebrate the cozy season with this pumpkin kitty that’s cute enough to cuddle and festive enough for your fall display! 🧶🐾