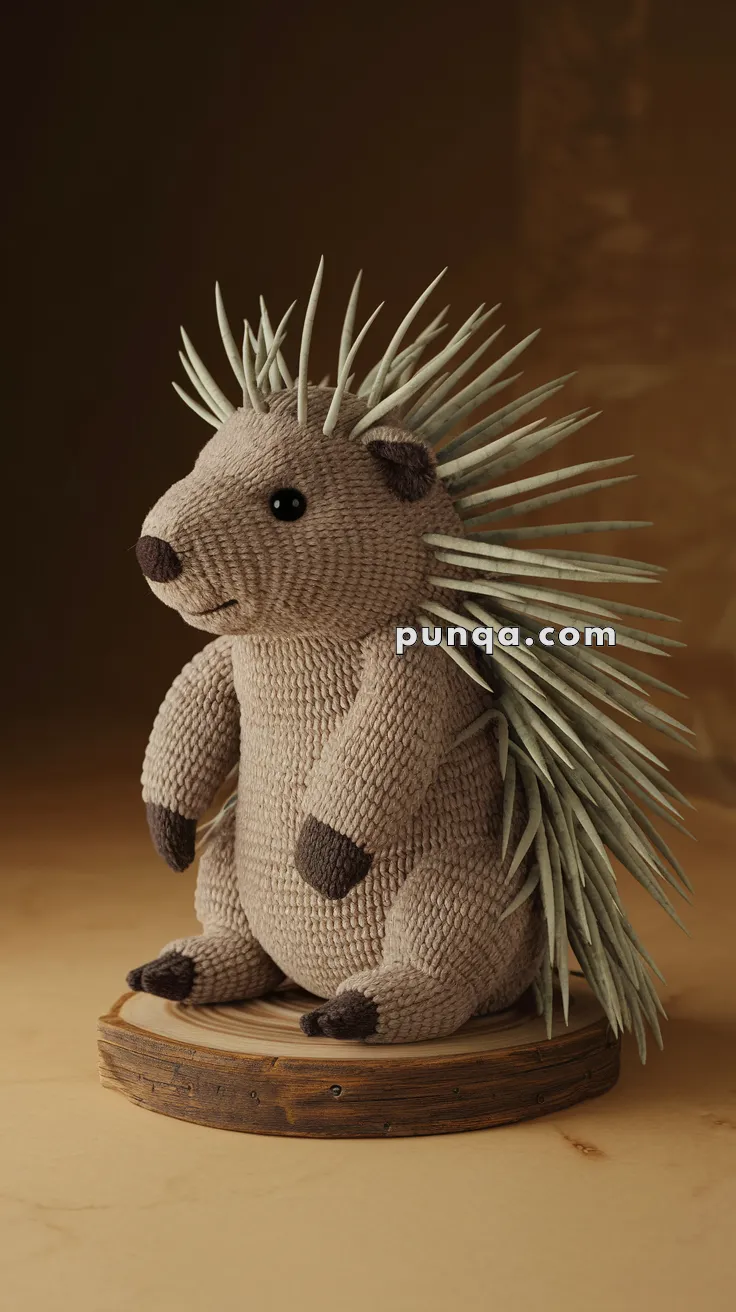
Meet the most adorable woodland companion—the Amigurumi Porcupine Baby! With its soft-textured quills and endearing little paws, this tiny porcupine is the perfect blend of cuteness and craftsmanship. Whether you’re creating a forest-inspired collection or looking for a unique handmade gift, this FREE crochet pattern brings whimsy to your amigurumi lineup. Designed for intermediate crocheters, it’s a delightful project that plays with stitch texture to mimic the gentle fluff of quills while maintaining a cuddly look.
Customize your porcupine with earthy tones or playful pastel shades to give it a unique personality! The step-by-step instructions guide you through shaping the tiny features, making sure your creation is just as charming as you imagine. Whether it’s perched on a nursery shelf or accompanying other woodland amigurumi friends, this little porcupine will bring warmth and character to any space. Grab your hook, select your favorite yarn, and let’s bring this woodland cutie to life! 🦔✨
🦔 Amigurumi Porcupine Baby Crochet Pattern
Soft, cuddly, and just a little bit prickly — this adorable Amigurumi Porcupine Baby makes the perfect forest friend! With soft body tones and layered faux quills, this plushy pal is equal parts wild and sweet.
✨ Skill Level
Intermediate – Includes shaping, color changes, limb sewing, and attaching textured “quills.”
📏 Finished Size
Approx. 20–25 cm (8–10 inches) tall using worsted weight yarn and a 3.5 mm hook.
🧶 Materials
-
Worsted weight yarn:
-
Light brown or tan (main body)
-
Dark brown (paws, nose, ears)
-
-
3.5 mm crochet hook
-
Black safety eyes (10–12 mm)
-
Tapestry needle
-
Fiberfill stuffing
-
Faux leather, felt, raffia, or yarn for quills
-
Stitch marker
-
Scissors
-
Hot glue (optional for attaching quills)
🪡 Abbreviations (US Terms)
-
MR – Magic Ring
-
sc – Single Crochet
-
inc – Increase
-
dec – Decrease
-
ch – Chain
-
sl st – Slip Stitch
-
FO – Fasten Off
🧠 Head & Body (Worked as One Piece)
With light brown yarn:
-
MR, 6 sc
-
inc x6 (12)
-
(1 sc, inc) x6 (18)
-
(2 sc, inc) x6 (24)
-
(3 sc, inc) x6 (30)
6–13. sc around (30)
– Place safety eyes between Rounds 10–11, approx. 6–7 stitches apart -
(3 sc, dec) x6 (24)
-
(2 sc, dec) x6 (18)
-
(1 sc, dec) x6 (12)
-
inc x6 (18) ← start body
-
(2 sc, inc) x6 (24)
-
(3 sc, inc) x6 (30)
20–30. sc around (30) -
(3 sc, dec) x6 (24)
-
(2 sc, dec) x6 (18)
-
(1 sc, dec) x6 (12)
– Stuff firmly -
dec x6 (6)
FO and close.
🐾 Arms (Make 2)
With light brown yarn:
-
MR, 6 sc
-
(1 sc, inc) x3 (9)
3–8. sc around (9)
Switch to dark brown (paw):
9–10. sc around (9)
– Lightly stuff
FO and sew to sides of body.
🦵 Legs (Make 2)
With dark brown:
-
MR, 6 sc
-
inc x6 (12)
Switch to light brown:
3–7. sc around (12)
– Stuff firmly
FO and sew to base of body, slightly forward-facing.
👂 Ears (Make 2)
With dark brown:
-
MR, 6 sc
-
(1 sc, inc) x3 (9)
-
sc around
– FO and flatten, pinch into a half-moon shape
– Sew to sides of head above eyes.
👃 Nose (Dark Brown)
-
MR, 6 sc
-
(1 sc, inc) x3 (9)
-
sc around
– Stuff lightly
– FO and sew at tip of snout
– Use black or dark yarn to embroider mouth
🦔 Quills (Faux Material or Yarn)
Option A – Felt or Faux Leather Spikes:
-
Cut 40–50 thin strips (~5–7 cm long, tapering ends)
-
Glue or sew in rows starting from top back of the head, layered downward to the rump.
Option B – Yarn Quills:
-
Cut yarn into 7–10 cm strands
-
Tie or sew in bundles down the back
-
Fray or twist for added texture
Tip: Stagger layers of spikes for a full, natural effect. Use glue if sewing is difficult.
✂️ Finishing Touches
-
Weave in all ends
-
Optional blush cheeks with pink thread
-
Add extra embroidery on paws for toe detail
-
Position quills for a puffed look
💡 Customization Ideas
-
Use variegated or boucle yarn for a fluffy effect
-
Add baby acorn or mushroom accessories
-
Create a whole woodland critter collection
This little porcupine is a gentle woodland warrior with soft cuddles and wild style. Whether you’re decorating a nursery or gifting forest-themed love, it’s a joy to stitch up this spiny sweetheart! 🌲🧶🦔