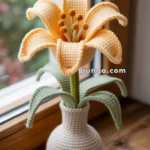
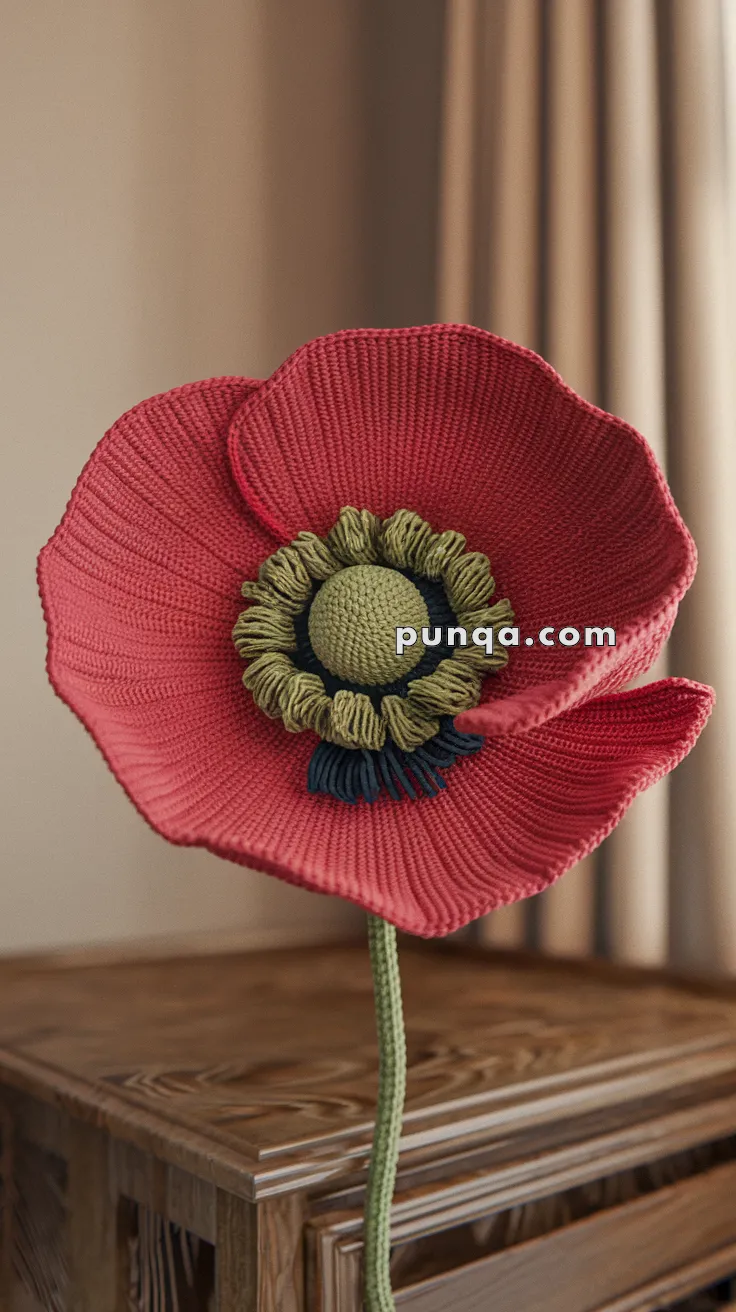
Brighten up your crochet collection with the Amigurumi Poppy, a project that’s bold, realistic, and absolutely striking! 🌺🧶 This oversized flower features a domed green center, flat black inner fringe, upright green crown, and wide wavy petals that beautifully capture the essence of a real poppy. With wire support to hold its shape, this design combines artistry and structure for a truly eye-catching piece.
Perfect as a decorative accent, a heartfelt handmade gift, or a stunning addition to your floral amigurumi collection, this poppy radiates charm and elegance. Fun to stitch and delightful to display, the Amigurumi Poppy is a joyful way to crochet beauty, creativity, and a sprinkle of handmade magic—one loop at a time! ✨🌿🧵
🌺 Crochet Poppy Flower Pattern
This elegant crochet poppy features a bold domed center, a soft textured inner ring, and a wide flowing petal layer that gently curves outward. Designed with sculptural realism and smooth shaping, this flower makes a stunning decorative piece for vases, memorial displays, or artistic home décor.
With its oversized form and graceful silhouette, this poppy captures the beauty of a blooming flower in yarn.
✨ Skill Level
Intermediate
(Includes shaping, loop stitches, and ruffled petal construction)
📏 Finished Size
Approx. 18–20 cm (7–8 inches) across, with stem about 25–30 cm (10–12 inches) long.
🧶 Materials
Yarn (DK / sport weight cotton):
-
Red – petals
-
Olive green – center ball + loop ring + stem
-
Dark navy or black – inner fringe ring
Tools:
-
2.0–2.5 mm crochet hook
-
Floral wire (1–1.5 mm) for stem
-
Polyester fiberfill
-
Tapestry needle
-
Stitch marker
-
Scissors
🧵 Abbreviations (US Terms)
MR – Magic Ring
sc – Single crochet
inc – Increase
dec – Decrease
ch – Chain
sl st – Slip stitch
FO – Fasten off
🌿 Center Dome (Olive Green)
R1: MR, 6 sc (6)
R2: inc ×6 (12)
R3: (sc, inc) ×6 (18)
R4: (2 sc, inc) ×6 (24)
R5: (3 sc, inc) ×6 (30)
R6–9: sc around (30)
Begin closing dome:
R10: (3 sc, dec) ×6 (24)
R11: (2 sc, dec) ×6 (18)
Insert stuffing firmly.
R12: (sc, dec) ×6 (12)
R13: dec ×6 (6)
FO and close.
🌑 Inner Fringe Ring (Dark Blue / Black)
Attach dark yarn around the lower edge of the green dome.
(ch 5, sl st in next stitch) repeat around entire round.
FO.
This creates the short dark fringe visible beneath the green loops in the photo.
🍃 Olive Loop Ring (Green Textured Ring)
Attach olive yarn just above the dark fringe.
(ch 7, sl st in next stitch) repeat around.
FO.
These long loops form the soft textured ring seen around the center.
🌺 Petal Layer (One Large Ruffled Disk – Red)
Worked as a single continuous piece (not separate petals).
R1: MR, 6 sc (6)
R2: inc ×6 (12)
R3: (sc, inc) ×6 (18)
R4: (2 sc, inc) ×6 (24)
R5: (3 sc, inc) ×6 (30)
R6: (4 sc, inc) ×6 (36)
R7: (5 sc, inc) ×6 (42)
R8: (6 sc, inc) ×6 (48)
R9: (7 sc, inc) ×6 (54)
R10: (8 sc, inc) ×6 (60)
Create waviness:
R11: (2 sc, inc) ×20 (80)
R12: sc around (80)
R13: (3 sc, inc) ×20 (100)
FO, leave long tail.
This produces the wide, flowing ruffled petal disk visible in the photo.
🌱 Stem (Olive Green)
Cut 25–30 cm floral wire.
Hold wire inside stitches and crochet tightly around it:
Attach yarn, sc tightly around wire until fully covered.
FO.
🪡 Assembly
-
Sew the red petal disk to the underside of the center dome
-
Position so petals flare outward naturally
-
Insert stem wire into base of center and stitch securely
-
Shape petals gently with fingers for soft curves
🌟 Finishing Touches
-
Light steam-block petals for gentle waves
-
Adjust loops and fringe so they sit neatly
-
Keep stem slim and straight
-
Let petals fall naturally (not stiff or pointed)
🌸 Final Result
Your crochet poppy should now have:
✔ A domed olive center
✔ A dark inner fringe ring
✔ A green looped texture ring
✔ One wide flowing red petal layer
✔ A slim straight stem
✔ Soft sculptural shape
Exactly matching the photographed flower’s structure and elegance.
💐 Closing Thoughts
This crochet poppy is a statement piece — bold, graceful, and timeless. Whether displayed in a vase, gifted with meaning, or used as artistic décor, it brings warmth and beauty to any space.
A flower that never fades, stitched petal by petal with care. 🌺🧶