Oink your way into cuteness with this Amigurumi Pig Face Bag crochet pattern! With its round snout, perky ears, and irresistible charm, this playful bag is perfect for pig lovers of all ages. Whether you’re crafting a fun accessory for a little one, adding a whimsical touch to your outfit, or just love turning adorable animals into functional crochet, this pattern lets you stitch up a sweet companion that’s as practical as it is delightful. 🐷👜💖
Designed for both fun and flair, this pattern invites you to play with soft pink yarns, expressive facial features, and clever shaping to bring your piggy pouch to life. Add a zipper or button closure, a strap for easy carrying, or even a curly tail for extra personality. Whether it’s used to hold treasures, snacks, or everyday essentials, this Amigurumi Pig Face Bag is a joyful and satisfying project—perfect for bringing a touch of handmade whimsy to every stitch! 🧶🌈✨
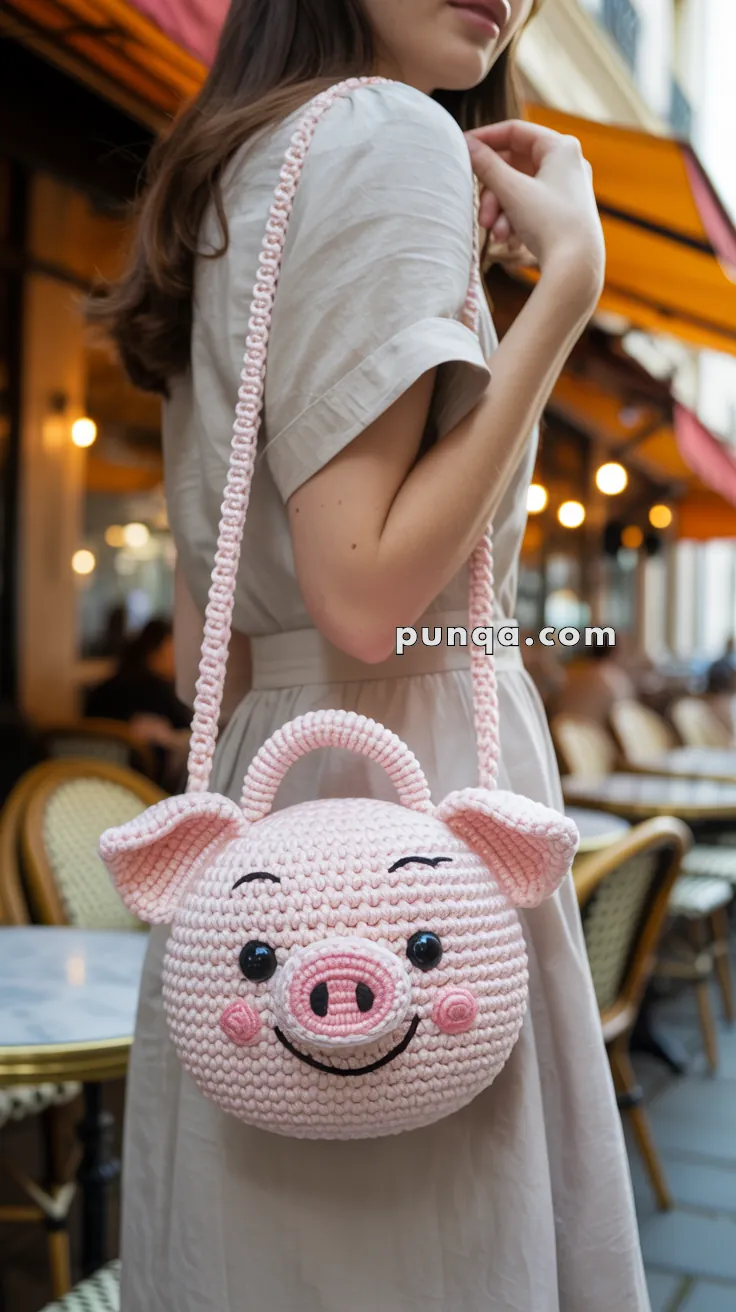
🐷 Amigurumi Pig Face Bag – Free Crochet Pattern
Add a playful pop of personality to your outfit with this amigurumi pig-shaped shoulder bag! Featuring a chubby round face, floppy ears, a happy embroidered expression, and a handy shoulder strap and top handle, this pig bag is a cute and functional project for all ages. Perfect for festivals, markets, or everyday whimsy.
✨ Skill Level
Intermediate – Involves amigurumi shaping, assembling 3D features, bag construction, and adding handles and closure.
📏 Finished Size
Approx. 8″ (20 cm) diameter body, plus 30″ (76 cm) shoulder strap
🧶 Materials
| Item | Details |
|---|---|
| Yarn (Worsted weight / Cotton preferred) | |
| • Light Pink (Main body) | |
| • Darker Pink (Snout & cheeks) | |
| • Black (Eyes, nostrils, mouth) | |
| Hook | 3.5 mm or 4.0 mm |
| Notions | |
| • Tapestry needle | |
| • 2 safety eyes (10–12 mm) or black felt | |
| • Zipper or button for closure | |
| • Small magnets or Velcro (optional for flap) | |
| • Stitch markers | |
| • Lining fabric (optional) | |
| • Fabric glue (optional) |
🧵 Abbreviations (US Terms)
- MR – Magic Ring
- sc – Single Crochet
- inc – Increase (2 sc in same st)
- dec – Decrease (sc 2 together)
- sl st – Slip Stitch
- ch – Chain
- FO – Fasten Off
👜 Bag Base (Make 2 panels – Light Pink)
- MR, 6 sc
- inc x6 → (12)
- (1 sc, inc) x6 → (18)
- (2 sc, inc) x6 → (24)
- (3 sc, inc) x6 → (30)
- (4 sc, inc) x6 → (36)
- (5 sc, inc) x6 → (42)
- (6 sc, inc) x6 → (48)
- (7 sc, inc) x6 → (54)
- (8 sc, inc) x6 → (60)
- (9 sc, inc) x6 → (66)
- sc around (66)
FO the first panel. For the second, do not fasten off—you will crochet them together later.
🐽 Snout (Dark & Light Pink)
- With light pink: MR, 6 sc
- inc x6 → (12)
- (1 sc, inc) x6 → (18)
- sc around (18)
Switch to darker pink: - sc around (18)
- sc around (18), sl st to finish
FO, leave long tail for sewing.
Embroider two vertical black nostrils.
🐷 Cheeks (Make 2 – Dark Pink)
- MR, 6 sc
- inc x6 → (12)
- sl st, FO and leave tail
🐖 Ears (Make 2 – Light Pink)
- MR, 4 sc
- (1 sc, inc) x2 → (6)
- (2 sc, inc) x2 → (8)
- (3 sc, inc) x2 → (10)
- (4 sc, inc) x2 → (12)
- sc around (12)
- (5 sc, inc) x2 → (14)
- sc around (14), FO, leave long tail
Shaping Tip:
After folding base flat, tack the bottom corners slightly inward to give the ear a curled/floppy look. Stitch on top of head, slightly angled outward.
👁 Eyes & Face Assembly
- Place safety eyes approx. 14–16 sts apart and 3–4 rounds down from the top center.
- Sew snout centered below the eyes.
- Sew cheeks slightly off to each side under the eyes.
- Use black thread or yarn to embroider the arched eyebrows and smiling mouth.
🧷 Bag Construction
Place both panels wrong sides together. Using the working yarn from second panel:
- sc around both panels, matching stitch for stitch (you’re joining them together)
- Leave 4″ (10 cm) open at the top for zipper, button, or drawstring opening
- Optionally, add a fabric lining inside for structure
🧵 Top Handle (Light Pink)
- Ch 40 (or desired handle length)
- Row 1: sc in 2nd ch and across
- Row 2: sc across
FO and sew ends to top-center of bag, inside edge of the opening.
🧶 Shoulder Strap (Light Pink)
Option 1 (Sturdy):
- Ch 120–130 (adjust for length)
- Work 3 rows of sc
- Fold into a tube and seam OR
- Twist and stitch down both ends inside the bag’s side seam area
Option 2 (Textured Spiral):
- Ch desired length
- Work 2 sc in each ch → makes a spiral cord
- Secure ends into sides of bag firmly
🔒 Closure Options
- Zipper: Hand-sew into the opening using backstitch
- Button Loop: Ch 10, sl st to make loop → sew button opposite
- Velcro or Magnetic Snap: Sew inside flap area
💡 Customization Ideas
- Add a bow on one ear
- Use brown and cream for a cow face version
- Make matching coin purse with mini face
- Embroider name or initials on back
This chubby piggy purse is just the right mix of cute and practical! 🐽💕 Perfect for playful hearts of all ages.