Oh, the wonderful world of amigurumi! 🎨 There’s just something incredibly delightful about crafting these miniature crochet wonders, especially when it involves beloved characters like Peter Pan. Bringing to life the adventurous spirit of Neverland through yarn and hook is an absolute joy. Amigurumi has this magical way of transforming simple skeins of yarn into charming figures that can spark imagination and joy in both creators and admirers alike. The appeal lies in the whimsical nature of these creations, where you can let your creativity soar and add personal touches to make each piece unique.
Creating a Peter Pan amigurumi pattern is a fantastical journey in itself! 🧚♂️ The process begins with choosing the right yarn and colors that capture Peter’s iconic green outfit and mischievous smile. Then, it’s all about getting those stitches just right, forming the perfect silhouette of this beloved character. As each part of Peter comes together, from his pointed hat to his tiny fairy boots, there’s a sense of accomplishment that comes with every stitch. It’s like weaving a bit of magic into each piece, knowing that this little creation might inspire dreams of adventure in anyone who sees it. 🌟 Plus, the satisfaction of seeing Peter Pan take shape in your hands is an experience that’s truly worth every moment spent crafting!

🧝♂️ Peter Pan Amigurumi – FREE Crochet Pattern
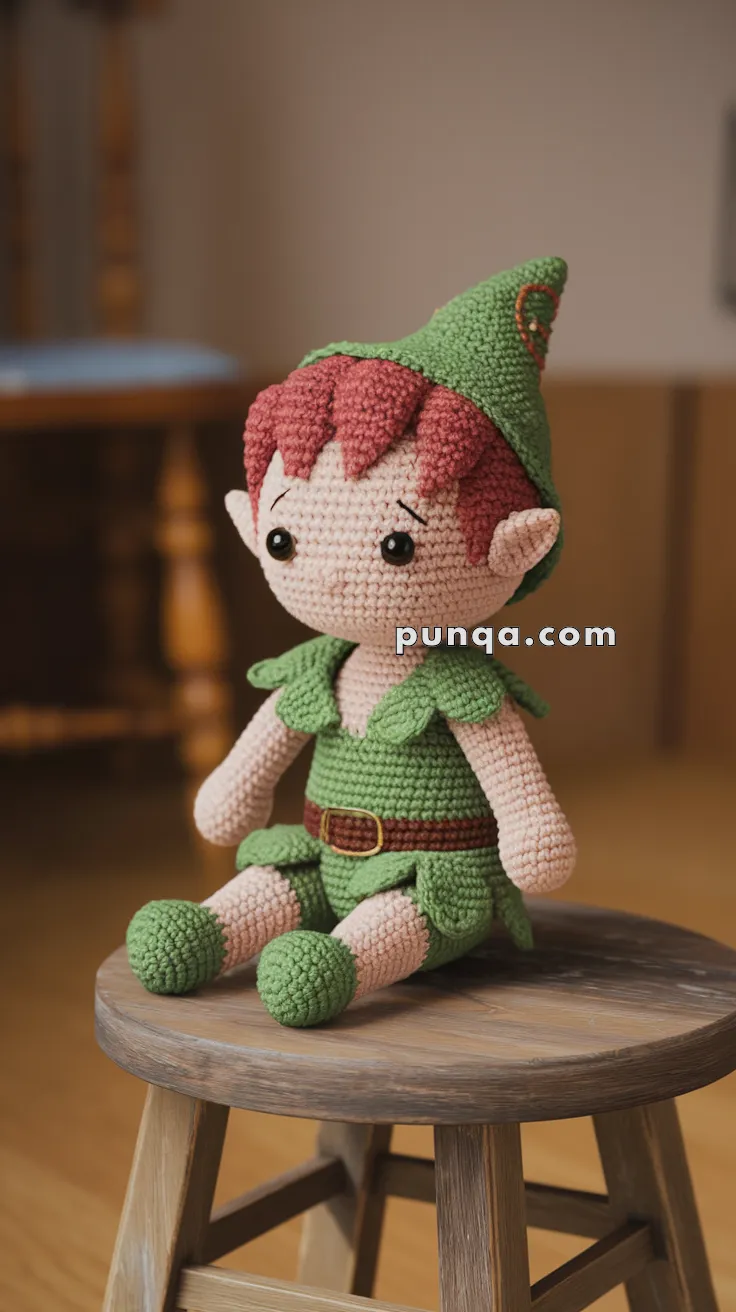
This charming Peter Pan—complete with a leafy tunic, pointy elf ears, and a classic green cap—is perfect for magical woodland playsets, fantasy lovers, or fans of storybook adventures! 🌲✨
🧶 Materials
-
DK or worsted weight yarn in:
-
Beige (skin)
-
Green (outfit, hat, shoes)
-
Brown (belt, eye details)
-
Dark red (hair)
-
Yellow (belt buckle)
-
-
2.5 mm or 3.0 mm crochet hook
-
10–12 mm safety eyes
-
Fiberfill stuffing
-
Yarn needle
-
Stitch marker
-
Scissors
📏 Finished Size
Approximately 24–28 cm (9.5–11 inches) tall when using DK yarn and a 2.5–3.0 mm crochet hook. Size may vary slightly depending on yarn type, hook size, and personal tension.
✨ Abbreviations (US Terms)
-
MR – Magic Ring
-
sc – Single Crochet
-
inc – Increase
-
dec – Decrease
-
ch – Chain
-
sl st – Slip Stitch
-
BLO/FLO – Back/Front Loop Only
-
FO – Fasten Off
🧠 Skill Level
Intermediate – Requires shaping, color changes, assembly, and basic embroidery for face details.
🧵 Pattern Instructions
🧑 Head
With beige yarn:
-
MR, sc 6
-
[inc] x6 → (12)
-
[sc, inc] x6 → (18)
-
[2 sc, inc] x6 → (24)
-
Continue increasing to 48
-
Rounds 9–20: sc evenly (48 sts)
-
Insert safety eyes between Rounds 13–14, ~8 sts apart
-
Add light blush and embroidery for eyebrows
-
Begin decreasing: [6 sc, dec] x6 and so on
-
Stuff firmly and FO
🧑🦱 Hair Cap
With dark red yarn:
-
Repeat the same steps as head until Round 15
-
Begin shaping fringe by working into FLO with chains and scs
-
Create jagged bangs with varied ch lengths (e.g., ch 5, sc, ch 3, sl st)
-
FO and sew to head
🦻 Ears (Make 2)
With beige yarn:
-
MR, sc 4
-
[sc, inc] x2 → (6)
-
Fold and pinch into ear shape
-
Sew to sides of head, aligned with eyes
👕 Body
With green yarn:
-
MR, sc 6
-
Increase to 36
-
Work even for 6 rounds
-
Begin color change to beige for neck
-
Add decreases to shape neck
-
FO, stuff, and sew to head
🟫 Belt
With brown yarn:
-
Ch enough to wrap around the waist
-
Row 1: sc in each, FO
-
Optional: embroider yellow rectangle for buckle
-
Sew to body
🦵 Legs (Make 2)
Start with green (shoes):
-
MR, sc 6
-
Increase to 12, work 3 rounds
-
Switch to beige (legs)
-
Work evenly for ~14 rounds
-
Stuff and FO
-
Sew both legs to body
💪 Arms (Make 2)
With beige yarn:
-
MR, sc 6
-
Increase to 10, work even
-
Switch to green for sleeves
-
Work a few more rounds
-
FO, lightly stuff, and sew to body
🧢 Hat
With green yarn:
-
MR, sc 6
-
Increase each round by 6 until reaching ~48 sts
-
Continue for several rounds to form tall point
-
Optional: add leaf embroidery
-
FO and sew to head at angle
🌿 Tunic Edging
-
Ch ~20, sc along to make leafy shoulder ruffles
-
Repeat and attach as tunic flaps at waist
-
Sew on securely
🪄 Assembly & Finishing
-
Attach arms slightly below head
-
Sew on hat firmly, letting it droop if desired
-
Embroider face details and belt buckle
-
Add optional props like a mini bow, pouch, or wooden sword for character
🌲 Display Ideas
-
Pose your forest boy beside mushrooms, tree stumps, or a fairy house
-
Add a tiny squirrel or fox friend for woodland charm 🐿️🦊
-
Perfect for fantasy shelves, storytime gifts, or imaginative kids’ decor!


