Welcome to the colorful and creative world of amigurumi! 🎨✨ Today, I’m excited to share my free crochet pattern for a Painter Doll—a vibrant and artistic creation perfect for craft lovers, art enthusiasts, or anyone who enjoys stitching up expressive and detailed plush figures! 🖌️ Whether you love bringing characters to life, creating textured and dynamic designs, or simply want to add a whimsical painter to your handmade collection, this pattern will guide you through crafting a beautifully sculpted plush with a tiny palette, playful brush, and a touch of artistic charm! 🧵
This design embraces bold colors, flowing shapes, and intricate details to bring a joyful and imaginative presence to your crochet projects! 🧶🌈 I’ve carefully outlined each step to ensure your Amigurumi Painter Doll turns out just right—ready to brighten up your collection or become a treasured handmade gift! 🎁 So grab your hooks, pick out vibrant reds, deep blues, or soft pastels, and let’s stitch up a delightful painter friend! ✨
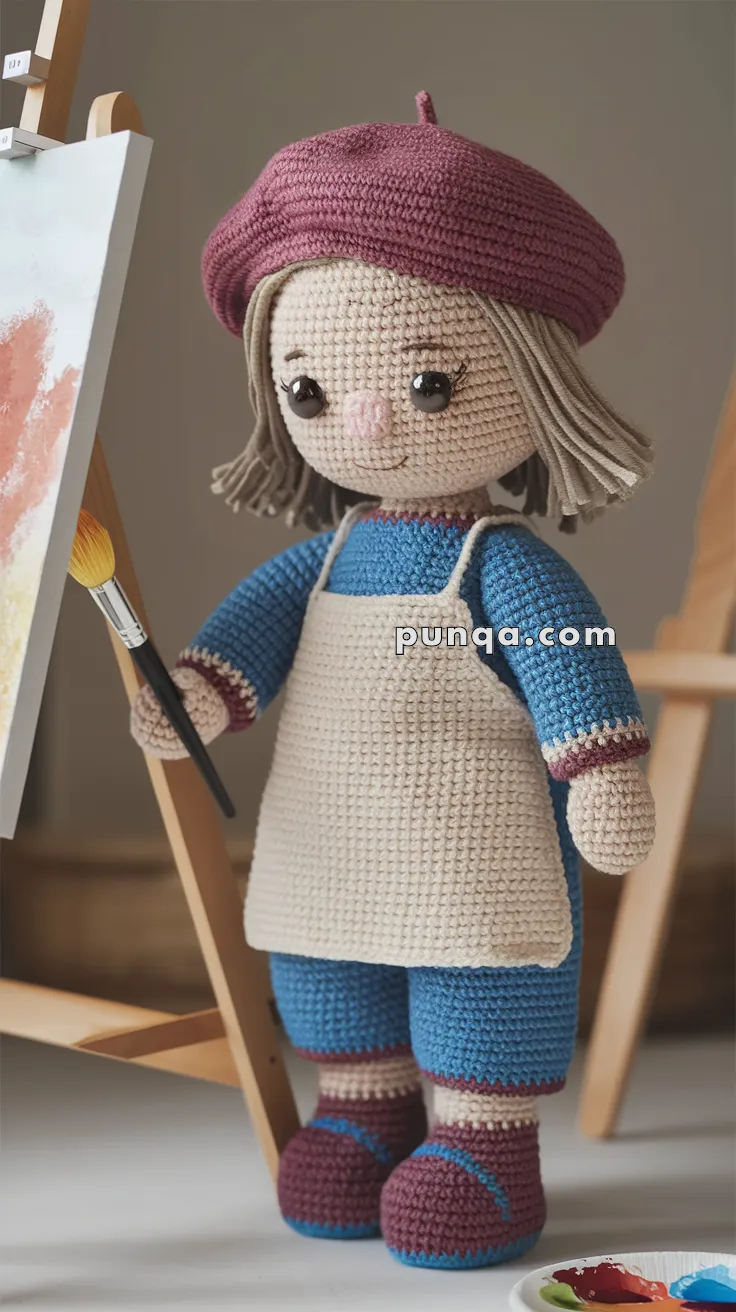
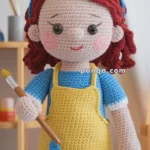
🎨 Amigurumi Painter Doll Crochet Pattern
Bring your creativity to life with this charming amigurumi painter doll! With her beret, apron, and sweet expression, she’s a wonderful gift for artists and a whimsical decor addition to your craft room.
✨ Skill Level
Intermediate – Involves shaping, clothing changes, and accessories.
📏 Finished Size
Approx. 10–12 inches (25–30 cm) tall using DK or worsted weight yarn and a 2.5–3.5 mm hook.
🧶 Materials
Yarn (DK or Worsted weight):
-
Skin tone (head, arms, legs)
-
Blue (shirt and pants)
-
Cream or beige (apron)
-
Burgundy (shoes and beret)
-
Light brown (hair)
-
Contrasting trim color (e.g. teal)
Notions:
-
9 mm safety eyes
-
Embroidery thread (black, pink for lashes and blush)
-
Polyfill stuffing
-
Stitch markers
-
Tapestry needle
-
Small paintbrush prop (optional)
-
Optional: small palette or mini canvas for display
🧵 Abbreviations (US Terms)
MR – Magic Ring
sc – Single Crochet
inc – Increase
dec – Decrease
sl st – Slip Stitch
ch – Chain
FLO – Front Loop Only
BLO – Back Loop Only
FO – Fasten Off
👩 Head (Skin Tone)
-
MR, 6 sc
-
inc x6 (12)
-
(sc, inc) x6 (18)
-
(2 sc, inc) x6 (24)
-
(3 sc, inc) x6 (30)
-
(4 sc, inc) x6 (36)
7–14. sc (36)
Insert safety eyes between R10–11, 6 sts apart -
(4 sc, dec) x6 (30)
-
(3 sc, dec) x6 (24)
-
(2 sc, dec) x6 (18)
Stuff firmly -
(1 sc, dec) x6 (12)
-
dec x6 (6), FO
💇 Hair Cap (Light Brown)
-
MR, 6 sc
-
inc x6 (12)
-
(sc, inc) x6 (18)
-
(2 sc, inc) x6 (24)
-
(3 sc, inc) x6 (30)
6–8. sc (30), FO
Cut ~20 strands of yarn and attach as loops along bottom edge. Trim to shoulder length. Use strands to form straight locks.
👚 Body (worked from top down)
Attach blue yarn to base of head:
-
sc around (12)
-
(1 sc, inc) x6 (18)
-
(2 sc, inc) x6 (24)
-
(3 sc, inc) x6 (30)
5–9. sc (30) -
dec both sides to form underarms (2 dec at sides) = 26
11–13. sc (26), FO and stuff
🦵 Legs (make 2)
Start with burgundy (shoes):
-
MR, 6 sc
-
inc x6 (12)
-
sc around
-
Switch to skin tone: sc (12)
-
sc (12)
-
Switch to blue: sc (12)
7–12. sc (12), FO
Sew to bottom of body
✋ Arms (make 2)
With skin tone:
-
MR, 6 sc
2–3. sc (6)
Switch to blue:
4–9. sc (6), FO
Sew to body at shoulders
🎨 Apron (Beige)
-
ch 18
-
sc across (17)
3–10. sc across
FO, ch 40 for each strap, attach at top corners
🖼 Beret (Burgundy)
-
MR, 6 sc
-
inc x6 (12)
-
(sc, inc) x6 (18)
-
(2 sc, inc) x6 (24)
-
(3 sc, inc) x6 (30)
-
(4 sc, inc) x6 (36)
7–9. sc (36) -
(4 sc, dec) x6 (30)
-
(3 sc, dec) x6 (24)
-
sc in BLO (24), FO
Ch 3 and make a tiny loop on top, sew to center.
✂️ Finishing Touches
-
Sew arms and legs to the body
-
Attach hair strands and trim to style
-
Sew apron to body or tie straps
-
Embroider small smile and lashes
-
Blush cheeks using pink thread or soft crayon
-
Insert a mini paintbrush in hand or sew one using felt and yarn
💡 Customization Ideas
-
Add a paint palette with felt or small yarn circles
-
Embroider “Art” or heart on apron
-
Use variegated yarn for pants for a fun texture
This sweet little artist is ready to paint the world with joy and color—one stitch at a time! 🎨🧵🖌️