Add a wise and whimsical touch to your crochet collection with the Amigurumi Owl, a charming project that’s perfect for nature lovers and cozy décor fans alike! 🦉🧶 With its round body, wide eyes, and soft little wings, this cuddly creature brings woodland magic to any shelf, nursery, or gift basket. Whether perched among your yarn stash or nestled in a handmade forest scene, this owl is sure to be a hoot to make and display.
Ideal for crocheters who enjoy playful shapes and expressive details, this pattern invites you to explore fun textures, gentle curves, and a palette of earthy or vibrant colors. Customize your owl with sleepy eyelids, a tiny bow tie, or even a graduation cap for extra personality! The Amigurumi Owl is a delightful way to stitch up charm, character, and a sprinkle of handmade joy—one loop at a time! 🧵💫
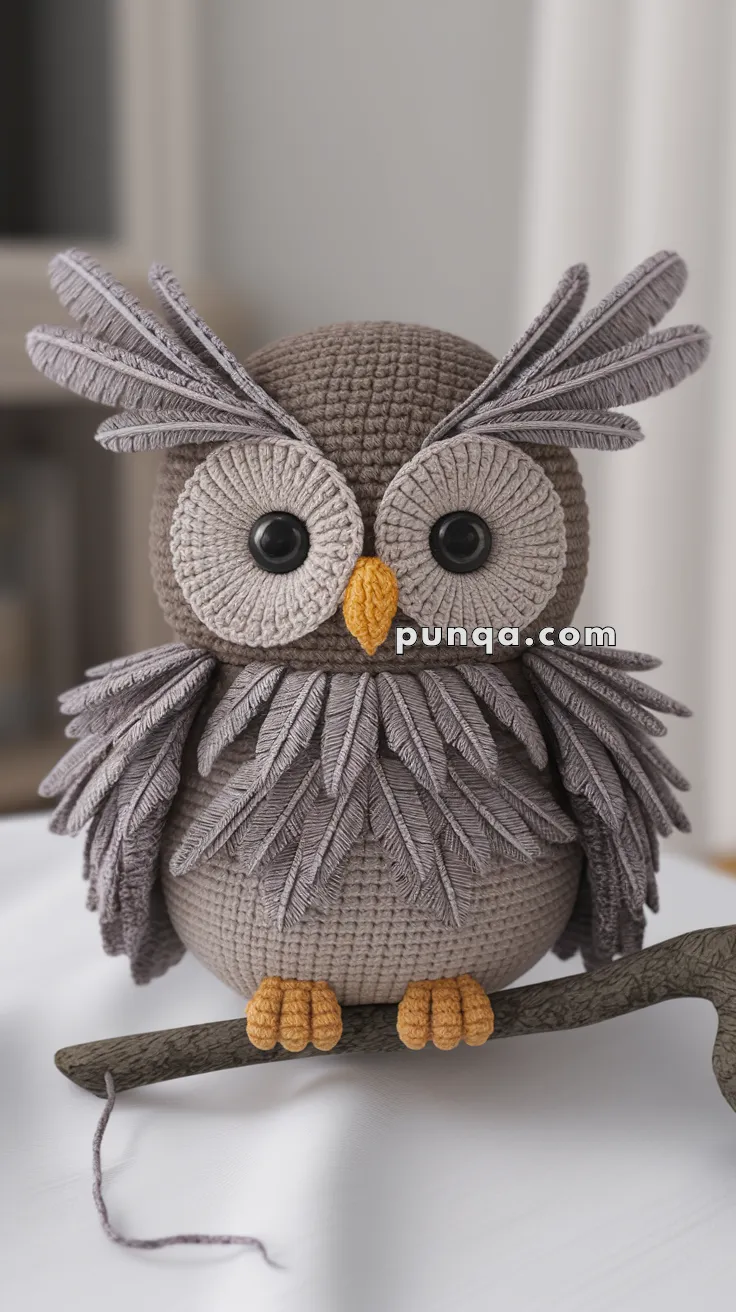
🦉 Amigurumi Owl Crochet Pattern
Bring woodland magic into your home with this stunning amigurumi Owl Feather. With large expressive eyes, layered feathers, and a wise little beak, this charming owl is the perfect project for nature lovers and cozy home décor.
✨ Skill Level
Intermediate – Includes feather layering, shaping, and detailed assembly.
📏 Finished Size
Approx. 9–10 inches (23–25 cm) tall when made with worsted yarn and a 3.5 mm hook.
🧶 Materials
- Yarn (Worsted weight or Velvet/Chenille recommended):
- Taupe / Light Brown (main body)
- Gray / Silver (feathers, eyes, feather tufts)
- Yellow / Orange (beak and feet)
- 10 mm safety eyes (black)
- Crochet hook: 3.0–3.5 mm
- Fiberfill stuffing
- Yarn needle
- Stitch marker
- Hot glue (optional for attaching feathers)
📐 Abbreviations (US Terms)
- MR = Magic Ring
- sc = Single Crochet
- inc = Increase (2 sc in same stitch)
- dec = Decrease (sc2tog)
- ch = Chain
- hdc = Half Double Crochet
- dc = Double Crochet
- sl st = Slip Stitch
- FO = Fasten Off
🪶 Pattern Instructions
Head & Body (worked in one piece – Taupe Yarn)
- MR, 6 sc (6)
- inc x6 (12)
- (1 sc, inc) x6 (18)
- (2 sc, inc) x6 (24)
- (3 sc, inc) x6 (30)
- (4 sc, inc) x6 (36)
7–18. sc around (36) - (4 sc, dec) x6 (30)
- (3 sc, dec) x6 (24)
- (2 sc, dec) x6 (18)
👉 Stuff firmly. - (1 sc, dec) x6 (12)
- dec x6 (6), FO and weave in.
Eyes (Make 2 – Gray Yarn)
- MR, 6 sc (6)
- inc x6 (12)
- (1 sc, inc) x6 (18)
- (2 sc, inc) x6 (24)
- sc around (24). FO.
👉 Attach safety eyes in center and sew to front of head, touching in the middle.
Beak (Yellow/Orange Yarn)
- MR, 5 sc (5)
- sc around (5)
- (1 sc, inc) x2, 1 sc (7)
4–5. sc around (7), FO.
👉 Sew between eyes.
Chest Feathers (Gray Yarn – 35–40 pieces)
- ch 7–9 (vary lengths).
- Row: sc in 2nd ch, hdc, dc x3, hdc, sc. FO.
👉 Make 35–40 feathers.
👉 Sew in overlapping rows starting under beak and working down belly for full fluffy chest coverage.
Wings (Make 2 – Taupe Base + Gray Feathers)
Wing Base (Taupe):
- MR, 6 sc (6)
- inc x6 (12)
- (1 sc, inc) x6 (18)
- (2 sc, inc) x6 (24)
- sc around (24). FO.
Feathers (Gray):
- ch 8–10 (vary lengths).
- Row: sc in 2nd ch, hdc, dc x4, hdc, sc. FO.
👉 Make 30–35 feathers per wing.
👉 Layer feathers on base and sew wings to sides of body.
Feather Tufts (Gray Yarn – 6–8 pieces)
- ch 10
- Row: sc in 2nd ch, hdc x2, dc x3, hdc x2, sc. FO.
👉 Sew 3–4 tufts per side above eyes in a V-shape.
Feet (Make 2 – Yellow/Orange)
Base:
- MR, 6 sc (6)
- inc x6 (12)
3–4. sc around (12). FO.
Toes (Make 3 per foot):
- MR, 5 sc, FO.
👉 Sew toes to foot base. Attach both feet under body.
✂️ Assembly
- Sew eyes and beak to head.
- Attach chest feathers in overlapping rows.
- Sew and layer wings to sides.
- Add feather tufts above eyes.
- Attach feet firmly at bottom.
- Stuff firmly and shape owl.
💡 Finishing Touches
- For extra realism, lightly brush feather edges with a yarn brush.
- Try color variations (white/gray for snowy owl, brown/gold for barn owl).
- Perch your owl on a crocheted branch or display as a cozy woodland friend.
🎉 Final Thoughts
This owl is full of texture and charm — with its big eyes, layered feathers, and soft tufts, it’s the perfect handmade woodland companion. Whether for gifting or home décor, this project will wow anyone who sees it. 🦉🍂