Welcome to the rhythmic and expressive world of amigurumi! 🎶✨ Today, I’m excited to share my free crochet pattern for an Amigurumi Musician Doll—a lively and artistic creation perfect for music lovers, performers, or anyone who enjoys crafting detailed and personality-filled plush designs! 🧶 Whether you love stitching up creative characters, experimenting with tiny instrument accessories, or simply want to add a musical touch to your handmade lineup, this pattern will guide you through crafting a beautifully sculpted plush with stylish attire, expressive features, and a touch of melodic charm! 🎸
This design embraces vibrant colors, dynamic shaping, and thoughtful details to bring an energetic and inspiring presence to your crochet projects! 🧶✨ I’ve carefully outlined each step to ensure your Amigurumi Musician Doll turns out just right—ready to rock your collection or become a treasured handmade gift! 🎁 So grab your hooks, pick out bold blacks, rich blues, or fiery reds, and let’s stitch up a show-stopping musician! 🎶
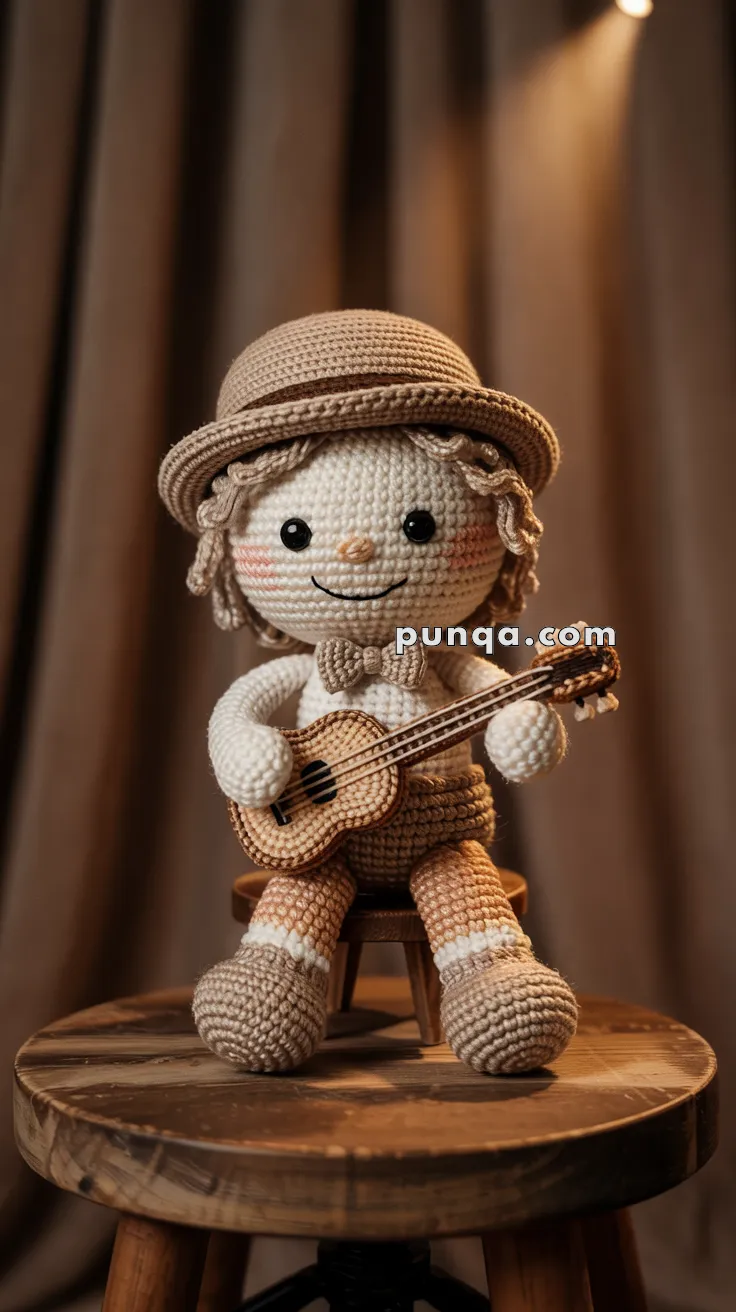
🎵 Amigurumi Musician Doll – FREE Crochet Pattern
Meet the sweetest little stage performer! This Amigurumi Musician Doll is dressed to charm with his bow tie, hat, shorts, and mini guitar. Whether displayed on a shelf or gifted to music lovers, this doll is sure to strike a chord. 🎸
✨ Skill Level
Intermediate – Includes color changes, shaping, and accessories.
📏 Finished Size
Approx. 10–12 inches (25–30 cm) tall using worsted weight yarn and a 3.0–3.5 mm hook.
🧶 Materials
- Worsted weight yarn in:
- Cream (skin)
- Light brown (hair, shorts, hat, shoes, guitar)
- Beige (shirt)
- Dark brown (guitar strings & frets)
- Blush/pink (cheeks)
- 3.5 mm crochet hook
- Black safety eyes (10–12 mm)
- Embroidery floss (black for smile, brown for details)
- Stuffing
- Tapestry needle
- Stitch markers
- Thin cardboard or plastic (for guitar neck)
🧵 Abbreviations (US Terms)
- MR – Magic Ring
- sc – Single Crochet
- inc – Increase
- dec – Decrease
- sl st – Slip Stitch
- ch – Chain
- BLO – Back Loops Only
- FO – Fasten Off
🧠 Head (Cream)
- MR, 6 sc
- inc x6 (12)
- (1 sc, inc) x6 (18)
- (2 sc, inc) x6 (24)
- (3 sc, inc) x6 (30)
- (4 sc, inc) x6 (36)
- (5 sc, inc) x6 (42)
8–16. sc around (42)
– Insert safety eyes between Rounds 11–12, about 7 stitches apart
– Embroider smile and cheeks - (5 sc, dec) x6 (36)
- (4 sc, dec) x6 (30)
- (3 sc, dec) x6 (24)
- (2 sc, dec) x6 (18)
– Stuff firmly - (1 sc, dec) x6 (12)
- dec x6 (6), FO and close
💇 Hair (Light Brown)
- Make a hair cap using the same method as the head up to Round 7
- FO and sew to head
- Add strands: attach loops of yarn around edge, then sew or embroider wavy strands on top
- Secure tightly and trim
🎩 Hat (Light Brown)
- MR, 6 sc
- inc x6 (12)
- (1 sc, inc) x6 (18)
- (2 sc, inc) x6 (24)
- (3 sc, inc) x6 (30)
- (4 sc, inc) x6 (36)
- (5 sc, inc) x6 (42)
8–11. sc around (42) - (6 sc, inc) x6 (48)
- (7 sc, inc) x6 (54)
- sl st around, FO
Shape and sew to hair
🧍 Body (Beige shirt, Light Brown shorts)
Start with beige:
- MR, 6 sc
- inc x6 (12)
- (1 sc, inc) x6 (18)
- (2 sc, inc) x6 (24)
- (3 sc, inc) x6 (30)
6–10. sc around (30)
Switch to light brown (shorts):
11–16. sc around (30)
– Stuff - (3 sc, dec) x6 (24)
- (2 sc, dec) x6 (18)
FO, leave tail for attaching head
✋ Arms (Make 2 – Cream)
- MR, 6 sc
- (1 sc, inc) x3 (9)
3–14. sc around (9) - Switch to beige, sc around (9)
FO, stuff lightly and sew to shoulders
🧦 Legs (Make 2 – Cream to Brown)
Start with cream (legs), then brown (shoes):
- MR, 6 sc
- (1 sc, inc) x3 (9)
3–7. sc around (9)
Switch to brown:
8–12. sc around (9) - Flatten and FO, sew to bottom of body
🎀 Bow Tie (Beige)
- Ch 7
- sc across (6)
3–5. Repeat row
FO, wrap center tightly with yarn and sew to neck
🎸 Mini Guitar
🪵 Body (Light Brown)
- MR, 6 sc
- inc x6 (12)
- (1 sc, inc) x6 (18)
- (2 sc, inc) x6 (24)
- sc around
- (3 sc, dec) x4 (20)
- sc around, flatten
FO and shape into oblong oval
Sew black oval for sound hole
🪕 Neck (Dark Brown or Beige)
- Ch 6, sc across
- Repeat 3–4 rows
Insert cardboard inside for stiffness
Attach to top of guitar body
🎼 Strings
- Embroider 4–6 straight lines from body up the neck using black thread
- Add tiny white or brown beads for tuners on top of neck
- Attach guitar diagonally with arms stitched in place to appear “holding” it
✂️ Final Assembly
- Sew head to body
- Attach arms, legs
- Sew hat and bow tie
- Stitch or glue guitar in place under arms
💡 Customization Ideas
- Add suspenders with chain stitch
- Embroider tiny music notes on his shirt
- Make a mini mic or stool for a full concert setup
This charming musician is ready to serenade you with joy and handcrafted harmony. A perfect keepsake for music lovers and amigurumi artists alike! 🎶🧶✨