There’s something truly magical about crafting an amigurumi moonlit tree 🌙🌳. The appeal of these adorable creations lies in their whimsical charm and the sense of wonder they evoke. Imagine a miniature tree, with delicate branches swaying gently under the moonlit sky, capturing the enchanting beauty of nature in a playful crochet form. The process of making an amigurumi tree is both a delightful challenge and a rewarding experience. With each stitch, you infuse a bit of your own personality into the piece, bringing it to life with vibrant yarn and creative flair. It’s an art form that allows you to express your love for nature and creativity in the most delightful way possible.
Creating an amigurumi moonlit tree feels like embarking on a whimsical adventure 🌌🧶. You start with picking the perfect yarn colors, perhaps a deep green for the leaves and a soft brown for the trunk. As you crochet, you watch the tree take shape, branch by branch, leaf by leaf. The intricate detailing, like adding tiny blossoms or a crescent moon, makes each piece unique and special. It’s a joyful journey of creativity, requiring a bit of patience and a lot of imagination. Whether it’s for a gift or a personal keepsake, this enchanting little tree becomes a symbol of your hard work and artistic spirit, ready to bring joy and wonder to whoever gazes upon it.
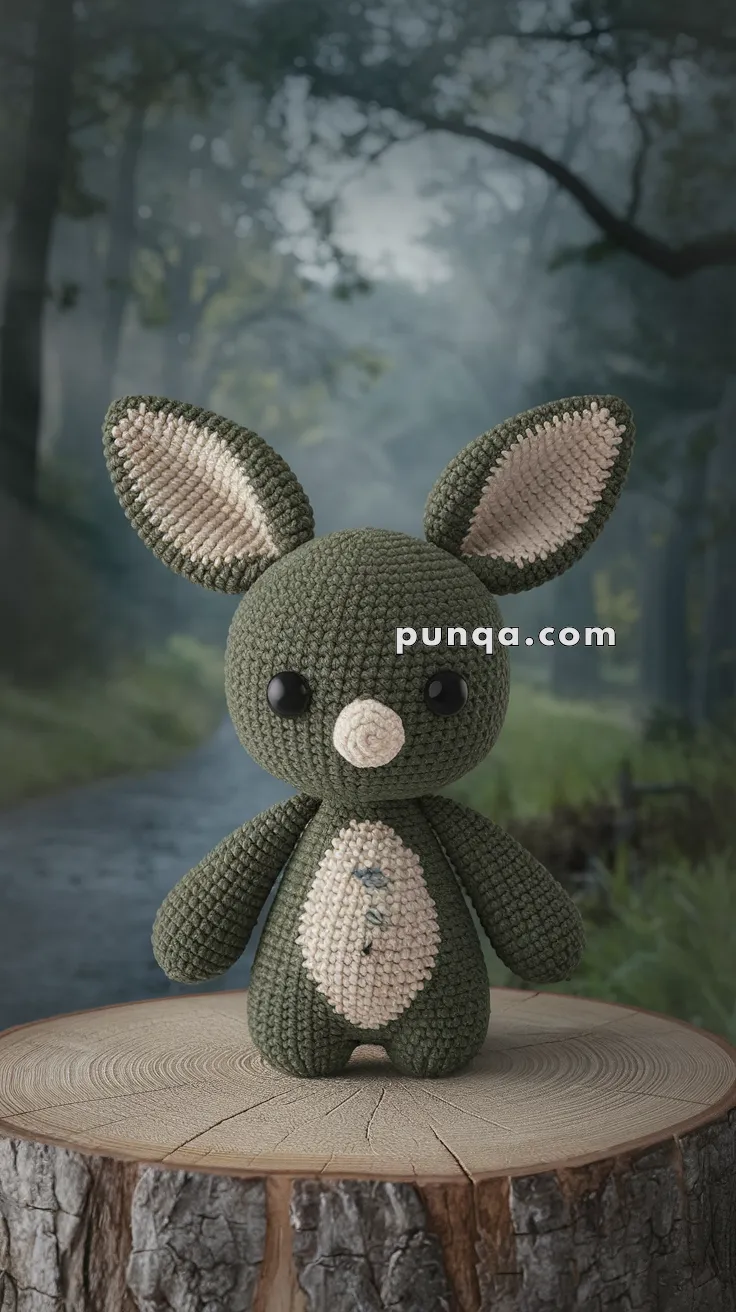
🌲 Amigurumi Moonlit Tree Bunny Crochet Pattern
Step into an enchanted forest with the adorable Moonlit Tree Bunny! With its forest green tones, big floppy ears, and peaceful woodland vibe, this amigurumi bunny is perfect for cozy nursery decor, woodland-themed gifts, or just a sweet crochet companion. The contrast between the deep green and soft beige makes this bunny both rustic and charming.
✨ Skill Level
Easy to Intermediate – Uses basic shaping, color changes, and careful sewing for assembly.
📏 Finished Size
Approx. 9–10 inches (23–25 cm) tall when using DK or worsted yarn with a 2.5–3.5 mm crochet hook.
🧶 Materials
-
Yarn (DK or Worsted Weight):
-
Forest Green (Main color)
-
Soft Beige or Cream (Belly, ears, nose)
-
Small amount of dark blue or grey (belly embroidery)
-
-
Crochet hook: 2.5 mm or 3.0 mm
-
10–12 mm safety eyes
-
Tapestry needle
-
Polyfill stuffing
-
Stitch marker
🧵 Abbreviations (US Terms)
-
MR – Magic Ring
-
sc – Single Crochet
-
inc – Increase (2 sc in same st)
-
dec – Decrease (sc 2 together)
-
sl st – Slip Stitch
-
FO – Fasten Off
-
ch – Chain
🐰 Head (Forest Green)
-
MR, 6 sc
-
inc x6 (12)
-
(1 sc, inc) x6 (18)
-
(2 sc, inc) x6 (24)
-
(3 sc, inc) x6 (30)
-
R6–12: sc around (30)
-
(3 sc, dec) x6 (24)
-
(2 sc, dec) x6 (18)
-
– Insert safety eyes between R8–9, approx. 7 stitches apart
-
– Embroider a small light beige nose and a few dots if desired
-
(1 sc, dec) x6 (12)
-
dec x6 (6), FO and close
🌿 Body (Forest Green)
-
MR, 6 sc
-
inc x6 (12)
-
(1 sc, inc) x6 (18)
-
(2 sc, inc) x6 (24)
-
(3 sc, inc) x6 (30)
-
R6–14: sc around (30)
-
(3 sc, dec) x6 (24)
-
(2 sc, dec) x6 (18)
-
(1 sc, dec) x6 (12)
-
dec x6 (6), FO and close
Optional: Add a beige oval patch on belly using felt or crochet a beige oval and embroider small vertical lines to mimic the details shown.
🐾 Arms (Make 2 – Forest Green)
-
MR, 6 sc
-
inc x6 (12)
-
R3–5: sc (12)
-
dec x2, sc x8 (10)
-
R6–10: sc (10)
-
Stuff lightly, FO and leave tail for sewing
🐾 Legs (Make 2 – Forest Green)
-
MR, 6 sc
-
inc x6 (12)
-
(1 sc, inc) x6 (18)
-
R4–7: sc (18)
-
(1 sc, dec) x6 (12)
-
R9–10: sc (12)
-
Stuff and FO, leave tail for sewing
👂 Ears (Make 2 Outer + 2 Inner)
Outer Ear (Forest Green):
-
ch 6
-
sc in 2nd ch from hook, sc x3, 3 sc in last
-
Rotate, sc x3, inc in last (12)
-
sc around, sl st to finish, FO
Inner Ear (Beige):
-
Repeat outer pattern but skip last round for smaller size
-
Sew inner ear onto outer ear
-
Fold ears slightly and stitch in place on head
🐾 Tail (Forest Green)
-
MR, 6 sc
-
inc x6 (12)
-
R3–4: sc (12)
-
dec x6 (6), FO
-
Sew to lower back
✂️ Finishing Touches
-
Sew head to body securely
-
Attach arms to sides of upper body
-
Attach legs evenly underneath
-
Stitch on ears to top sides of head
-
Add tail to back
-
Embroider belly details using small blue or dark thread
💡 Optional Add-ons
-
Add a tiny wooden button or bow on chest
-
Stitch or applique a moon or stars on the belly for a “moonlit” theme
-
Use variegated green yarn for a mossy texture look
Remember to stuff as you go for a nice firm shape! 🌙 Your Moonlit Tree Amigurumi is ready to befriend forest creatures or sit as a mystical decoration. Enjoy your crocheting adventure! 🌳✨