Welcome to the dynamic and disciplined world of amigurumi! 🥋✨ Today, I’m excited to share my free crochet pattern for a Martial Arts Fighter—a bold and energetic creation perfect for martial arts enthusiasts, action-themed collections, or anyone who enjoys crafting expressive and powerful plush designs! 💥 Whether you love stitching up fierce characters, creating textured and lifelike figures, or simply want to add a determined fighter to your handmade lineup, this pattern will guide you through crafting a beautifully sculpted plush with a traditional gi, a strong stance, and a touch of warrior spirit! 🏆
This design embraces clean lines, intricate shaping, and dynamic details to bring a sense of movement and strength to your crochet projects! 🧶🔥 I’ve carefully outlined each step to ensure your Amigurumi Martial Arts Fighter turns out just right—ready to kick into your collection or become a treasured handmade gift! 🎁 So grab your hooks, pick out crisp whites, deep blacks, or bold reds, and let’s stitch up a fearless martial artist! ✨
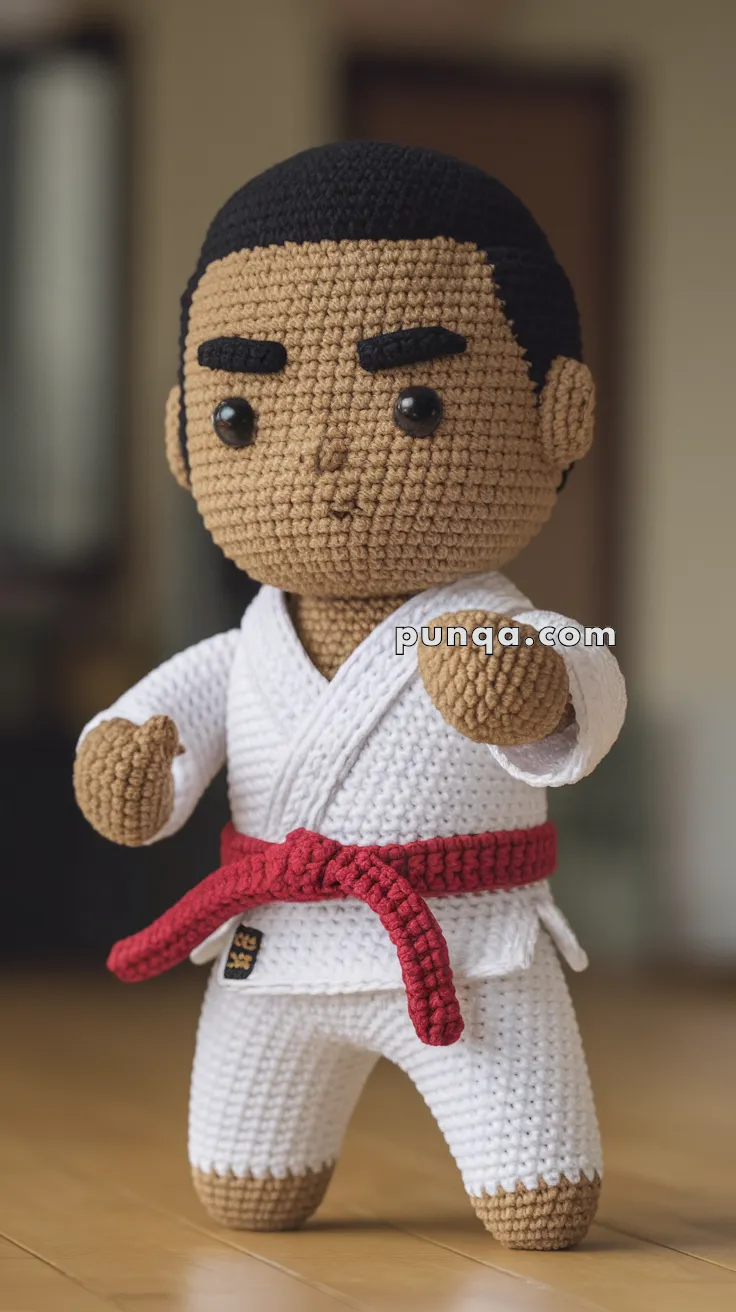
🥋 Amigurumi Martial Arts Fighter – FREE Crochet Pattern
Bring strength and spirit to your amigurumi collection with this bold Martial Arts Fighter! Dressed in a traditional gi with a red belt and ready-for-action pose, this design captures both discipline and character. A perfect project for martial arts enthusiasts and crochet fans alike!
✨ Skill Level
Intermediate – Includes shaping, color changes, and assembling multiple parts.
📏 Finished Size
Approximately 8–9 inches (20–23 cm) tall using worsted-weight yarn and a 3.5 mm crochet hook.
🧶 Materials
-
Yarn (Worsted weight):
-
Skin tone (Head, hands, feet)
-
Black (Hair, brows)
-
White (Gi / uniform)
-
Red (Belt)
-
-
3.5 mm crochet hook
-
12 mm safety eyes
-
Tapestry needle
-
Stitch marker
-
Polyfill stuffing
🧵 Abbreviations (US Terms)
MR – Magic Ring
sc – Single Crochet
inc – Increase (2 sc in same stitch)
dec – Decrease (sc two stitches together)
sl st – Slip Stitch
ch – Chain
FO – Fasten Off
BLO – Back Loops Only
FLO – Front Loops Only
🧑🦱 Head
With skin tone yarn:
-
MR, 6 sc (6)
-
inc x6 (12)
-
(1 sc, inc) x6 (18)
-
(2 sc, inc) x6 (24)
-
(3 sc, inc) x6 (30)
-
(4 sc, inc) x6 (36)
7–15. sc around (36) -
(4 sc, dec) x6 (30)
-
(3 sc, dec) x6 (24)
-
(2 sc, dec) x6 (18)
-
(1 sc, dec) x6 (12)
– Stuff firmly -
dec x6 (6), FO, close opening
Hair Cap (in Black):
Work as for Rounds 1–7 of Head
Sl st and FO, sew onto head.
Eyebrows (Make 2):
With black yarn, ch 5, sl st across
Sew just above eyes
👕 Body
With white yarn:
-
MR, 6 sc (6)
-
inc x6 (12)
-
(1 sc, inc) x6 (18)
-
(2 sc, inc) x6 (24)
5–10. sc around (24) -
(2 sc, dec) x6 (18)
-
sc around (18)
Change to skin tone: -
(1 sc, dec) x6 (12)
-
dec x6 (6), FO, close and stuff
Gi Flap (Front Panel – Make 2):
With white yarn, ch 9
Row 1–6: sc in each (8), ch 1 turn
FO, sew to front crossing diagonally like a martial arts gi
🦵 Legs (Make 2)
With skin tone yarn:
-
MR, 6 sc (6)
-
inc x6 (12)
-
(3 sc, inc) x3 (15)
4–5. sc around (15)
Change to white:
6–10. sc around (15)
FO and stuff lightly
Sew to bottom of body in squat pose
💪 Arms (Make 2)
With skin tone yarn:
-
MR, 6 sc (6)
-
inc x6 (12)
3–5. sc around (12)
Change to white:
6–10. sc around (12)
FO and stuff
Sew to sides of body
🧣 Belt
With red yarn, ch 41
Row 1: sc in 2nd ch from hook and across (40)
FO and tie around waist, knot in front
Optional: Create a short ch 12 cord, fold and tie for belt tails
👀 Face Details
-
Attach 12 mm safety eyes between Rounds 10 and 11 of head, about 6 stitches apart
-
Use black yarn to embroider a simple nose and subtle mouth
🪡 Assembly
-
Sew head to body securely
-
Attach arms angled forward in martial arts pose
-
Position legs to create dynamic stance
-
Add belt and adjust for tight fit
-
Use invisible stitches for a clean finish
💡 Customization Ideas
-
Use black belt, blue belt, or other color levels to reflect real martial arts ranks
-
Stitch initials or symbols onto gi for personalization
-
Create a dojo setting or match it with other fighter dolls
This fierce little fighter brings both discipline and fun to your crochet collection! Whether you’re a karate fan or just love making dynamic dolls, this project is a true knockout! 🥋👊