Welcome to the warm and radiant world of floral-inspired amigurumi! 🌼🧶 Today, I’m delighted to share my FREE crochet pattern for an Amigurumi Marigold Doll—a vibrant celebration of tradition and craftsmanship, inspired by the golden cempasúchil blooms of Día de los Muertos. Whether you’re creating a heartfelt altar offering, stitching a meaningful gift to honor loved ones, or simply embracing the beauty of Mexican folk art, this design features a charming muñeca with layered marigold-petal skirts, delicate sugar skull embroidery, and a floral crown that captures the spirit of remembrance and joy. Perfect for cultural crafters, festival enthusiasts, or anyone who loves creating with color and symbolism.
This design blends intricate detail with heartfelt simplicity, with step-by-step instructions for the doll’s twirling skirt, embroidered floral motifs, and optional accessories like a tiny candle or papel picado banner. Choose fiery oranges, sunny yellows, and rich purples for a traditional look, or soft pastels for a gentle twist. 🌸 So grab your hooks, select your brightest yarns, and let’s crochet a tribute that blooms with love and memory. “Every stitch weaves a story—yarn becomes celebration!” ✨🧶
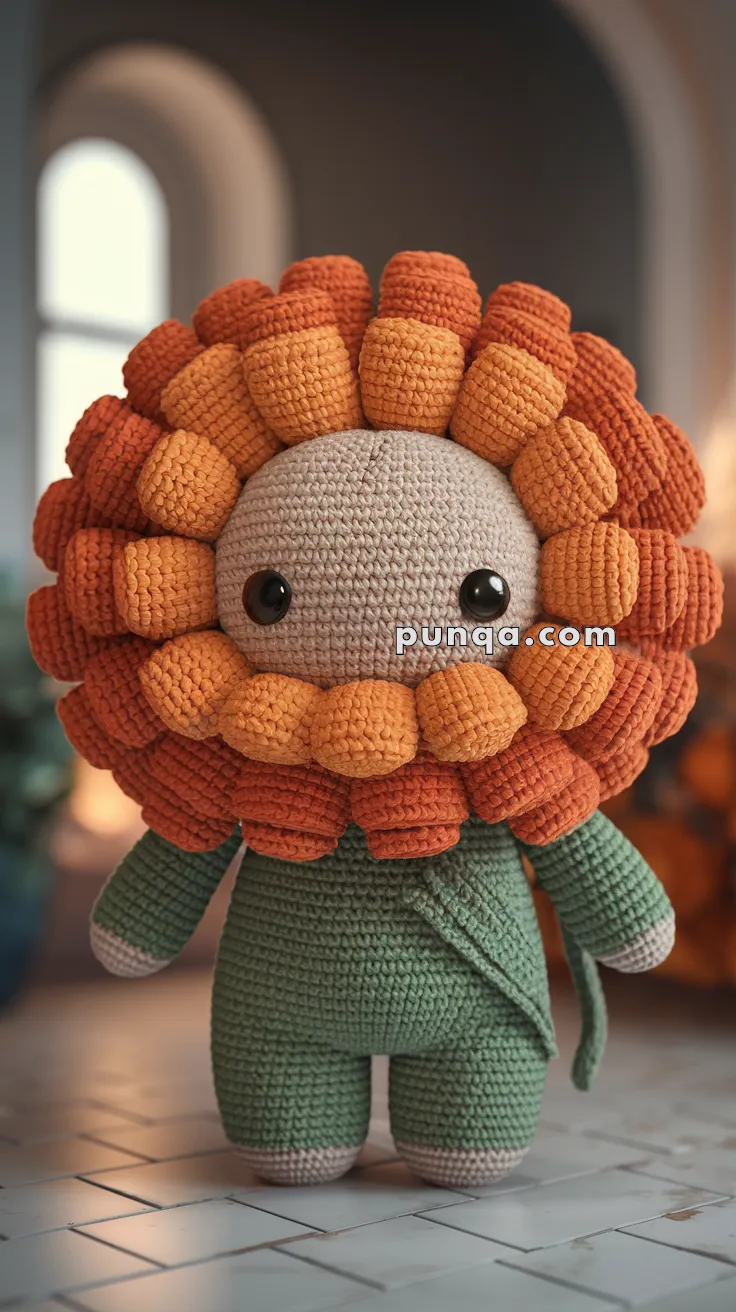
🌼 Amigurumi Marigold Flower Doll Crochet Pattern
Bring a cheerful burst of bloom into your handmade world with this marigold-inspired amigurumi! With tightly layered ruffled petals in shades of orange and gold, a soft round head, and a leafy green body, this flower buddy is perfect for nature lovers, kids, and seasonal displays.
✨ Skill Level
Intermediate – Involves 3D shaping, layered petal work, and precise attachment.
📏 Finished Size
Approx. 8–10″ (20–25 cm) tall using DK or worsted weight yarn and a 2.75–3.5 mm hook.
🧶 Materials
-
Yarn (Worsted or DK Weight):
-
Color A: Light beige (head, hands, feet)
-
Color B: Olive green (body, arms, legs, leaf wrap)
-
Color C: Marigold yellow (inner petals)
-
Color D: Burnt orange (outer petals)
-
-
Hook Size: 2.75–3.5 mm
-
12 mm safety eyes
-
Polyfill stuffing
-
Stitch markers
-
Tapestry needle
-
Black embroidery floss (for smile)
🧵 Abbreviations (US Terms)
-
MR – Magic Ring
-
sc – Single Crochet
-
inc – Increase
-
dec – Decrease
-
ch – Chain
-
sl st – Slip Stitch
-
BLO – Back Loop Only
-
FO – Fasten Off
🌸 Head
With Color A:
-
MR, 6 sc
-
inc x6 (12)
-
(1 sc, inc) x6 (18)
-
(2 sc, inc) x6 (24)
-
(3 sc, inc) x6 (30)
-
(4 sc, inc) x6 (36)
7–15. sc around (36) -
(4 sc, dec) x6 (30)
-
(3 sc, dec) x6 (24)
-
(2 sc, dec) x6 (18)
-
(1 sc, dec) x6 (12)
-
dec x6 (6), FO and close
Attach eyes between Rounds 9–10, approx. 6–7 stitches apart.
Optional: Embroider a small smile.
Stuff firmly and set aside.
🌿 Body
With Color B:
-
MR, 6 sc
-
inc x6 (12)
-
(1 sc, inc) x6 (18)
-
(2 sc, inc) x6 (24)
-
(3 sc, inc) x6 (30)
6–12. sc around (30) -
(3 sc, dec) x6 (24)
14–16. sc around (24) -
(2 sc, dec) x6 (18)
-
sc around, FO and stuff
💪 Arms (Make 2)
Start with Color A (hands):
-
MR, 5 sc
2–4. sc around
Switch to Color B (sleeves):
5–10. sc around
FO and stuff lightly
Sew to upper body.
🦵 Legs (Make 2)
Start with Color A (feet):
-
MR, 6 sc
-
inc x6 (12)
-
sc around
Switch to Color B (legs):
4–10. sc around
FO and stuff
Sew to base of body.
🍃 Leaf Wrap (Optional Accessory)
With Color B:
-
Ch 20
-
sc in 2nd ch and across
-
Ch 1, turn, sl st around to neaten
FO and wrap around waist, sew edge to body
🌼 Petal Ruffles (Make 2 Layers)
Inner Petals – Color C (Make 12):
-
Ch 6
-
sc in 2nd ch, hdc, dc, hdc, sc (petal base)
-
FO, leave tail
Sew in a circular layer around head base
Outer Petals – Color D (Make 16):
Same as above but slightly longer:
-
Ch 7
-
sc, hdc, dc x2, hdc, sc
FO and sew in second layer around the back of the head to create a full marigold bloom
Overlap petals as needed for volume.
🪄 Final Assembly
-
Attach head securely to the body.
-
Sew arms and legs evenly.
-
Wrap and sew leaf sash.
-
Layer petals tightly to create a rounded floral mane.
-
Shape petals gently with fingers for full bloom effect.
This marigold buddy will brighten any space with floral joy! Whether it’s fall, spring, or just your favorite garden vibe, this flower friend is always in bloom. 🌼🧶