Welcome to the cozy and nature-inspired world of amigurumi! 🍃✨ Today, I’m excited to share my free crochet pattern for a beautiful Leaf Pillow—a soft and textured creation perfect for adding a touch of botanical charm to your home décor! 🏡 Whether you love crafting nature-themed pieces, enjoy making decorative accents, or simply want a unique handmade pillow to brighten up your space, this pattern will guide you through stitching up a lush, leafy design full of organic beauty! 💚
This project embraces rich textures and flowing shapes to create a truly special crochet piece that brings warmth and a connection to nature! 🧶🌿 I’ve carefully outlined each step to ensure your Leaf Pillow turns out just right—perfect for snuggling, decorating, or gifting to fellow plant lovers! 🍂 So grab your hooks, choose earthy greens or autumnal hues, and let’s stitch up a cozy botanical treasure! ✨
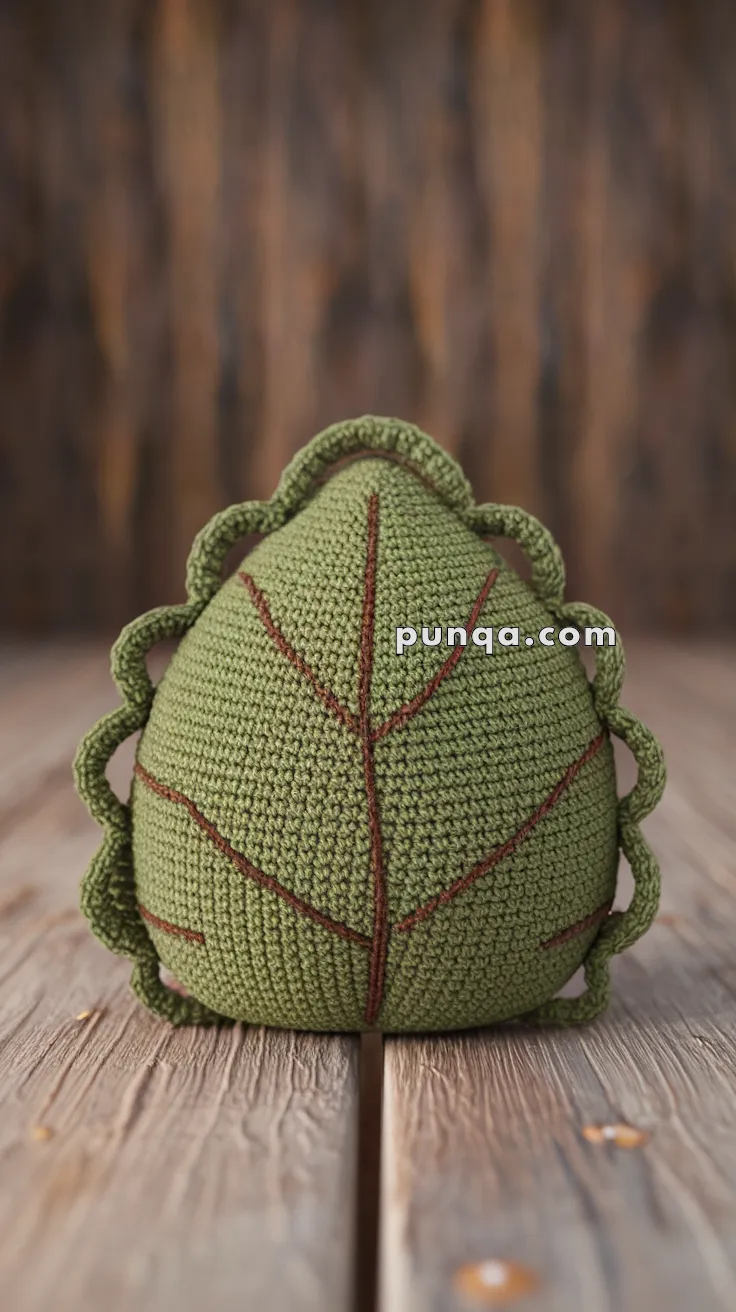
🍃 Amigurumi Leaf Pillow Crochet Pattern
Bring a cozy forest vibe into your home with this plump amigurumi leaf pillow! With a beautifully embroidered leaf vein pattern and scalloped edges, this piece is perfect as a soft woodland accent, meditation cushion, or whimsical toy. 🍂🌿
✨ Skill Level
Intermediate – Includes shaping, embroidery, and working in the round.
📏 Finished Size
Approximately 7–9 inches (18–23 cm) tall when made with worsted weight yarn and a 3.5 mm hook.
🧶 Materials
-
Yarn (Worsted Weight):
-
Olive green (Main leaf)
-
Brown (Embroidery veins)
-
-
Crochet hook: 3.5 mm
-
Tapestry needle
-
Stitch marker
-
Embroidery needle
-
Polyfill stuffing
🧵 Abbreviations (US Terms)
MR – Magic Ring
sc – Single Crochet
inc – Increase
dec – Decrease
sl st – Slip Stitch
ch – Chain
FO – Fasten Off
🍃 Leaf Body (Main Panel – Make 2)
Using olive green yarn:
-
MR, 6 sc (6)
-
inc x6 (12)
-
(1 sc, inc) x6 (18)
-
(2 sc, inc) x6 (24)
-
(3 sc, inc) x6 (30)
-
(4 sc, inc) x6 (36)
-
(5 sc, inc) x6 (42)
8–18. sc around (42) -
(5 sc, dec) x6 (36)
-
(4 sc, dec) x6 (30)
-
(3 sc, dec) x6 (24)
-
(2 sc, dec) x6 (18)
-
(1 sc, dec) x6 (12)
-
dec x6 (6)
FO and weave in ends on first piece.
Do NOT fasten off on the second piece.
🪡 Embroidery Details
Using brown yarn and embroidery needle:
-
Embroider one central vertical vein from tip to base.
-
Add angled side veins branching off symmetrically.
-
You can use back stitch or split stitch for realism.
🧷 Assembly
-
Place both leaf panels together, right sides facing out.
-
Start single crocheting around the edge to join.
-
Stuff firmly before closing completely.
-
FO and weave in the final yarn tail.
🌿 Leaf Edge Ruffle
Attach olive green yarn to any stitch on the outer edge:
-
(ch 3, sl st in next st) repeat around entire edge
This creates the beautiful scalloped outline.
FO and weave in ends.
✂️ Finishing Touches
-
Shape pillow gently with hands
-
Optional: lightly steam block the embroidered surface to smooth stitches
-
Display it on your bed, sofa, or meditation nook
💡 Customization Ideas
-
Use brighter green and yellow for a spring leaf
-
Add a loop and hang it as forest nursery decor
-
Stitch a tiny face to turn it into a kawaii leaf plush!
Let this forest-inspired amigurumi leaf bring a touch of serenity and handmade charm into your life. 🌳✨