✨ Skill Level
Advanced — panel shaping, structural assembly, and precise placement of layered details.
📏 Finished Size
Approx. 23 cm (9 in) long × 13 cm (5 in) tall
Using worsted yarn and a 3–3.5 mm hook.
🧶 Materials
-
Mustard yellow yarn — main body
-
Dark navy/black yarn — tires, trim, roof, bumpers
-
Light blue yarn — windows
-
Gray yarn — wheel rims & grille
-
Small amount orange yarn — signal lights
-
Polyester fiberfill
-
3–3.5 mm crochet hook
-
Yarn needle
-
Stitch marker
-
Optional: plastic canvas or thin cardboard insert for body base
🧵 Abbreviations (US Terms)
MR — magic ring
sc — single crochet
inc — increase
dec — decrease
ch — chain
sl st — slip stitch
BLO — back loop only
FO — fasten off
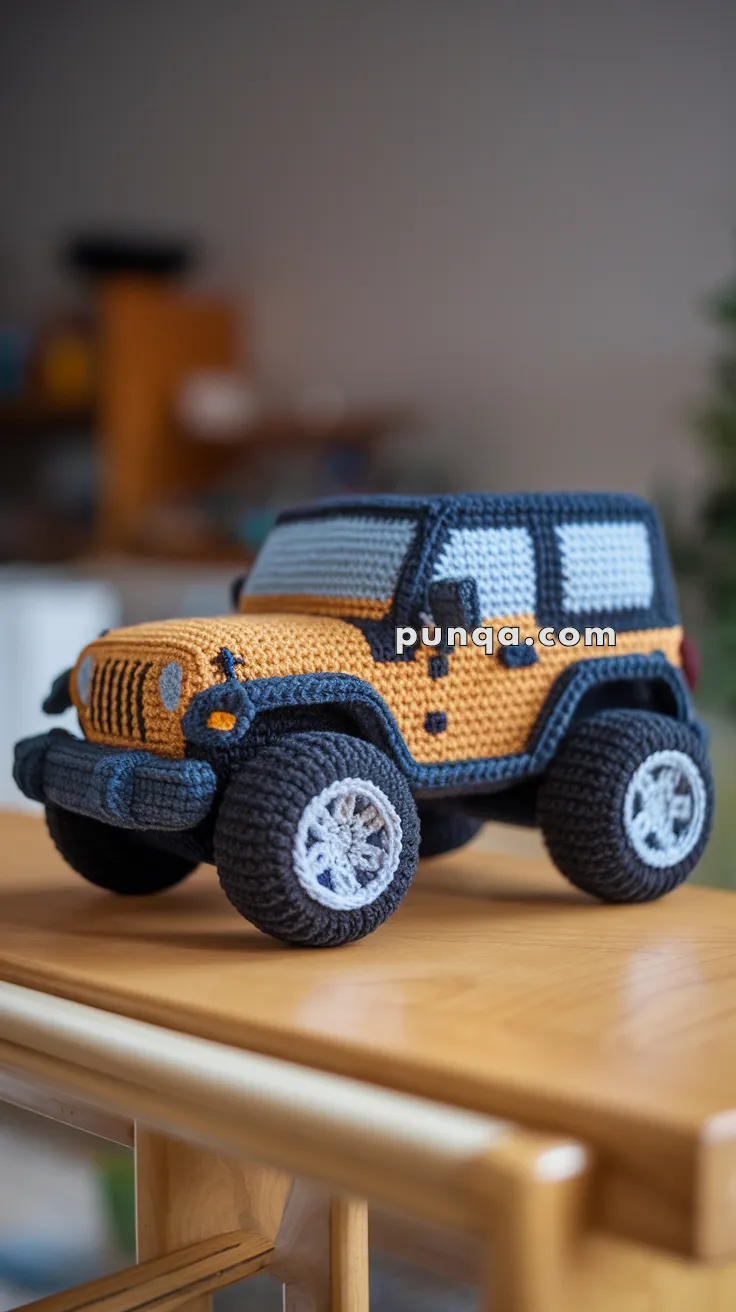
🚗 Jeep Body Shell
The body is a firm rectangular shell with vertical sides and a gently rounded hood.
Bottom Base
With mustard yarn:
Ch 26
R1: sc in 2nd ch from hook, sc 23, 3 sc in last ch; working opposite side: sc 23, 2 sc in last st (52)
R2: inc, sc 23, inc ×3, sc 23, inc ×2 (58)
R3: sc 2, inc, sc 23, (sc, inc) ×3, sc 23, (sc 2, inc) ×2 (64)
R4–5: sc around (64)
Body Walls
R6: sc BLO around (64)
R7–16: sc around (64)
Insert optional base support. Stuff lightly but keep edges crisp and flat.
Fasten off, leaving top open.
🏠 Recessed Roof Panel
With dark yarn:
Ch 20
Row 1–9: sc across (19)
Fasten off.
This panel sits slightly inset from the upper edges of the body to create the hardtop roof.
🛞 Wheels (Make 4)
Tires
With dark yarn:
R1: MR 6
R2: inc ×6 (12)
R3: (1 sc, inc) ×6 (18)
R4: (2 sc, inc) ×6 (24)
R5: (3 sc, inc) ×6 (30)
R6–15: sc around (30)
Stuff extremely firmly.
R16: (3 sc, dec) ×6 (24)
R17: (2 sc, dec) ×6 (18)
R18: (1 sc, dec) ×6 (12)
R19: dec ×6 (6)
Close tightly.
Rims (Make 4)
With gray yarn:
R1: MR 6
R2: inc ×6 (12)
R3: (1 sc, inc) ×6 (18)
Fasten off and sew centered onto tires.
🛡 Raised Wheel Arches (Make 4)
With dark yarn:
Ch 14
Row 1–5: sc across (13)
Fasten off and curve into a semi-oval. These sit prominently above each wheel.
🚦 Front Grille Panel
With gray yarn:
Ch 9
Row 1–7: sc across (8)
Fasten off.
Sew centered on the front. Add 5–6 vertical surface stitches using dark yarn to form grille slats.
🧱 Front Bumper
With dark yarn:
Ch 16
Row 1–4: sc across (15)
Lightly stuff the center and sew beneath the grille with a gentle outward curve.
🚨 Signal Lights (Make 2)
With orange yarn:
MR 6
Sl st to close.
Fasten off and sew on the front corners near the grille.
🪟 Windows
Side Windows (Make 2)
With light blue yarn:
Ch 10
Row 1–7: sc across (9)
Windshield
Ch 15
Row 1–8: sc across (14)
Fasten off all window pieces.
Sew windows inset into the body. Outline with dark surface slip stitches.
🔩 Rear Bumper
With dark yarn:
Ch 16
Row 1–4: sc across (15)
Sew centered on the rear base.
🧩 Assembly
Stuff the body firmly while maintaining flat sides.
Attach wheels underneath so they extend outward and lift the jeep. Place the front wheels slightly forward of center.
Sew wheel arches above each tire.
Attach grille, bumpers, and signal lights.
Sew windows in place.
Insert and stitch the recessed roof panel inside the top opening.
Adjust stuffing and close any gaps.
✨ Finishing Details
Embroider small door hinges or trim lines with dark yarn.
Light steam blocking sharpens edges.
Optional: attach a spare tire to the rear.
🌟 Final Thoughts
This structured amigurumi jeep combines crisp geometry with plush oversized wheels to create a bold, playful miniature vehicle. Careful shaping and firm stuffing give it a lifted off-road stance and a clean handcrafted finish. Take your time with assembly and alignment, and you’ll have a charming crochet jeep ready for display or imaginative adventures.


💞💞💞💞 THIS SO NEAT LOVE IT TY TY SVM💞💞💞💞💞💞💞