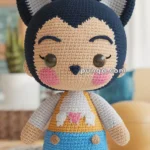
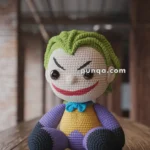
Oh, the delightful world of amigurumi! 🧶 Isn’t it just magical how a few balls of yarn and a trusty crochet hook can transform into whimsical creatures and beloved characters? One of my all-time favorites to create is the Hulk in amigurumi form. There’s just something so charming about turning this larger-than-life superhero into a soft, cuddly version that fits in the palm of your hand. It’s like capturing the essence of the Hulk’s strength and gentleness all at once. Plus, who wouldn’t want a mini Hulk as a desk buddy or a fun gift for a fellow Marvel fan? 🦸♂️
Creating an amigurumi Hulk pattern involves a delightful blend of creativity and step-by-step precision. I start by choosing vibrant green yarn to capture that iconic Hulk hue. The process usually begins with crocheting the head and body as one piece, ensuring that our little green friend has a sturdy base. Then comes the fun part—adding those tiny limbs and the expressive face that bring this soft superhero to life. The joy of seeing it all come together is unbeatable. Every stitch feels like crafting a tiny piece of art, and by the end, I’ve got a mini Hulk ready to take on the world, one adorable pose at a time! 💚

💥 Amigurumi Hulk Crochet Pattern
Unleash the cutest side of the mighty green superhero with this amigurumi Hulk pattern! With his iconic green muscles, purple shorts, and playful tuft of dark hair, this version of Hulk is more likely to give you a hug than smash something—unless it’s your stress!
✨ Skill Level
Intermediate – Involves shaping, basic embroidery, hair assembly, and some detail work on fingers and toes.
📏 Finished Size
Approx. 10–11 inches (25–28 cm) tall when using worsted yarn and a 2.5–3.5 mm crochet hook.
🧶 Materials
-
Yarn (Worsted or DK Weight):
-
Olive Green (body, head, arms, legs)
-
Purple (shorts)
-
Black or Dark Gray (hair)
-
White (teeth)
-
Dark yarn for eyebrows and embroidered details
-
-
Crochet Hook: 2.5–3.5 mm
-
10–12 mm Safety Eyes
-
Tapestry Needle
-
Polyfill Stuffing
-
Stitch Marker
-
Scissors
🧵 Abbreviations (US Terms)
MR – Magic Ring
sc – Single Crochet
inc – Increase (2 sc in one stitch)
dec – Decrease (sc two together)
ch – Chain
sl st – Slip Stitch
BLO – Back Loops Only
FO – Fasten Off
🧠 Head (Olive Green)
-
MR, 6 sc
-
inc x6 (12)
-
(1 sc, inc) x6 (18)
-
(2 sc, inc) x6 (24)
-
(3 sc, inc) x6 (30)
-
(4 sc, inc) x6 (36)
-
(5 sc, inc) x6 (42)
8–15. sc (42) -
(5 sc, dec) x6 (36)
-
(4 sc, dec) x6 (30)
-
(3 sc, dec) x6 (24)
– Insert safety eyes between R10–11, 8 sts apart
– Embroider eyebrows and white teeth with yarn -
(2 sc, dec) x6 (18)
-
(1 sc, dec) x6 (12)
-
dec x6 (6), FO and close
💪 Arms (Make 2 – Olive Green)
-
MR, 6 sc
-
inc x6 (12)
-
(1 sc, inc) x6 (18)
4–6. sc (18) -
(1 sc, dec) x6 (12)
8–12. sc (12)
– Optional: Stitch 3 small lines on end for fingers
FO and leave long tail to sew
🦵 Legs (Make 2 – Olive Green)
-
MR, 6 sc
-
inc x6 (12)
-
(1 sc, inc) x6 (18)
4–7. sc (18) -
(2 sc, dec) x4, sc 2 (14)
-
sc (14), FO
🩳 Shorts (Make 2 Legs First in Purple)
-
MR, 6 sc
-
inc x6 (12)
-
(1 sc, inc) x6 (18)
4–6. sc (18)
FO first leg. Do not FO second leg.
Join legs with ch 2, sc around both legs = 40 sts
7–9. sc around (40) -
(3 sc, dec) x8 (32)
-
(2 sc, dec) x8 (24)
– Use BLO for waistband edge, FO and leave long tail
– Add a slight ruffle stitch for ripped shorts edge
💪 Body (Attach Legs Together – Continue in Green)
Join green yarn at top of shorts.
-
sc around the last round of shorts (24)
2–6. sc around (24) -
(2 sc, dec) x6 (18)
-
(1 sc, dec) x6 (12), FO and stuff firmly
🦶 Feet & Hands
Toes (Make 3 per foot)
MR, 4 sc, sl st, FO
Sew to top of foot
Fingers (Make 4 per hand)
MR, 4 sc, sl st, FO
Sew in small fan shape to tip of each arm
💇 Hair (Black or Dark Yarn)
Cut many strands (~6–8 cm long)
Use latch-hook method or sew on top of head
Fluff and trim to spiky Hulk style
✂️ Assembly Instructions
-
Attach head to top of body
-
Sew arms to upper sides
-
Position and sew legs to the base if not already joined
-
Stitch on ears (optional) or sculpt them with embroidery
-
Add final touches: embroidered eyebrows, mouth, and toes
The amigurumi Hulk is ready to leap into action—with hugs, not havoc! He’s squishy, strong, and surprisingly sweet—perfect for superhero fans of all ages. 💚💪


