Bring a touch of rustic charm to your crochet collection with this Amigurumi Highland Cow pattern! Inspired by the shaggy, lovable cows of the Scottish Highlands, this adorable amigurumi captures their signature fluffy coat, curved horns, and gentle expression in every stitch. Whether you’re crafting for farm animal lovers, adding a cozy accent to your handmade collection, or simply enjoy making unique crochet designs, this Highland Cow is sure to steal hearts. Perfect for gifting, decorating a nursery, or simply celebrating the joy of handmade creations, this amigurumi Highland Cow brings warmth and personality—one stitch at a time! 🐮✨
Designed for customization, this pattern allows you to experiment with different shades of brown, embroidered details, or even tiny accessories like a miniature flower crown or scarf for extra charm. Craft a classic Highland Cow with rich earthy tones, create a whimsical version with pastel hues, or even stitch up a full set of farm-inspired amigurumi for a delightful display! Whether gifted as a cherished keepsake, displayed as a cozy accent, or made simply for the joy of crafting, this Amigurumi Highland Cow is a fun and creative project—perfect for bringing a touch of handmade countryside magic to every stitch! 🧶💖
🐮 Amigurumi Highland Cow Crochet Pattern
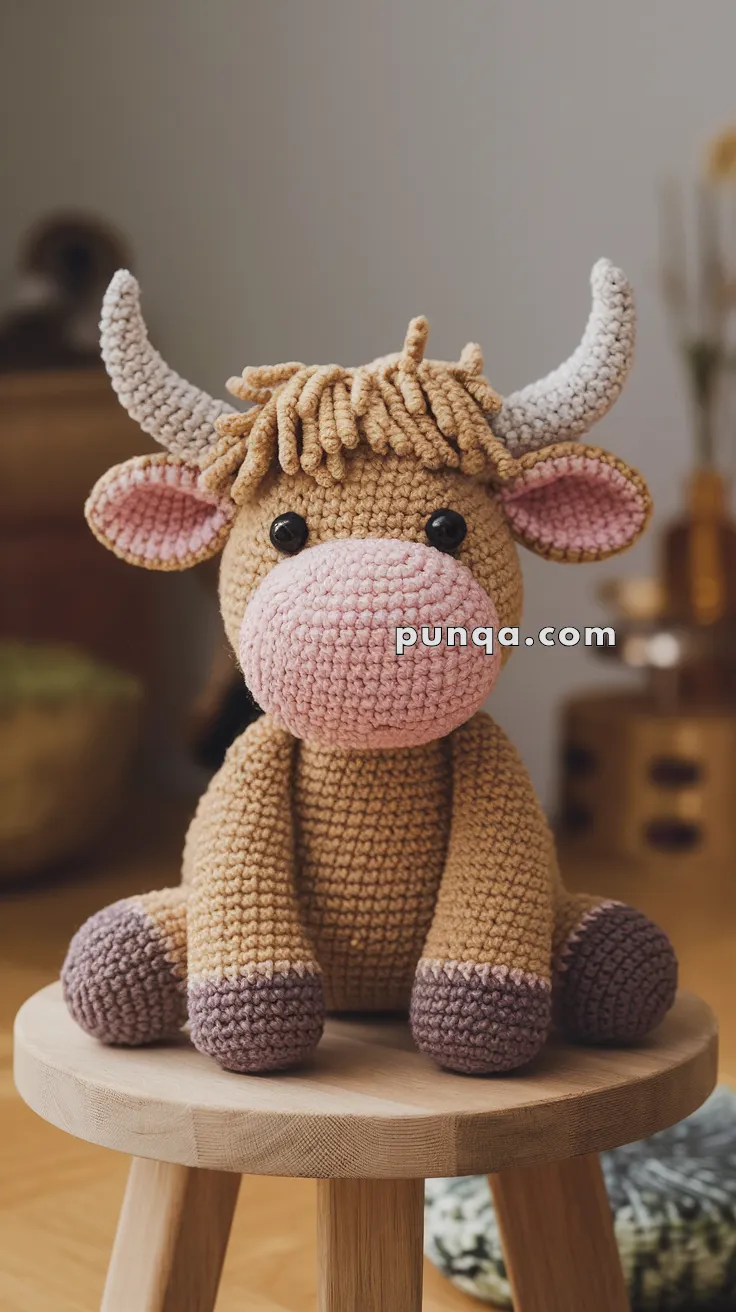
Bring the cozy charm of the Scottish Highlands into your home with this irresistibly sweet Highland Cow. This seated amigurumi features a tall rounded head, oversized soft-pink snout, shaggy caramel fringe, wide drooping ears, curved cream horns, and plump little legs that create the calm, cuddly posture seen in the photo.
Perfect as a nursery keepsake, heartfelt gift, or comforting décor piece, this cow is full of warmth and gentle personality.
🌟 Skill Level
Intermediate — includes shaping, layered fringe, curved horns, and precise placement for facial features.
📏 Finished Size
Approximately 12–13 inches (30–33 cm) tall in a seated position using worsted-weight yarn.
🧶 Materials
Worsted Weight Yarn
-
Color A – Caramel Brown: head, body, arms, legs, outer ears, fringe
-
Color B – Cocoa Brown: hooves
-
Color C – Soft Pink: snout, inner ears
-
Color D – Cream: horns
Notions
-
3.5 mm crochet hook
-
12 mm safety eyes
-
Polyester fiberfill
-
Tapestry needle
-
Stitch marker
-
Scissors
🔤 Abbreviations (US Terms)
-
MR – Magic Ring
-
sc – Single Crochet
-
inc – Increase
-
dec – Invisible Decrease
-
sl st – Slip Stitch
-
ch – Chain
-
FO – Fasten Off
🐮 Head (Color A – Caramel Brown)
MR, 6 sc
inc x6 → 12
(sc, inc) x6 → 18
(2 sc, inc) x6 → 24
(3 sc, inc) x6 → 30
(4 sc, inc) x6 → 36
(5 sc, inc) x6 → 42
(6 sc, inc) x6 → 48
(7 sc, inc) x6 → 54
Rounds 10–22: sc around (54)
This extended section creates the slightly taller-than-wide head profile visible in the photo.
Do not close yet.
👀 Eye Placement
Insert 12 mm safety eyes:
-
Between Rounds 11–12
-
Spaced 14–16 stitches apart
-
Positioned just above where the snout will sit
This placement gives the calm, friendly expression seen in the finished cow.
🩷 Snout (Color C – Soft Pink)
MR, 8 sc
inc x8 → 16
(sc, inc) x8 → 24
(2 sc, inc) x8 → 32
(3 sc, inc) x8 → 40
(4 sc, inc) x8 → 48
Rounds 7–16: sc around (48)
(6 sc, dec) x6 → 42
sc around (42)
(5 sc, dec) x6 → 36
FO, leave a long sewing tail.
Stuff very firmly so the snout bulges forward.
When sewing, position the top edge so it rises slightly into the lower eye line, forming soft rounded cheeks.
✂️ Fringe / Mane (Color A)
Cut 60–70 strands, each 7–8 cm long.
Attach fringe using a lark’s head knot in 5–6 dense rows:
-
First row begins just behind the horns
-
Final row ends just above the eyes
-
Leave sides slightly longer than the center
Trim carefully for a natural shaggy look, allowing uneven texture.
🐮 Horns (Color D – Cream) – Make 2
MR, 5 sc
Rounds 2–4: sc (5)
(sc, inc) x2, sc → 7
Rounds 6–8: sc (7)
(2 sc, inc) x2, sc → 9
Rounds 10–13: sc (9)
(3 sc, inc) x2, sc → 11
Rounds 15–19: sc (11)
(4 sc, inc) x2, sc → 13
Rounds 21–26: sc (13)
(2 sc, dec) x3, sc → 10
Rounds 28–30: sc (10)
FO, stuff lightly.
Shape each horn so it curves outward → upward → slightly forward before attaching.
👂 Ears (Make 2)
Outer Ear (Color A)
MR, 6
inc x6 → 12
(sc, inc) x6 → 18
(2 sc, inc) x6 → 24
sc around (24)
FO
Inner Ear (Color C)
MR, 6
inc x6 → 12
(sc, inc) x6 → 18
FO
Sew inner ear onto outer ear.
Fold gently and attach ears under the horns, angled outward with a soft droop.
🧸 Body (Color A)
MR, 6
inc x6 → 12
(sc, inc) x6 → 18
(2 sc, inc) x6 → 24
(3 sc, inc) x6 → 30
(4 sc, inc) x6 → 36
Rounds 7–17: sc around (36)
(4 sc, dec) x6 → 30
(3 sc, dec) x6 → 24
(2 sc, dec) x6 → 18
(sc, dec) x6 → 12
FO, stuff firmly.
🐾 Arms (Make 2)
Hoof (Color B)
MR, 6
inc x6 → 12
Rounds 3–5: sc (12)
Switch to Color A
Rounds 6–14: sc (12)
(sc, dec) x4 → 8
Stuff lightly.
FO
Attach arms slightly forward for a relaxed seated pose.
🐾 Legs (Make 2)
Hoof (Color B)
MR, 6
inc x6 → 12
(sc, inc) x6 → 18
Rounds 4–6: sc (18)
Switch to Color A
Rounds 7–12: sc (18)
Stuff firmly.
FO
Attach legs wide and angled outward to support the seated position.
🪡 Assembly Order
-
Sew snout onto head, shaping cheeks gently
-
Attach horns symmetrically
-
Sew ears under horns
-
Add layered fringe
-
Sew head to body
-
Attach legs for seated balance
-
Sew arms at sides
Optional: embroider small nostrils or a subtle smile for added character.
🌼 Final Notes
Your Highland Cow is now complete — soft-faced, shaggy, and full of gentle charm. The proportions, textures, and placement work together to create a calm, cuddly companion that looks beautiful from every angle. Whether it becomes a treasured gift or a cozy addition to your home, this cow is sure to bring warmth and smiles wherever it goes.
Happy crocheting 🧶💛