As the leaves turn golden and the air gets crisp, my thoughts inevitably drift towards cozy crafts that capture the essence of autumn. 🍂 One of my all-time favorites is creating amigurumi haunted pumpkins. There’s something truly magical about transforming a simple skein of yarn into a whimsical, spooky decoration that adds a playful touch to any Halloween setup. The charm of amigurumi lies in its simplicity and the ability to infuse each creation with personality and character. Crafting these little haunted pumpkins is not just a creative outlet, but an invitation to bring a bit of handcrafted joy into my seasonal celebrations. 🎃
The process itself is an enchanting journey that begins with selecting the perfect yarn. I usually opt for vibrant oranges, deep blacks, and ghostly whites to capture that quintessential Halloween vibe. 🧶 Picking up my trusty crochet hook, I start with a magic ring and work my way through a series of simple stitches, shaping each pumpkin with care and precision. It’s amazing how a few increases and decreases can bring a plump little pumpkin to life. Adding facial features is always a treat, whether I decide on a cheeky grin or a spooky scowl. With each stitch, I’m not just crafting a decoration—I’m weaving a story that will be part of my home for the season. 🧡
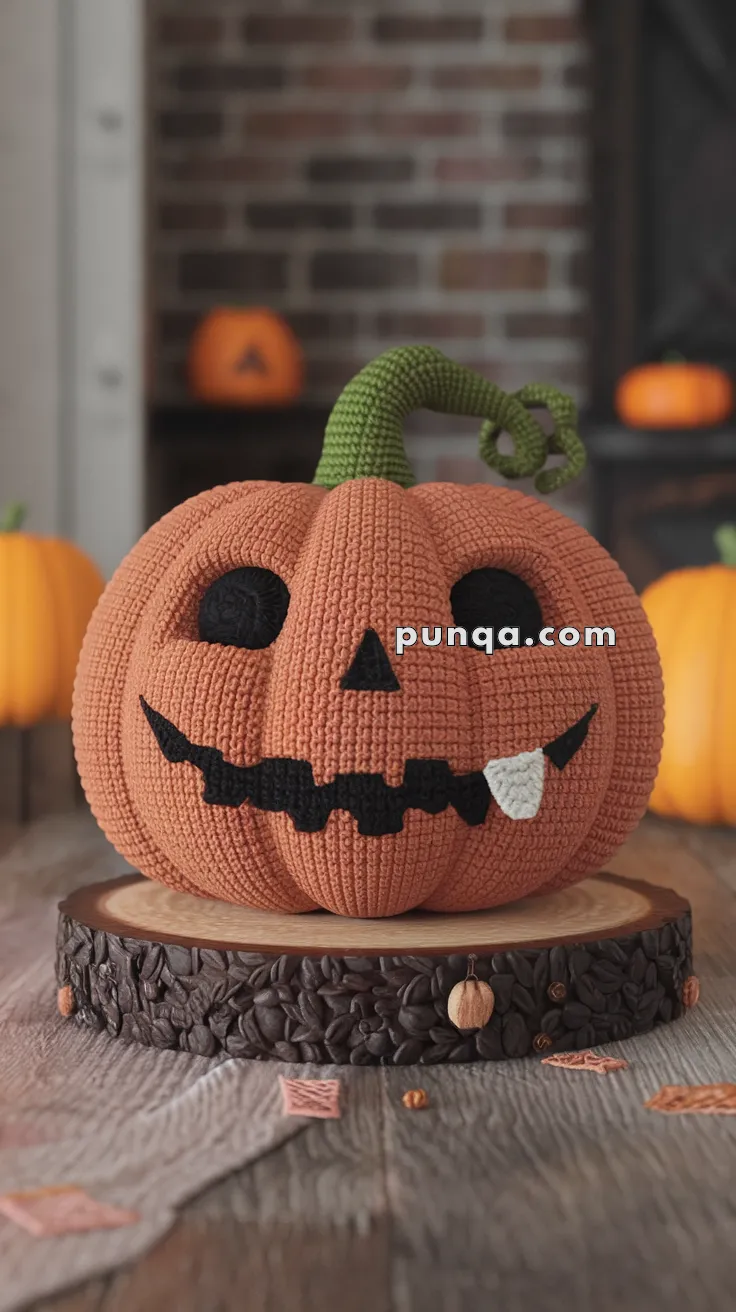
🎃 Amigurumi Haunted Pumpkin Crochet Pattern
Get ready for some spooky stitches! This haunted pumpkin—with its mischievous grin, oval eyes, and twisty vine stem—is the perfect Halloween decoration. Whether perched on your mantel or gifted to a pumpkin-loving ghoul, it’s bound to bring wicked charm to your home!
✨ Skill Level
Intermediate – involves shaping, embroidery, and light sculpting for the ridges and stem.
📏 Finished Size
Approx. 6–8 inches (15–20 cm) wide and 6 inches tall when using worsted yarn and a 3.5–4 mm hook.
🧶 Materials
-
Worsted or DK yarn:
-
Orange (pumpkin body)
-
Green (stem & vine)
-
Black (eyes, mouth, nose)
-
White (fang)
-
-
Crochet hook: 3.5–4 mm
-
Polyfill stuffing
-
Tapestry needle
-
Stitch marker
-
Optional: pipe cleaner for vine shaping
🧵 Abbreviations (US Terms)
-
MR = Magic Ring
-
sc = single crochet
-
inc = increase (2 sc in same st)
-
dec = decrease (sc2tog)
-
sl st = slip stitch
-
ch = chain
-
FO = fasten off
-
BLO = back loop only
🎃 Pumpkin Body (Orange)
-
MR, 6 sc
-
R2: inc x6 (12)
-
R3: (sc, inc) x6 (18)
-
R4: (2 sc, inc) x6 (24)
-
R5: (3 sc, inc) x6 (30)
-
R6: (4 sc, inc) x6 (36)
-
R7: (5 sc, inc) x6 (42)
-
R8: (6 sc, inc) x6 (48)
-
R9: (7 sc, inc) x6 (54)
-
R10: (8 sc, inc) x6 (60)
-
R11–25: sc around (60)
-
R26: (8 sc, dec) x6 (54)
-
R27: (7 sc, dec) x6 (48)
-
R28: (6 sc, dec) x6 (42)
-
R29: (5 sc, dec) x6 (36)
-
R30: (4 sc, dec) x6 (30)
-
R31: (3 sc, dec) x6 (24)
👉 Start stuffing -
R32: (2 sc, dec) x6 (18)
-
R33: (sc, dec) x6 (12)
-
R34: dec x6 (6) → FO and weave closed
Optional Ridges:
Thread a long orange strand from top to bottom through the pumpkin. Pull tightly to form 6–8 ridges. Repeat for all indentations.
🌿 Stem (Green)
-
MR, 6 sc
-
R2–6: sc around (6)
-
R7: (sc, inc) x3 (9)
-
R8–12: sc around (9)
FO, sew to pumpkin top.
🍃 Curly Vine (Green)
-
Ch 20–25
-
Work 2 sc in each ch back to start (this makes a curl).
👉 For extra stiffness, wrap vine around a pipe cleaner before sewing.
FO, attach beside stem.
👀 Eyes (Black – Oval, 2x)
-
MR, 6 sc
-
R2: inc x6 (12)
-
R3: (sc, inc) x6 (18)
-
R4: sc around (18)
-
R5: sc 9, ch 1, turn, sc 9 → this flattens the top, making the eye oval.
FO, sew one on each side of pumpkin, slightly indented.
👃 Nose (Black)
-
MR, 4 sc
-
R2: sc around (4)
FO. Shape into a small triangle and sew between the eyes.
😬 Mouth (Black – Embroidered Jagged Grin)
-
With black yarn, surface crochet or embroider directly onto pumpkin.
-
Work in a wide zigzag line, curving slightly upward at both ends.
-
Make 3–4 sharp “teeth” along bottom edge for a spooky grin.
🧛 Fang (White – Single Tooth)
-
MR, 4 sc (4)
-
R2–3: sc around (4)
FO, stuff lightly.
👉 Sew onto right side of mouth, angled slightly outward.
✂️ Assembly
-
Stuff pumpkin firmly and shape ridges with yarn strand method.
-
Attach stem and curly vine to top.
-
Sew on oval eyes and triangle nose.
-
Embroider jagged zigzag grin.
-
Add white fang angled outward.
🌟 Finishing Touches
-
Add LED tea light inside for a spooky glow.
-
Make a patch of pumpkins by changing face styles.
-
Try glow-in-the-dark yarn for fang or eyes!
🎁 Your Haunted Pumpkin is complete! With its wide grin, oval eyes, twisted vine, and cheeky fang, it’s a frightfully fun addition to your handmade Halloween décor. 👻🎃