Bring the legendary archer to life with this Amigurumi Green Arrow crochet pattern! Inspired by the iconic superhero, this miniature version captures his signature hood, bow, and determined expression in every stitch. Whether you’re crafting for comic book fans, adding a heroic touch to your handmade collection, or simply enjoy making detailed amigurumi designs, this pattern lets you create a tiny Green Arrow bursting with personality. Perfect for gifting to fellow superhero enthusiasts, decorating a themed space, or celebrating the joy of handmade creations, this amigurumi Green Arrow is ready to take aim—one stitch at a time! 🏹✨
Designed for customization, this pattern allows you to experiment with different shades of green, embroidered details, or even tiny accessories like a miniature quiver or mask for extra charm. Craft a classic Green Arrow with his iconic look, create a whimsical version with bold colors, or even stitch up a full set of superhero-inspired amigurumi for an action-packed display! Whether gifted as a cherished keepsake, displayed as a heroic accent, or made simply for the joy of crafting, this Amigurumi Green Arrow is a fun and creative project—perfect for bringing a touch of handmade adventure to every stitch! 🧶💖
![]()
🏹 Amigurumi Green Arrow-Inspired Doll Crochet Pattern
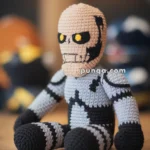
This adorable Green Arrow-inspired amigurumi features a forest-green suit, golden hood trim, and tiny arrow-like tail details, bringing a whimsical charm to the iconic archer. Perfect for fans of forest fantasy or superhero miniatures!
✨ Skill Level
Intermediate – Includes shaping, color work, hood trim, and light embroidery.
📏 Finished Size
Approx. 8–10 inches (20–25 cm) tall using DK or worsted yarn and a 2.5–3.5 mm hook.
🧶 Materials
-
Yarn (Worsted or DK):
-
Color A – Forest Green (Body, limbs, hood)
-
Color B – Gold (Hood border)
-
Color C – Black (Nose)
-
Color D – Light Green (Tail feather/arrow tip)
-
-
Crochet hook: 2.5–3.5 mm
-
Safety eyes (10–12 mm)
-
Tapestry needle
-
Stitch markers
-
Polyfill stuffing
-
Scissors
🧵 Abbreviations (US Terms)
MR – Magic Ring
sc – Single Crochet
inc – Increase
dec – Decrease
ch – Chain
sl st – Slip Stitch
FO – Fasten Off
BLO – Back Loop Only
🧠 Color Change Tips
-
Always change color on the last yarn-over of the previous stitch.
-
For the hood trim, use surface slip stitch or attach and sc evenly around the edge.
👤 Head (Color A)
-
MR, 6 sc
-
inc x6 (12)
-
(1 sc, inc) x6 (18)
-
(2 sc, inc) x6 (24)
-
(3 sc, inc) x6 (30)
-
(4 sc, inc) x6 (36)
7–14. sc around (36)
– Insert safety eyes between Rounds 10–11, ~6 sts apart
– Optional: Embroider nose with Color C -
(4 sc, dec) x6 (30)
-
(3 sc, dec) x6 (24)
-
(2 sc, dec) x6 (18)
– Stuff firmly -
(1 sc, dec) x6 (12)
-
dec x6 (6)
FO and weave to close.
🧥 Body (Color A)
-
MR, 6 sc
-
inc x6 (12)
-
(1 sc, inc) x6 (18)
-
(2 sc, inc) x6 (24)
5–13. sc around (24) -
(2 sc, dec) x6 (18)
15–16. sc around (18)
– Stuff firmly
FO and sew to head.
💪 Arms (Make 2 – Color A)
-
MR, 6 sc
-
(1 sc, inc) x3 (9)
3–12. sc around (9)
Stuff lightly
FO and sew to sides of body.
🦵 Legs (Make 2 – Color A)
-
MR, 6 sc
-
inc x6 (12)
3–5. sc around (12) -
(2 sc, dec) x3 (9)
7–10. sc around (9)
Stuff firmly
FO and sew sitting at the base.
🧝 Hood (Color A)
-
MR, 6 sc
-
inc x6 (12)
-
(1 sc, inc) x6 (18)
-
(2 sc, inc) x6 (24)
-
(3 sc, inc) x6 (30)
6–12. sc around (30) -
(4 sc, inc) x6 (36)
14–16. sc around (36)
FO and fit snugly over head.
✨ Hood Trim (Color B)
Attach yarn at base edge of hood and:
-
sc evenly around the opening of the hood (approx. 40–45 sc total)
-
Optional: use reverse sc or surface slip stitch for a more decorative look
FO and weave in ends.
🏹 Arrow Tail Accent (Back of Hood)
-
Ch 6 with Color A
-
sc across (5), ch 1, turn
-
dec, sc, dec (3)
-
dec, sc (2)
-
dec
FO. Wrap and tie a small light green brush-style tassel for fletching (Color D). Attach to the back of the hood tip.
✂️ Assembly
-
Sew head to body.
-
Attach arms slightly below neck.
-
Sew legs on bottom of body, angled forward.
-
Place hood and stitch gently along back neckline if desired.
-
Add tail accent and secure with stitches or knot.
💡 Customization Ideas
-
Add a bow or tiny quiver
-
Use variegated green yarn for texture
-
Make a companion Red Archer in red tones!
This tiny Green Arrow-inspired amigurumi is ready to guard your shelves with cozy courage and adorable charm! 🏹🧶