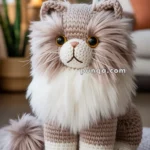
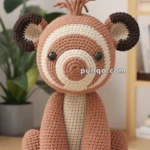
Creating an amigurumi Gollum is a delightful journey that combines the charm of crochet with the whimsical world of “The Lord of the Rings.” 🧶✨ There’s something truly magical about bringing such a complex character to life through yarn and a crochet hook. The appeal lies in the unique blend of creativity, craftsmanship, and a touch of geeky fandom. Crafting Gollum in amigurumi form allows me to add a personal twist to a beloved character. Plus, it’s a conversation starter that captures the hearts of both crochet enthusiasts and Tolkien fans alike. The process feels like a joyful dance between creativity and technique, as I work to capture Gollum’s distinct features and quirky personality.
The first step in this delightful adventure is gathering the right materials: a selection of yarn in shades that reflect Gollum’s pallid yet intriguing complexion, along with the perfectly-sized crochet hook to ensure those stitches are just right. As I start, I focus on capturing Gollum’s unique characteristics, like his large, expressive eyes and his wiry frame. 🧙♂️ With a little patience and a lot of imagination, each stitch brings him closer to life. Crafting an amigurumi Gollum is more than just a hobby; it’s a journey into a world of creativity and fantasy where I can immerse myself and emerge with a tiny, yarn-crafted treasure.

🧌 Amigurumi Gollum-Inspired Goblin Crochet Pattern
Looking for a mischievous companion straight from a fantasy realm? This wide-eared, big-eyed goblin creature is perfect for fans of quirky crochet! With floppy limbs, a long tongue, and jagged teeth, this goblin is full of personality and charm.
🧶 Skill Level
Intermediate
📏 Finished Size
Approximately 8–9 inches (20–23 cm) seated
🪡 Materials Needed
-
DK or worsted weight yarn in:
-
Gray or pale green (main body)
-
Pink (inner ears and tongue)
-
Beige/off-white (teeth)
-
-
3.0 mm crochet hook
-
10–12 mm safety eyes
-
Polyester fiberfill stuffing
-
Stitch markers
-
Tapestry needle
-
Scissors
-
Optional: black thread for mouth outline
🧵 Abbreviations (US Terms)
-
sc – single crochet
-
inc – increase (2 sc in same stitch)
-
dec – decrease (sc 2 together)
-
MR – magic ring
-
ch – chain
-
sl st – slip stitch
-
FLO – front loop only
-
FO – fasten off
👤 Head (Gray/Green)
-
MR, 6 sc
-
inc x6 (12)
-
(1 sc, inc) x6 (18)
-
(2 sc, inc) x6 (24)
-
(3 sc, inc) x6 (30)
-
(4 sc, inc) x6 (36)
7–13. sc around (36)
– Insert safety eyes between R10–11, ~7 stitches apart
– Embroider mouth if desired
– Stuff head firmly -
(4 sc, dec) x6 (30)
-
(3 sc, dec) x6 (24)
-
(2 sc, dec) x6 (18)
-
(1 sc, dec) x6 (12)
-
dec x6 (6)
– FO and close
👂 Ears (Make 2 – Gray + Pink Inner)
Outer Ear (Gray)
-
MR, 6 sc
-
(1 sc, inc) x3 (9)
-
(2 sc, inc) x3 (12)
-
(3 sc, inc) x3 (15)
-
sc around (15)
– Flatten, FO, leave tail to sew
Inner Ear (Pink)
– Repeat rounds 1–4 from above
– Sew pink inner to gray outer
– Sew ears to sides of head, slightly curved
👅 Tongue (Pink)
-
ch 5
-
sc in 2nd ch from hook and across (4)
3–5. sc across (4)
– FO and shape with curve; sew into mouth opening
🦷 Teeth (Beige – Make 4–5)
-
ch 3, sc in 2nd ch from hook and next (2)
– FO and sew spaced evenly on top jaw inside mouth
🧍 Body (Gray)
-
MR, 6 sc
-
inc x6 (12)
-
(1 sc, inc) x6 (18)
-
(2 sc, inc) x6 (24)
5–12. sc around (24) -
(2 sc, dec) x6 (18)
-
(1 sc, dec) x6 (12)
– Stuff, FO
✋ Arms (Make 2 – Gray)
-
MR, 6 sc
2–9. sc around (6)
– Do not stuff
– FO and sew to body sides
🦶 Legs (Make 2 – Gray)
-
MR, 6 sc
-
inc x6 (12)
-
(1 sc, inc) x6 (18)
4–6. sc around (18) -
(1 sc, dec) x6 (12)
8–10. sc around (12)
– Stuff lightly
– FO and sew to base of body with wide stance
🧷 Assembly
-
Attach head to body securely
-
Sew on ears at an outward angle
-
Attach arms and legs firmly
-
Sew tongue and teeth in mouth area
-
Optional: Use thin thread to define lips or nostrils with small embroidery stitches
✨ Final Touches
-
Add blush using makeup or light yarn for cheeks
-
Use surface slip stitches to define toes or ribs
-
Pose ears for maximum expression!


