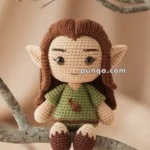
Oh, the joy of creating amigurumi! 🎉 There’s something truly special about bringing a little character to life with nothing more than yarn, a hook, and a lot of love. Amigurumi, the Japanese art of knitting or crocheting small, stuffed yarn creatures, has captured hearts worldwide. Among the many possibilities, a Gimli amigurumi stands out as a delightful project, especially for fans of “The Lord of the Rings.” Crafting a Gimli amigurumi combines the charm of this beloved dwarf with a dose of creativity and whimsy. Watching Gimli’s beard take shape, or his distinctive helmet come together, fills me with excitement each step of the way.
The process itself is a journey filled with creativity and fun. Starting with choosing the perfect yarn colors to mimic Gimli’s iconic look, I can’t help but feel like I’m setting off on a mini crafting adventure. 🧶 The pattern usually begins with the head and body, followed by those quintessential features like his bushy beard and sturdy helmet. Adding details such as his axe or a tiny cloak can be incredibly rewarding, turning a simple yarn creation into a recognizable character. Every stitch feels like a step closer to completing a one-of-a-kind piece that I can proudly display or gift to a fellow fan. Each project is a chance to refine my skills and indulge in a little creative storytelling through yarn.
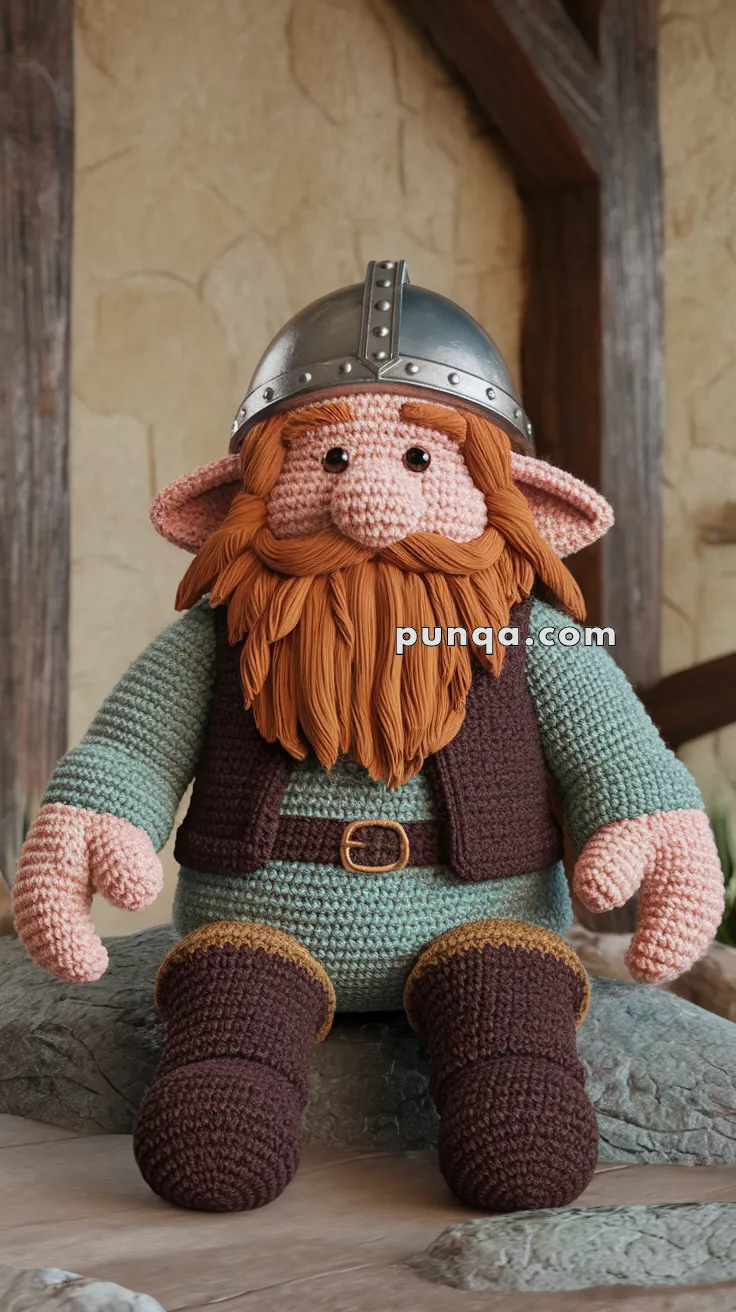
🪓 Amigurumi Gimli Crochet Pattern
Bring this stout and brave dwarven warrior to life with yarn! This amigurumi Gimli doll features his iconic red beard, battle-ready armor, and signature dwarf proportions—perfect for LOTR fans and fantasy crafters alike.
🧵 Skill Level
Intermediate
📏 Finished Size
Approximately 12–14 inches (30–36 cm) tall using worsted weight yarn
🧶 Materials
-
Worsted weight yarn in:
-
Skin tone (face, hands)
-
Brick red or rust (beard and eyebrows)
-
Steel gray or silver (helmet)
-
Olive green (shirt)
-
Brown (pants, vest, boots, belt)
-
Mustard yellow (boot cuffs)
-
-
Crochet hook: 2.5 mm or 3.0 mm
-
10 mm safety eyes (or black yarn for embroidery)
-
Stitch markers
-
Fiberfill stuffing
-
Yarn needle
-
Optional: metal or faux leather buckle piece for belt
✨ Abbreviations (US Terms)
-
MR – Magic Ring
-
sc – Single Crochet
-
inc – Increase
-
dec – Decrease
-
sl st – Slip Stitch
-
ch – Chain
-
BLO – Back Loop Only
-
FLO – Front Loop Only
-
FO – Fasten Off
👤 Head (Skin Color)
-
MR, 6 sc
-
inc x6 (12)
-
(1 sc, inc) x6 (18)
-
(2 sc, inc) x6 (24)
-
(3 sc, inc) x6 (30)
-
(4 sc, inc) x6 (36)
7–14. sc around (36) -
(4 sc, dec) x6 (30)
-
(3 sc, dec) x6 (24)
-
(2 sc, dec) x6 (18)
– Insert safety eyes between Rnd 10–11, approx. 6 sts apart
– Embroider brows and nose -
(1 sc, dec) x6 (12)
– Stuff firmly, FO and close
🧔 Beard and Hair (Rust)
-
Cut multiple strands and attach loop-style around chin
-
Braid small sections or embroider beard lines for texture
-
Add two thick brows above the eyes
-
Attach in layers under the helmet brim
🪖 Helmet (Gray)
-
MR, 6 sc
-
inc x6 (12)
-
(1 sc, inc) x6 (18)
-
(2 sc, inc) x6 (24)
-
(3 sc, inc) x6 (30)
6–9. sc around (30) -
sc 22, ch 8, skip 8 sts (for face opening), join (30)
11–13. sc around including chs
– FO, embellish with front strip and side bolts
👕 Body (Green)
-
MR, 6 sc
-
inc x6 (12)
-
(1 sc, inc) x6 (18)
-
(2 sc, inc) x6 (24)
5–10. sc around -
(3 sc, inc) x6 (30)
12–18. sc around
– Switch to brown for belt area -
BLO, sc around
20–23. sc around
– FO, stuff and attach to head
🧤 Arms (Make 2 – Start with Skin Color)
-
MR, 6 sc
-
inc x6 (12)
3–5. sc around -
Switch to green
7–14. sc around
– Lightly stuff, FO and sew to body sides
🥾 Legs (Brown + Yellow Top – Make 2)
-
MR, 6 sc
-
inc x6 (12)
-
(1 sc, inc) x6 (18)
4–8. sc around -
Switch to mustard
10–13. sc around
– FO, stuff and sew to bottom of body
🦺 Vest (Brown)
-
ch enough to wrap halfway around torso
-
Work back and forth in rows to desired length
-
Leave armholes and neckhole
-
FO, sew or leave open front for realism
🪡 Assembly & Details
-
Sew head to body securely
-
Attach helmet over beard and brow
-
Stitch arms and legs in seated pose
-
Add a yarn or metal belt buckle
-
Optional: crochet a small axe or shield accessory
✨ Final Touches
-
Add blush using pink pastel or yarn
-
Embroider nose bridge, ears, and finger lines
-
Add faux leather trim to vest or helmet for realism
-
Pose seated on a rock or throne for full effect!