There’s something genuinely delightful about creating amigurumi, especially when it comes to crafting them for specific occasions like Easter! 🐣🐰 The charm of these tiny, handmade treasures lies in their ability to capture the imagination and bring a touch of whimsy to any setting. As someone who loves both crocheting and celebrating holidays, I find great joy in designing and bringing to life these adorable pieces, particularly Easter-themed ones like an amigurumi Easter bonnet. With the vibrant colors and playful designs, each little creation becomes a decorative delight, perfect for adding a splash of festive cheer to Easter celebrations.
The process of creating an amigurumi Easter bonnet pattern is wonderfully engaging and surprisingly simple once you get the hang of it. You start by selecting your favorite soft yarns in cheerful pastel shades—perhaps a sunny yellow, soft pink, or a calming lavender. 🌸 The real magic happens as you begin to crochet, stitch by stitch, transforming strands of yarn into a tiny, detailed bonnet, complete with ribbons and maybe even a little flower or two. As you work, there’s a sense of accomplishment that grows with every loop and twist of the yarn, knowing that at the end, you’ll have a unique, handmade piece that’s both a labor of love and a testament to creativity.
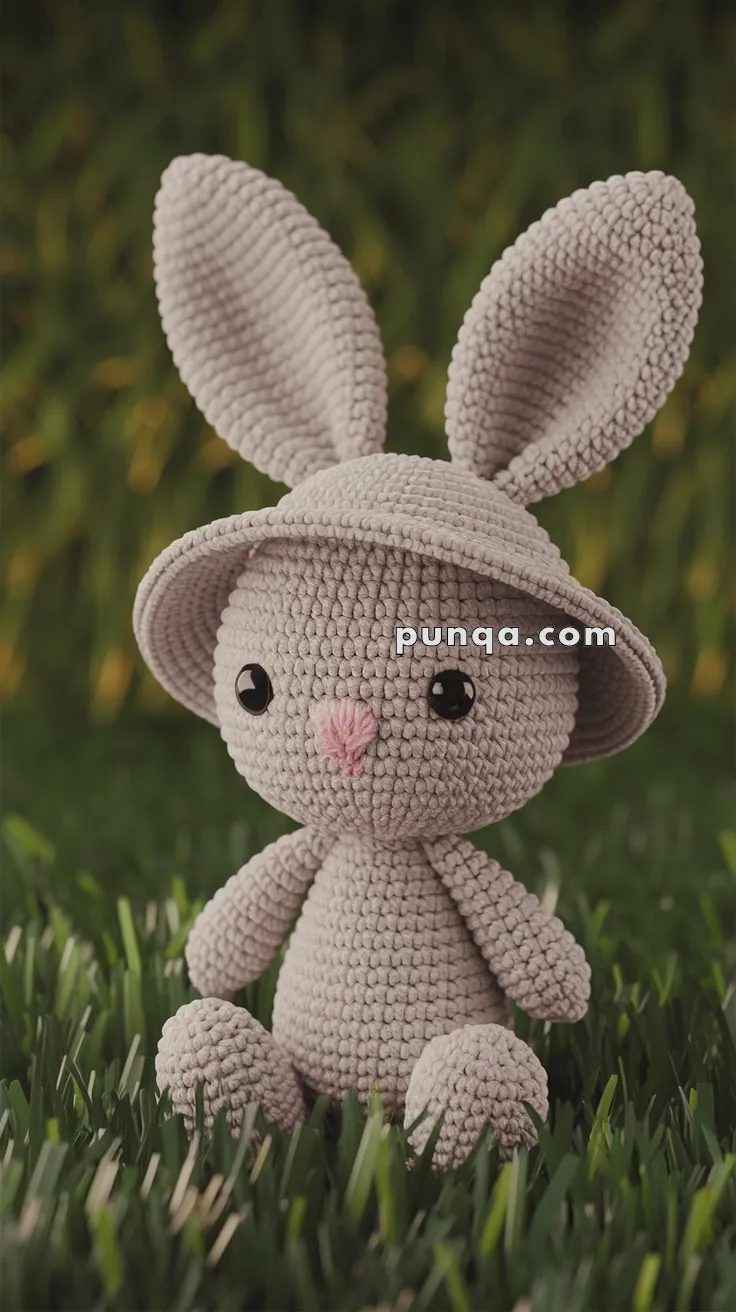
🐰 Amigurumi Bunny with Easter Bonnet Crochet Pattern
Celebrate springtime with this soft and charming Amigurumi Bunny wearing a sweet Easter bonnet! With floppy ears, a rosy nose, and a wide-brimmed hat, this cuddly friend is perfect for gifting, decorating, or adding to your handmade toy collection.
✨ Skill Level
Easy to Intermediate – Basic shaping, increases, and a simple accessory make this a joyful project.
📏 Finished Size
Approx. 10–11 inches (25–28 cm) tall with ears, using velvet or worsted weight yarn and a 3.5–4.0 mm hook.
(2 sc, dec) x3 (9) 8–10. sc (9) – Stuff lightly – FO and sew to body sides
🦶 Legs (Make 2)
MR, 6 sc
inc x6 (12)
(1 sc, inc) x6 (18) 4–6. sc (18)
(1 sc, dec) x6 (12) – Stuff – FO and sew to base of body
👂 Ears (Make 2)
MR, 6 sc
(1 sc, inc) x3 (9)
(2 sc, inc) x3 (12)
(3 sc, inc) x3 (15) 5–10. sc (15)
(3 sc, dec) x3 (12) 12–13. sc (12)
(2 sc, dec) x3 (9)
sc (9), FO – Sew to top of head with slight curve
👒 Easter Bonnet Pattern
🧢 Hat Top
MR, 6 sc
inc x6 (12)
(1 sc, inc) x6 (18)
(2 sc, inc) x6 (24)
(3 sc, inc) x6 (30)
(4 sc, inc) x6 (36)
(5 sc, inc) x6 (42)
🧢 Hat Sides
BLO, sc around (42) 9–11. sc around (42) (Adjust height of hat here if needed)
🧢 Brim
(6 sc, inc) x6 (48)
(1 sc, inc) x24 (72)
sl st around loosely (for edging) – FO and weave in ends
✨ Decorating Ideas
Add a tiny bow to one side
Attach a small felt or crochet flower
Use ribbon to tie under bunny’s chin
Your sweet bunny with an Easter bonnet is now ready for spring picnics, egg hunts, or to be gifted with love. 🐇💐 Try it in different pastel colors for a whole garden of cuddly bunnies!