Waddle into cuteness with the Amigurumi Duckling, a tiny bundle of fluff that’s ready to brighten your day! 🐥🧶 With its round body, cheerful beak, and sweet little wings, this duckling is the perfect mix of playful and adorable. Whether perched on a shelf, nestled in a nursery, or gifted to someone special, it brings a splash of springtime charm to any space—no pond required!
This pattern is a delightful choice for crocheters who love quick, joyful projects with room for personality. You can customize your duckling with pastel yarns, add embroidered blushy cheeks, or even stitch up a whole flock in different colors. Whether you’re crafting for fun, gifting with love, or adding to your handmade menagerie, the Amigurumi Duckling is a heartwarming way to celebrate the joy of crochet—one chirpy stitch at a time! 💛🧵
🦆 Amigurumi Duckling Crochet Pattern
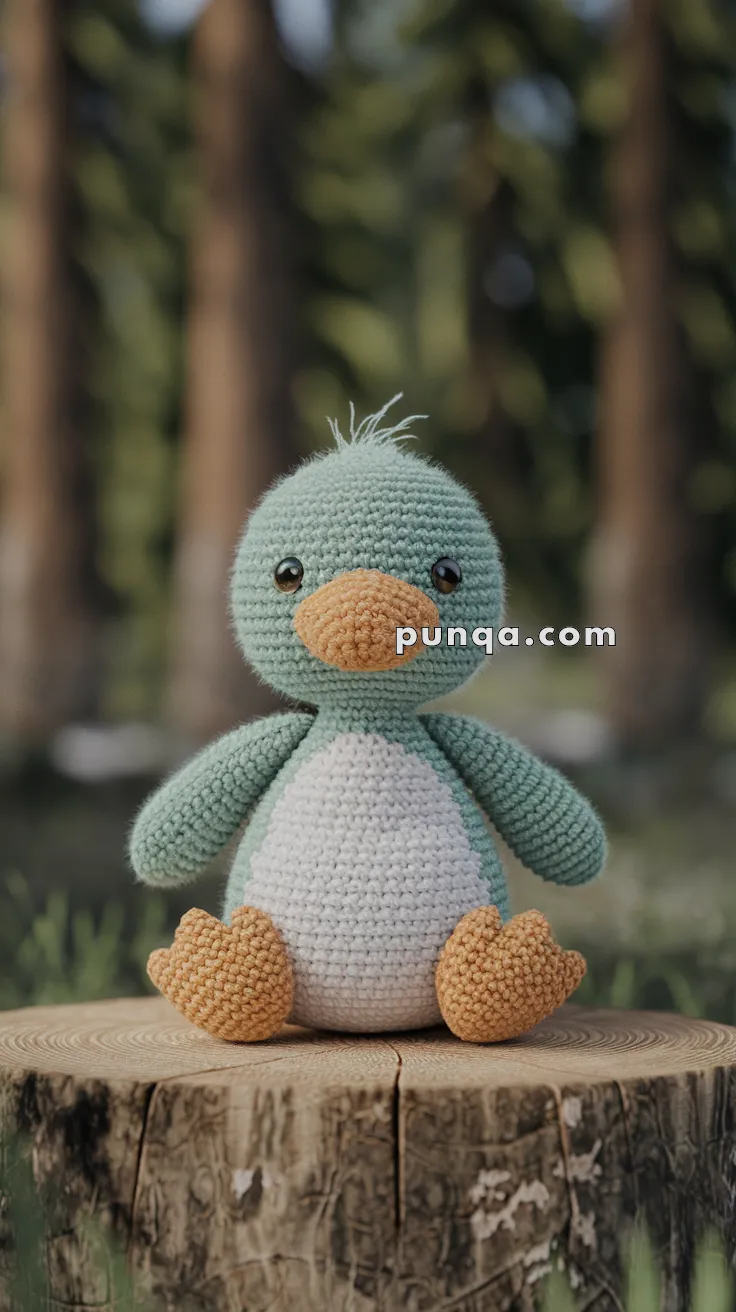
Bring a touch of woodland charm to your crochet collection with this sweet amigurumi duckling! With its mint-green body, bright orange beak and feet, fluffy tuft, and white belly patch, this little friend is the perfect springtime project—or a cozy year-round cuddle buddy.
✨ Skill Level
Beginner to Intermediate – simple stitches, shaping, color changes, and a bit of assembly.
📏 Finished Size
Approximately 18–20 cm (7–8 inches) tall using worsted weight yarn and a 3.0 mm hook.
🧶 Materials
- Mint green yarn – body, head, wings, arms
- White yarn – belly patch, head tuft option
- Orange yarn – beak & feet
- 9 mm safety eyes
- Black embroidery thread (eyebrows, optional smile)
- Fiberfill stuffing
- Yarn needle & stitch markers
- Crochet hook: 3.0 mm
🔑 Abbreviations (US Terms)
- MR = Magic Ring
- sc = single crochet
- inc = increase (2 sc in same st)
- dec = decrease (sc2tog)
- ch = chain
- sl st = slip stitch
- FO = fasten off
🧵 Pattern Instructions
🟢 Head (mint green)
R1: MR, 6 sc (6)
R2: inc around (12)
R3: (sc, inc) × 6 (18)
R4: (2 sc, inc) × 6 (24)
R5: (3 sc, inc) × 6 (30)
R6: (4 sc, inc) × 6 (36)
R7: (5 sc, inc) × 6 (42)
R8–16: sc around (42)
👉 Insert safety eyes between rounds 11–12, spaced 5–6 sts apart.
R17: (5 sc, dec) × 6 (36)
R18: (4 sc, dec) × 6 (30)
R19: (3 sc, dec) × 6 (24)
R20: (2 sc, dec) × 6 (18)
R21: (sc, dec) × 6 (12)
FO, stuff firmly, leave tail for sewing.
🟢 Body (mint green)
R1: MR, 6 sc (6)
R2: inc around (12)
R3: (sc, inc) × 6 (18)
R4: (2 sc, inc) × 6 (24)
R5: (3 sc, inc) × 6 (30)
R6: (4 sc, inc) × 6 (36)
R7–14: sc around (36)
R15: (4 sc, dec) × 6 (30)
R16: (3 sc, dec) × 6 (24)
R17: (2 sc, dec) × 6 (18)
FO, stuff firmly, sew to head.
⚪ Belly Patch (white, oval)
Ch 8, work around both sides of chain.
- R1: sc in 2nd ch, hdc in next 2, dc in next 2, hdc in next, 3 sc in last ch. Continue opposite side: hdc, dc in next 2, hdc in next 2, sc in last (16 sts).
- R2: inc evenly around (24 sts).
- R3: sc around, with increases at ends to elongate oval (approx. 30 sts).
FO, sew centered to front of body.
🟠 Beak (orange)
R1: MR, 6 sc (6)
R2: inc around (12)
R3: (sc, inc) × 6 (18)
R4: sc around (18)
R5: (sc, dec) × 6 (12)
Flatten slightly before stuffing lightly.
Sew centered between eyes.
🟢 Wings (make 2, mint green, longer)
R1: MR, 6 sc (6)
R2: inc around (12)
R3: (sc, inc) × 6 (18)
R4–9: sc around (18)
R10–11: sc around (18) → adds length
R12: (sc, dec) × 6 (12)
R13–14: sc around (12)
FO, flatten lightly, sew to body sides angled downward.
🟠 Feet (make 2, flat & webbed)
Ch 5
- R1: sc in 2nd ch, hdc in next, dc in next, 4 dc in last ch. Continue opposite side: dc, hdc, sc (12 sts).
- R2: sc around (12 sts).
FO, flatten slightly. Sew to bottom of body, toes pointing forward.
🟢 Arms (optional)
R1: MR, 6 sc (6)
R2: (sc, inc) × 3 (9)
R3–8: sc around (9)
FO, lightly stuff, sew under wings.
⚪ Head Tuft (mint or white yarn)
Cut 3–4 strands, knot together, attach securely at top of head. Trim to fluffy tuft.
🪡 Assembly
- Sew head to body.
- Attach belly patch centered on front.
- Sew wings slightly flattened, angled downward.
- Sew feet to bottom for stability.
- Add beak between eyes.
- Attach tuft on head.
- Optional: embroider eyebrows or a small smile.
🎀 Finishing Touches
Your duckling is now ready! With its mint body, fluffy tuft, orange beak and webbed feet, and oval white belly, it’s a delightful spring companion or year-round friend. Perfect as a baby shower gift, Easter decoration, or woodland buddy.