Hop into springtime joy with the Amigurumi Easter Duckling, a cheerful little hatchling that’s ready to brighten baskets and hearts alike! 🐣🌷 With its soft yellow fluff, tiny wings, and sweet embroidered features, this duckling is the perfect companion for Easter celebrations. Whether nestled in a nest, peeking out of an eggshell, or perched beside pastel bunnies and blooms, it brings a playful touch of handmade charm to your seasonal décor.
This pattern is a delightful treat for crocheters who love quick, festive projects with plenty of personality. You can customize your duckling with a bow tie, bonnet, or even a mini egg to hold, making each one uniquely adorable. Whether you’re crafting for little ones, decorating your table, or adding a handmade surprise to an Easter hunt, the Easter Duckling is a joyful way to celebrate spring—one chirpy stitch at a time! 🧶💛
🐤 Amigurumi Easter Duckling Crochet Pattern
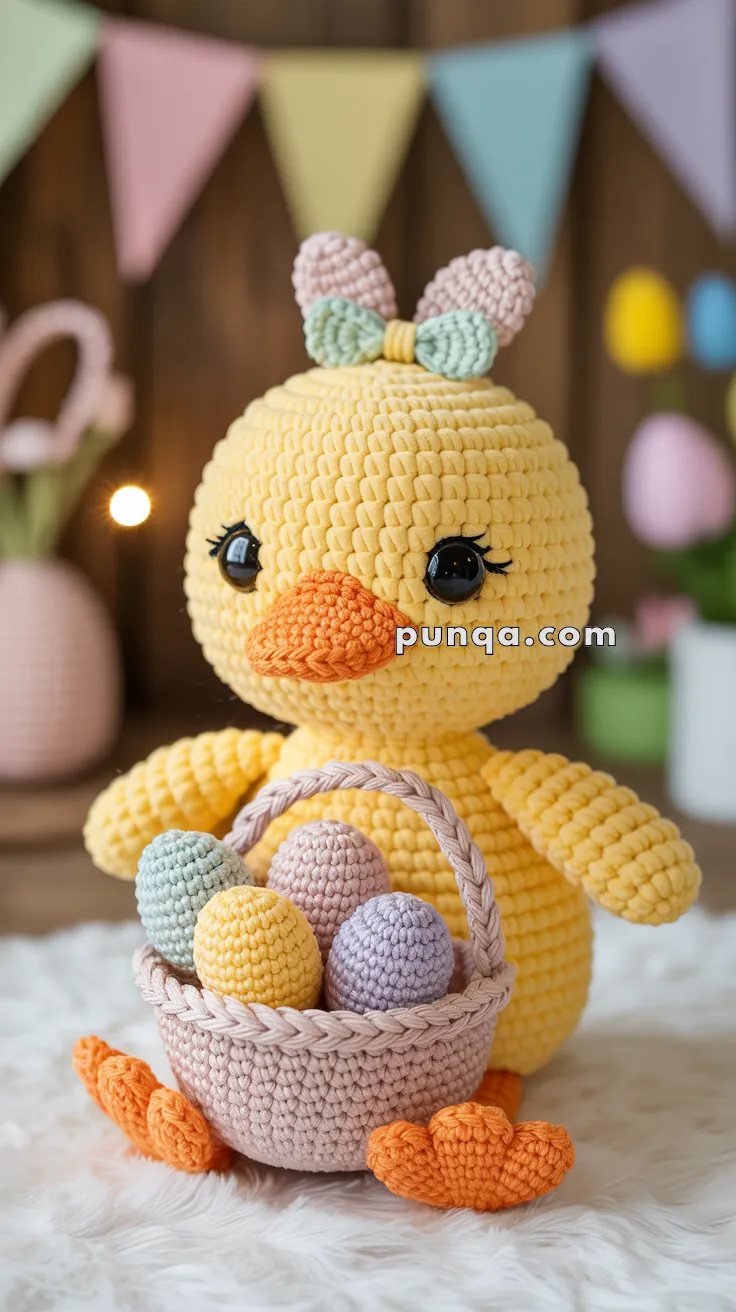
Add a handmade sparkle to your Easter décor with this adorable duckling! With her oversized webbed feet, stubby beak, glossy eyes, and a pastel bow perched on top, she’s the perfect springtime companion. She even carries her own basket filled with colorful eggs!
This project is ideal for crocheters who enjoy seasonal amigurumi and want a fun, detailed piece for display or gifting.
✨ Skill Level
Intermediate
Includes shaping, facial features, accessories, and basket assembly.
📏 Finished Size
Approx. 25–28 cm (10–11 inches) tall
Using plush or velvet yarn with a 3.5 mm hook
🧶 Materials
Yarn (plush or velvet recommended):
- Yellow – head, body, wings
- Orange – beak, feet
- Light pink or beige – basket
- Pastel colors – eggs (mint, pink, lavender, yellow)
- Mint + light pink – bow
Other supplies:
- 12–14 mm black safety eyes
- Black embroidery thread (eyelashes)
- Polyester fiberfill
- 3.5 mm crochet hook
- Yarn needle
- Stitch marker
- Scissors
🧵 Abbreviations (US Terms)
- MR – Magic Ring
- sc – Single Crochet
- inc – Increase
- dec – Decrease
- ch – Chain
- sl st – Slip Stitch
- FO – Fasten Off
🐤 Head
With yellow yarn:
R1: MR 6 sc (6)
R2: inc ×6 (12)
R3: (1 sc, inc) ×6 (18)
R4: (2 sc, inc) ×6 (24)
R5: (3 sc, inc) ×6 (30)
R6: (4 sc, inc) ×6 (36)
R7–14: sc around (36)
Insert safety eyes between R10–11, spaced about 9–10 stitches apart.
Embroider eyelashes at outer corners.
R15: (4 sc, dec) ×6 (30)
R16: (3 sc, dec) ×6 (24)
R17: (2 sc, dec) ×6 (18) – begin stuffing
R18: (1 sc, dec) ×6 (12)
R19: dec ×6 (6)
FO and close.
🐥 Body
The body is slightly smaller than the head.
R1: MR 6 sc (6)
R2: inc ×6 (12)
R3: (1 sc, inc) ×6 (18)
R4: (2 sc, inc) ×6 (24)
R5: (3 sc, inc) ×6 (30)
R6–10: sc around (30)
R11: (3 sc, dec) ×6 (24)
R12: (2 sc, dec) ×6 (18)
Stuff firmly.
R13: (1 sc, dec) ×6 (12)
R14: dec ×6 (6)
FO and close.
Sew body to head.
🪽 Wings (Make 2)
Small and rounded.
R1: MR 6 sc (6)
R2: inc ×6 (12)
R3: (1 sc, inc) ×6 (18)
R4–6: sc around (18)
R7: (1 sc, dec) ×6 (12)
FO, flatten slightly and stuff lightly.
Sew to sides of body, slightly forward.
🧡 Beak
Short, wide, and puffy.
R1: MR 6 sc (6)
R2: inc ×6 (12)
R3: sc around (12)
R4: (1 sc, inc) ×6 (18)
R5: sc around (18)
Stuff lightly, flatten into a soft triangle shape.
Sew between eyes.
🧡 Feet (Make 2)
Large, flat, webbed feet.
Ch 8
Row 1: sc in 2nd ch, sc across (7)
Row 2: ch 1, inc, 5 sc, inc (9)
Row 3: ch 1, sc across (9)
Toes:
Attach yarn at one side.
Toe 1: ch 4, sl st back down, sl st in next st
Toe 2: ch 4, sl st back down, sl st in next st
Toe 3: ch 4, sl st back down
FO and shape flat.
Sew under body for sitting position.
🎀 Bow with Bunny Ears
Bow (Mint)
Ch 8
Row 1: dc in 3rd ch and across (6)
Rows 2–4: ch 2, turn, dc across (6)
Wrap yarn tightly around center to cinch.
Bunny Ears (Make 2 – Pink)
R1: MR 6 sc (6)
R2: inc ×6 (12)
R3–10: sc around (12)
FO, flatten slightly.
Sew ears behind bow and attach to top of head.
🧺 Basket
With light pink or beige yarn:
R1: MR 6 sc (6)
R2: inc ×6 (12)
R3: (1 sc, inc) ×6 (18)
R4: (2 sc, inc) ×6 (24)
R5: (3 sc, inc) ×6 (30)
R6: BLO sc around (30)
R7–10: sc around (30)
Sl st around top edge for clean rim.
Basket Handle
Ch 28
Sc back across
FO and sew both ends to basket sides.
🥚 Eggs (Make 4–5 in Pastels)
R1: MR 6 sc (6)
R2: inc ×6 (12)
R3: (1 sc, inc) ×6 (18)
R4–7: sc around (18)
R8: (1 sc, dec) ×6 (12)
Stuff firmly.
R9: dec ×6 (6)
FO and close.
🧩 Assembly
- Sew head to body
- Attach wings slightly forward
- Sew beak under eyes
- Attach feet flat underneath
- Place basket in front and secure lightly between wings
- Fill basket with eggs
- Attach bow with ears on top
🌼 Final Touch
Your Easter Duckling is now ready to spread joy! With her pastel basket and oversized feet, she makes the sweetest spring decoration or a thoughtful handmade gift.